Mulching: Tips and Tricks

(Originally posted: July 12, 2019)

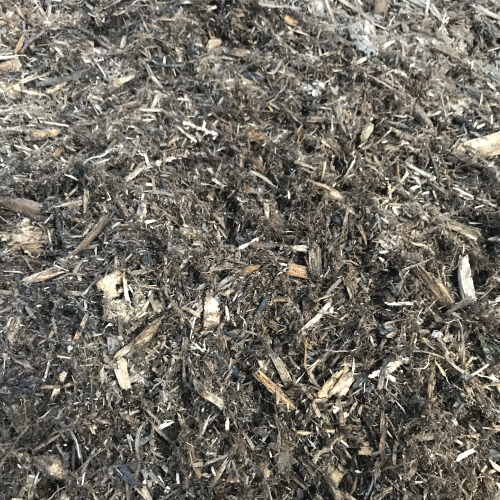
Time for part two of my ‘mulching series’…some tips for applying mulch.

I usually mulch after I have finished planting annuals. Annuals need to be planted in soil and not mulch, so the process of pushing aside mulch, planting flowers, and then replacing the mulch is a little too time-consuming for my liking. Once all my spring planting/transplanting is complete, and the soil is not saturated I begin mulching my gardens.

Now, it is one thing to just throw mulch on a bed but it is another to apply it with finesse. This is your finishing touch, after all! Attention to detail during this step goes a long way! Here are a few pointers on how to make your mulching job look top notch…

Leave no Trace

Start at the back of the bed and work forward so that you don’t have to trample on freshly applied fluffy mulch… footprints never look nice in a garden bed! If you must walk on your newly applied mulch- fluff out your footprints! It’s really all about keeping a nice uniform look to the bed.

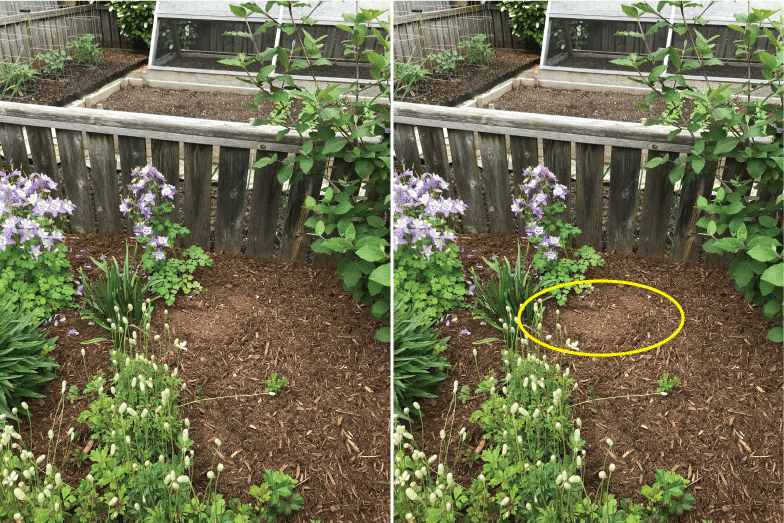
I feel a bit like a crime detective by circling footprints on the ground! Be a sneaky gardener- don’t leave your footprints behind! They really do look awful in a garden bed!

Mulch the Beds NOT the Plants!

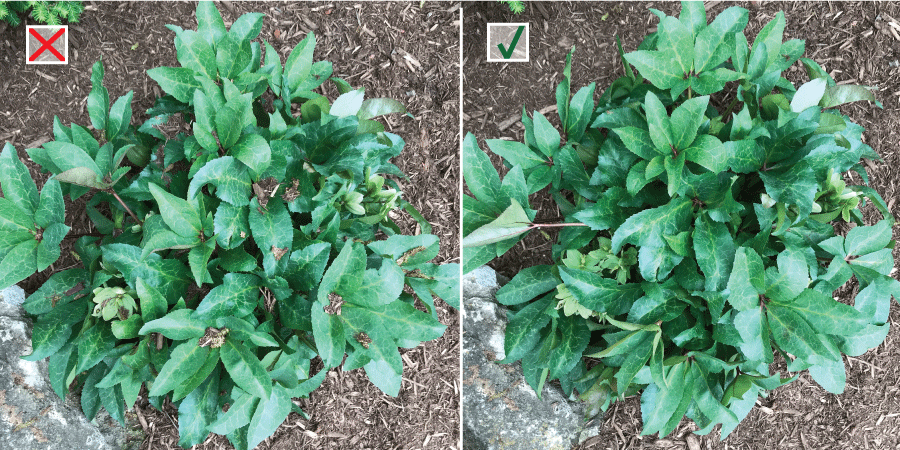
I know it is easy to just toss mulch into a bed and call it a day. Usually the plants get in the way. Take the time to brush the mulch off the greenery; the mulching job will look much tidier.

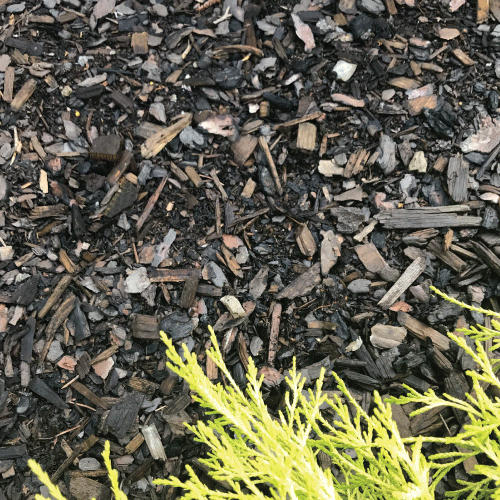
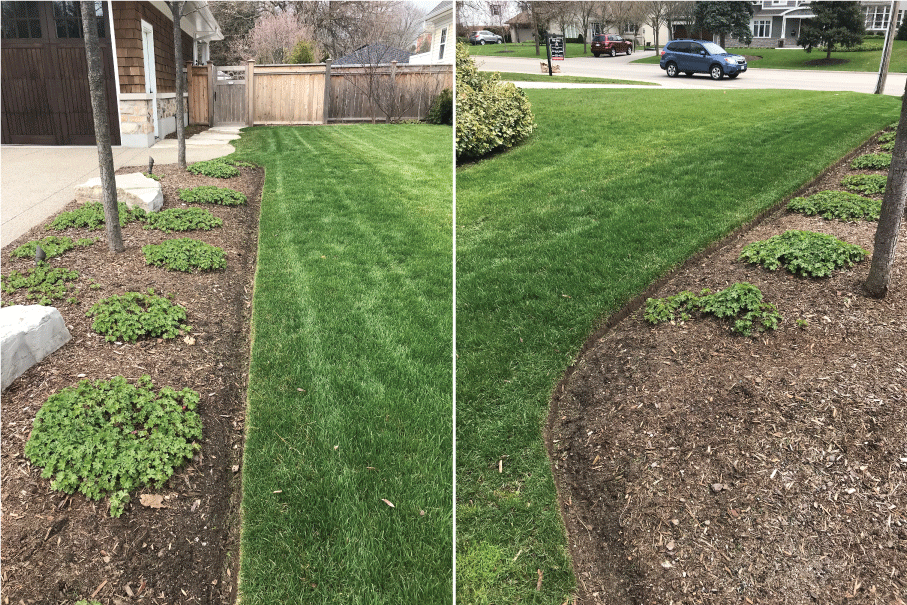
Show off your Curves (or Straight Lines…)

With all the work done to create nice definition to your garden beds through the use of edging, don’t throw all that work away by filling the edges in with mulch (or, even worse, allowing the mulch to overflow onto the grass!). Avoid this problem by tapering out the mulch as you approach the edge of the bed. This technique will keep the garden edge visible and clearly defined.

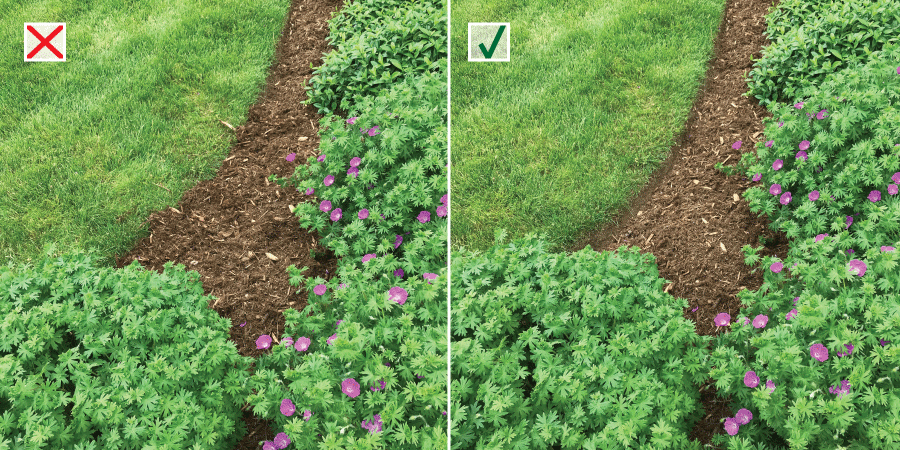
By thinning the mulch out as you approach the edge of your garden bed, you can retain a nice crisp edge!

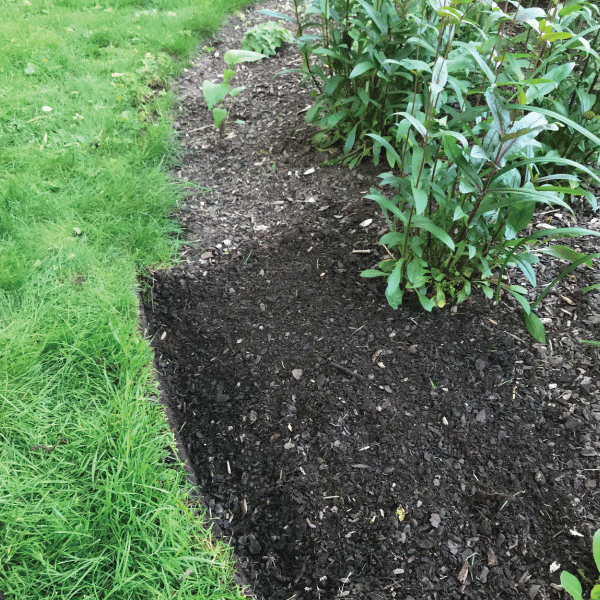
Don’t be smothering…

…give your plants some space by not piling up mulch around the base of them. This is an important tip from a plant health perspective. Piling up mulch against the base of perennials, shrubs and trees provides a nice cozy environment in which critters (such as insects, and microorganisms) can live. Many of these critters can negatively impact your plants through feeding or causing disease. I realize that not having mulch right up to the plants interrupts the uniformity of the mulching job. I work around this by applying a ‘sprinkling’ of mulch around the plants just to give the appearance that the area has been mulched when in fact it hasn’t been. Think of it like a dusting of icing sugar on a cake.

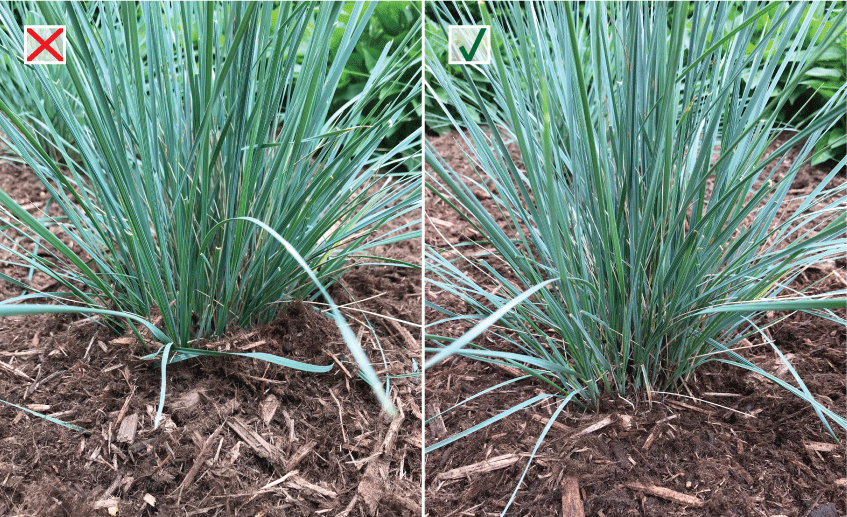
If this blue oat grass (Helictotrichon sempervirens) on the left could speak, it is saying”I love you, but I need my space…” Ouch. Don’t get smothering! Taper out the mulch around your plants. A ‘dusting’ around your plants can give the illusion that the mulch layer is continuous.

And there you have it! A couple long-winded posts about mulch. Much more can be written about this topic, but I will save background information for the winter :) Right now it’s time to get out there and garden!

Mulching: The Finishing Touch

(Originally posted: July 11, 2019)

As promised, I am following up my previous post about edging with a post about mulching- it is the ultimate finishing touch that helps make a garden look fabulous. There is a LOT to say about this topic, so I am dividing it into two parts: a mulch primer, followed by tips for doing a top notch mulching job.

OK. Let’s start with a little discussion about mulch shall we?

Aside from really setting off the plants in your garden and giving the garden beds a nice uniform look, the value of mulch goes well beyond aesthetics. It has some really important environmental benefits too. Here is a brief low down:

Benefit #1:

A layer of mulch acts as a sort of semi-permeable barrier when it comes to water. It allows rain/irrigation water to seep through to the soil but it also helps to slow down water lost from the soil due to evaporation- delaying the need to add supplemental water during dry periods… thus conserving this precious resource! (This ability to conserve soil moisture is also why we don’t want to apply mulch to water-logged spring soils… for the health of our plants, we want to encourage these soils to dry out a little before ‘locking in the moisture’!)

As summer weather hits, our minds shift to water conservation. In a garden, mulch is an important piece of the ‘water conservation puzzle’.

Benefit #2:

A layer of mulch can absorb the impact of driving rains thus preventing your garden soil from washing away or splashing up on your plants- a relevant concern given the weather we have been experiencing as of late! Mulch fibres tend to weave together which helps the layer stay in place in conditions that would otherwise wash soil away. (It is important to keep in mind that when mulch fibres become too interwoven, the layer has a tendency to repel water- this is where ‘fluffing’ the mulch every now and then is a good idea.)

Benefit #3: Exposed soil just screams “Hey weeds! Land available- make your home here!” The barrier provided by mulch can help control weeds in two ways. First of all, a good mulch layer (around a 3” depth) can prevent existing weed seeds in the soil from taking hold by eliminating the sunlight required for them to germinate. The layer of mulch is also not conducive to rooting, so seeds blowing into the area will have little success at ‘laying claim’ to the land. With that said, it is important to weed your garden before applying mulch. You may think you have won the war by covering up your unwanted plants, but most likely you have not. Sorry. Existing weeds will often grow right through the mulch… forcing you to actually deal with the problem instead of covering it up!

Attack of the weeds! Mulch can be used as a weapon in the war against weeds in your garden.

Benefit #4: Mulch is a natural product that, when it breaks down, it adds organic matter to the soil (which in turn adds nutrients to the soil, increases the water holding capacity of the soil as well as the ability of the soil to retain nutrients). Organic matter can also help break up clay soils and ‘beef-up’ really sandy soils (in general, it improves the structure of the soil). In this way, mulch is another way we can ‘give back’ to our gardens during the growing season!

Benefit #5: Mulch can help moderate soil temperatures, buffering plants from the heat of summer and the cold temperatures of winter. This can be the difference between the survival or demise of more tender plants (or plants growing at the edge of their climatic limits).

Clematis is a plant that benefits from a generous layer of mulch to moderate soil temperatures.

Types of Mulch and How Much to Use

Organic mulches are really the only type of mulch to consider for a garden. Of the organic mulches, the most readily available ones for the home gardener are the shredded bark mulches that are found in bags at your local garden centre. Usually it becomes a choice between pine and cedar. There is also a choice in colour as dyed mulches are available in brown, black or red (gag!).

Bagged shredded cedar mulch. Note the shredded/fibrous texture of this mulch.

So how does one choose? Here are some points to consider when choosing a mulch for your garden:

  • Pine mulch tends to be lighter in colour and breaks down faster than cedar mulch (this is not necessarily a bad thing since you will need to reapply mulch on a yearly basis anyway; I personally like a mulch to break down quickly so that it is incorporated into the soil sooner.)

  • Pine is more acidic than cedar

  • Cedar mulch tends to have a naturally reddish colour to it

  • The stained mulches may look nice when first applied but they tend to fade (in full sun situations they can start looking very ‘tired’ quite quickly)

  • Black mulch shows every single piece of debris that lands on it

  • Red mulch is just wrong and shouldn’t even be considered an option! (This is the hideous orange-red mulch that tends to be used in parking lot and gas station gardens. If you love your garden and want to show it off, I am begging you…DON’T USE THIS MULCH!)

Some other variations are available when buying mulch in bulk. If you are happy to get a pile of mulch dumped on your driveway, this is certainly the most economical way to go! I personally like a composted pine bark mulch. It has a more uniform consistency than the shredded mulches and it doesn’t tend to weave together. This does make it more susceptible to swimming away in driving rains… but considering the downpours we have seen in recent years, I have found it to hold up extremely well!

Composted pine bark mulch. Note the more consistent texture of the mulch particles compared to the shredded bark mulch. This mulch lacks the fibrous quality of the shredded bark mulches and the particles do not weave together.

I realize there are even more options when it comes to mulching (straw, compost, shredded leaves, wood chips to name a few) but I will save these for future posts. Let’s get on with the task at hand… applying mulch to our gardens! (Which just happens to be covered in the next post…)

Drawing the Line

(Originally posted: June 25, 2019)

Well the growing season is well underway and chances are you have not only been keeping your gardens tidy but you have also been doing the odd makeover as well. Perhaps you’ve swapped out some undesirable, struggling or dead plants with some ‘gotta-have’ ones or perhaps you have needed to create some room for said plants and you’ve decided to expand your beds.

(New gardeners be warned: lack of space is a common problem among gardeners- as a result, the proportion of one’s property devoted to garden beds generally increases steadily over time… it’s a little known not-so-scientific fact!)

Hmmm… where to fit this combination into the garden???

This time of year makes me think back a couple years when I was helping my sister with her garden. She was a little overwhelmed with the amount of work to be done as she had recently purchased a house and, as a result, inherited a garden with every aggressive spreader known to man. Let’s put it this way- I didn’t envy her! She tackled one project after another to bring some definition back to her plantings and, being a non-gardener going into the season, she emerged a month later with me wanting to hire her.

After my sister established her ‘alpha-female’ dominance over Mother Nature (which is a total farce… but I wasn’t about to burst her bubble!) she was ready to mulch her beds. WAIT!!! There is one VERY important step that comes before mulching! It is one thing to gain a certain level of ‘control’ within the garden beds but it is another to gain control of the garden beds themselves. After putting in SO much effort within the gardens, it was time to set-off all her hard work by setting her gardens apart from the rest of her yard. It was time to create a clear definition between garden and turf through the use of edging. I pulled out ‘that half-moon tool’ and set to work.

Steps for Edging a Bed

‘The half-moon tool’ otherwise known as an edger.

STEP 1: Facing your garden, place the curved edge of the edger down where you would like your garden bed to start, step on it to vertically slice into the turf, pull the handle toward your body to slightly lift and loosen the turf. Do not pull the edger out of the ground!

STEP 2: Bring the handle back to vertical and move the edger sideways a few inches; step down on it to slice the turf again; once again pull the handle toward your body. Repeat this for the length of your garden bed. By keeping the edger in the ground and inching along, you will get a much smoother/continuous line than if you were to remove the edger between cuts. (There are also electric edgers that you can use that can help make gorgeous lines.)

STEP 3: Pull up the grass that you cut and loosened with the edger, shake out the dirt from the roots and dispose of the grass.

STEP 4: Edge again- this time using the edger to flick the excess dirt into the bed.

STEP 5: Break apart any clumps of dirt and remove any grass that was tossed into the bed. Finish the task by smoothing out the surface of the bed. I do this by hand.

The end result should be a close to vertical edge where the grass meets the garden bed.

Before and after: adding an edge to a garden really helps give a garden definition. Even if the garden isn’t much to look at, the visual tidiness of a nice clean line makes a world of difference!

Some picture-perfect early season edging courtesy of Appleby Landscapes.

Looking back on that day, my sister reflects that the edger was her biggest ‘ah-ha’ moment. It was a very easy-to-use technique that could really set off her hard work and make her garden ‘pop’ from the rest of the yard. A nice clean line was the perfect finishing touch (aside from mulching… that, I will leave for my next post).

***SIDE NOTE: I have had this post written for a couple weeks now and cannot seem to get a half-decent video of the edging technique. I figured I would post it and, in the meantime work on my technological ineptness when it comes to video recording and editing. I will add to this post as soon as I create something worth viewing! My apologies to all you visual learners out there. I feel your pain. I am of your tribe. (2026 Update: Still no video. I think I’ll stick to writing.)