Tree and Shrub Care

Soil pH- it's quite basic (or acidic), really

(Originally posted: June 1, 2021)

It’s been a flashy time of year in my neck-of-the-woods. For weeks, the floral fireworks ignited by our trees and shrubs have been creating quite the show in a colourful progression... Witchhazels! Maples! Forsythias! Cherries! Magnolias! Serviceberries! Flowering Pears!

…and…

Rhododendrons!

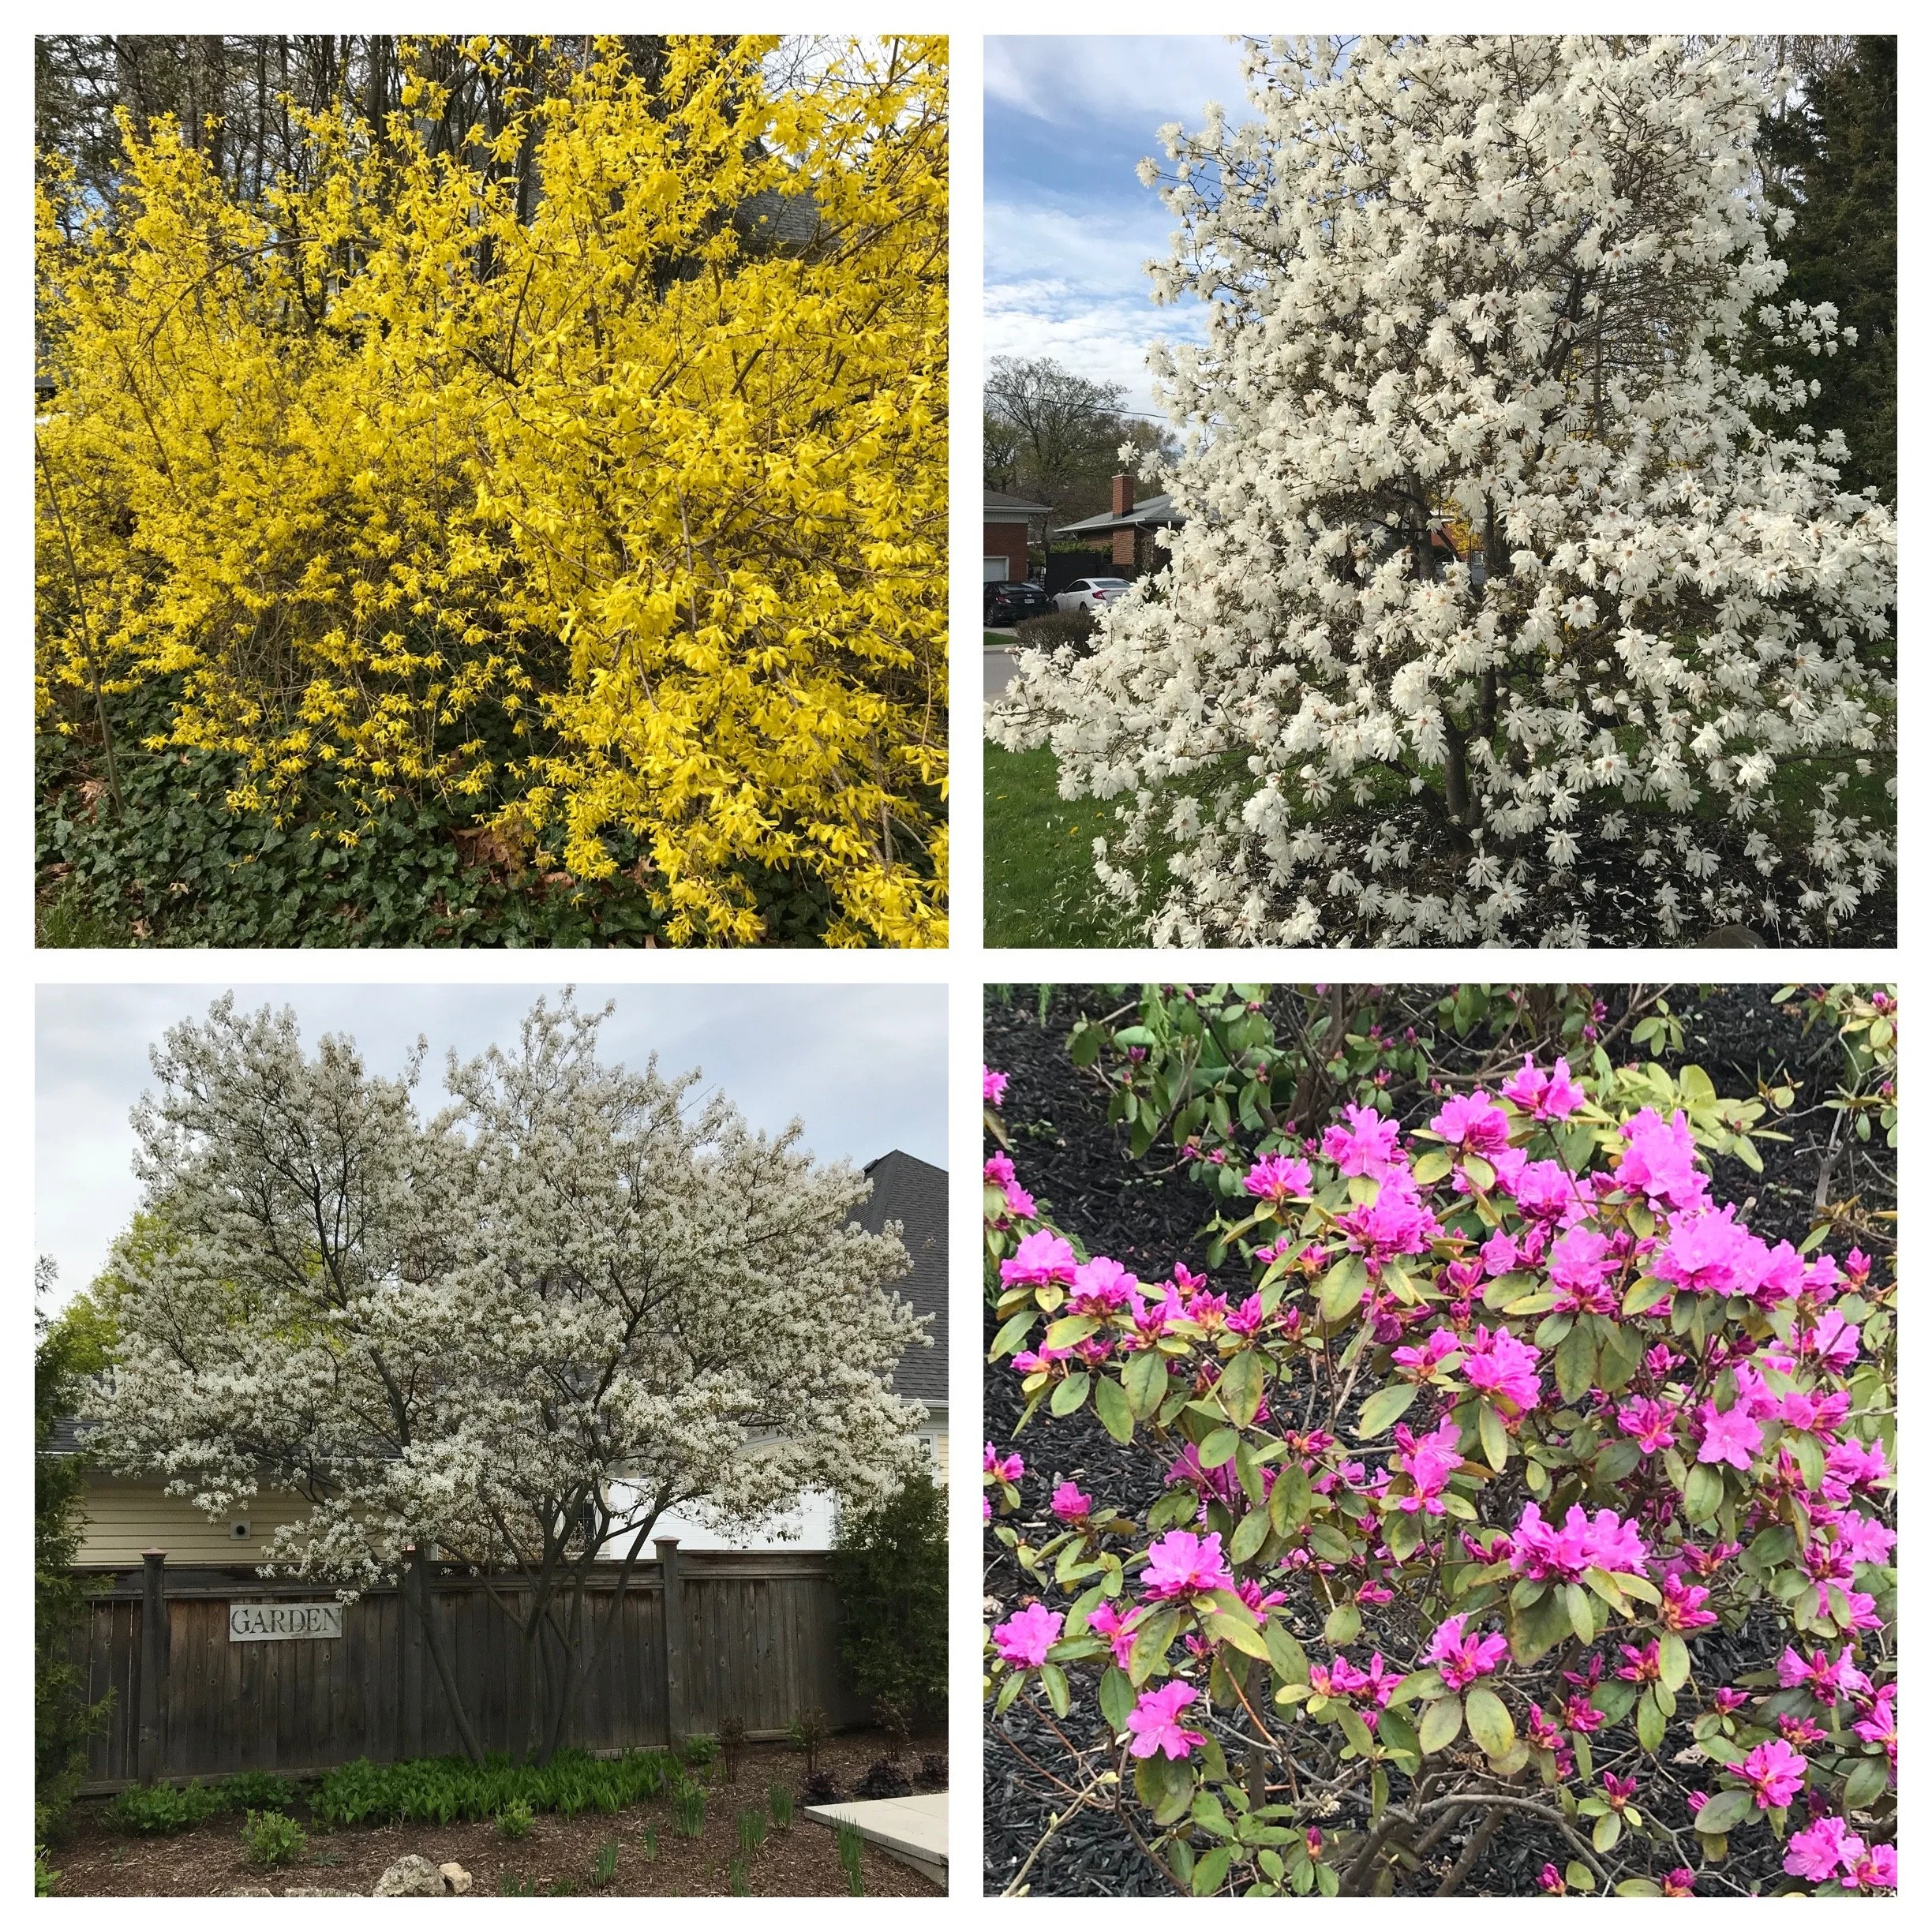
Floral fireworks of spring.

It is this time of year, when I longingly look at the blooms of the Rhodos. My feet then get ichy to ‘put the pedal to the metal’ and zip out to the garden centre to get a few (it’s best to buy in 3s, right!?) of my own.

Now I should say that kids are amazing at distracting one from the task at hand, so impulse purchases such as this have greatly decreased in recent years. This also affords me the time to let common sense prevail and I am then able to remind myself that these plants are simply not the right fit for my yard. Why? For me, the root problem is soil pH.

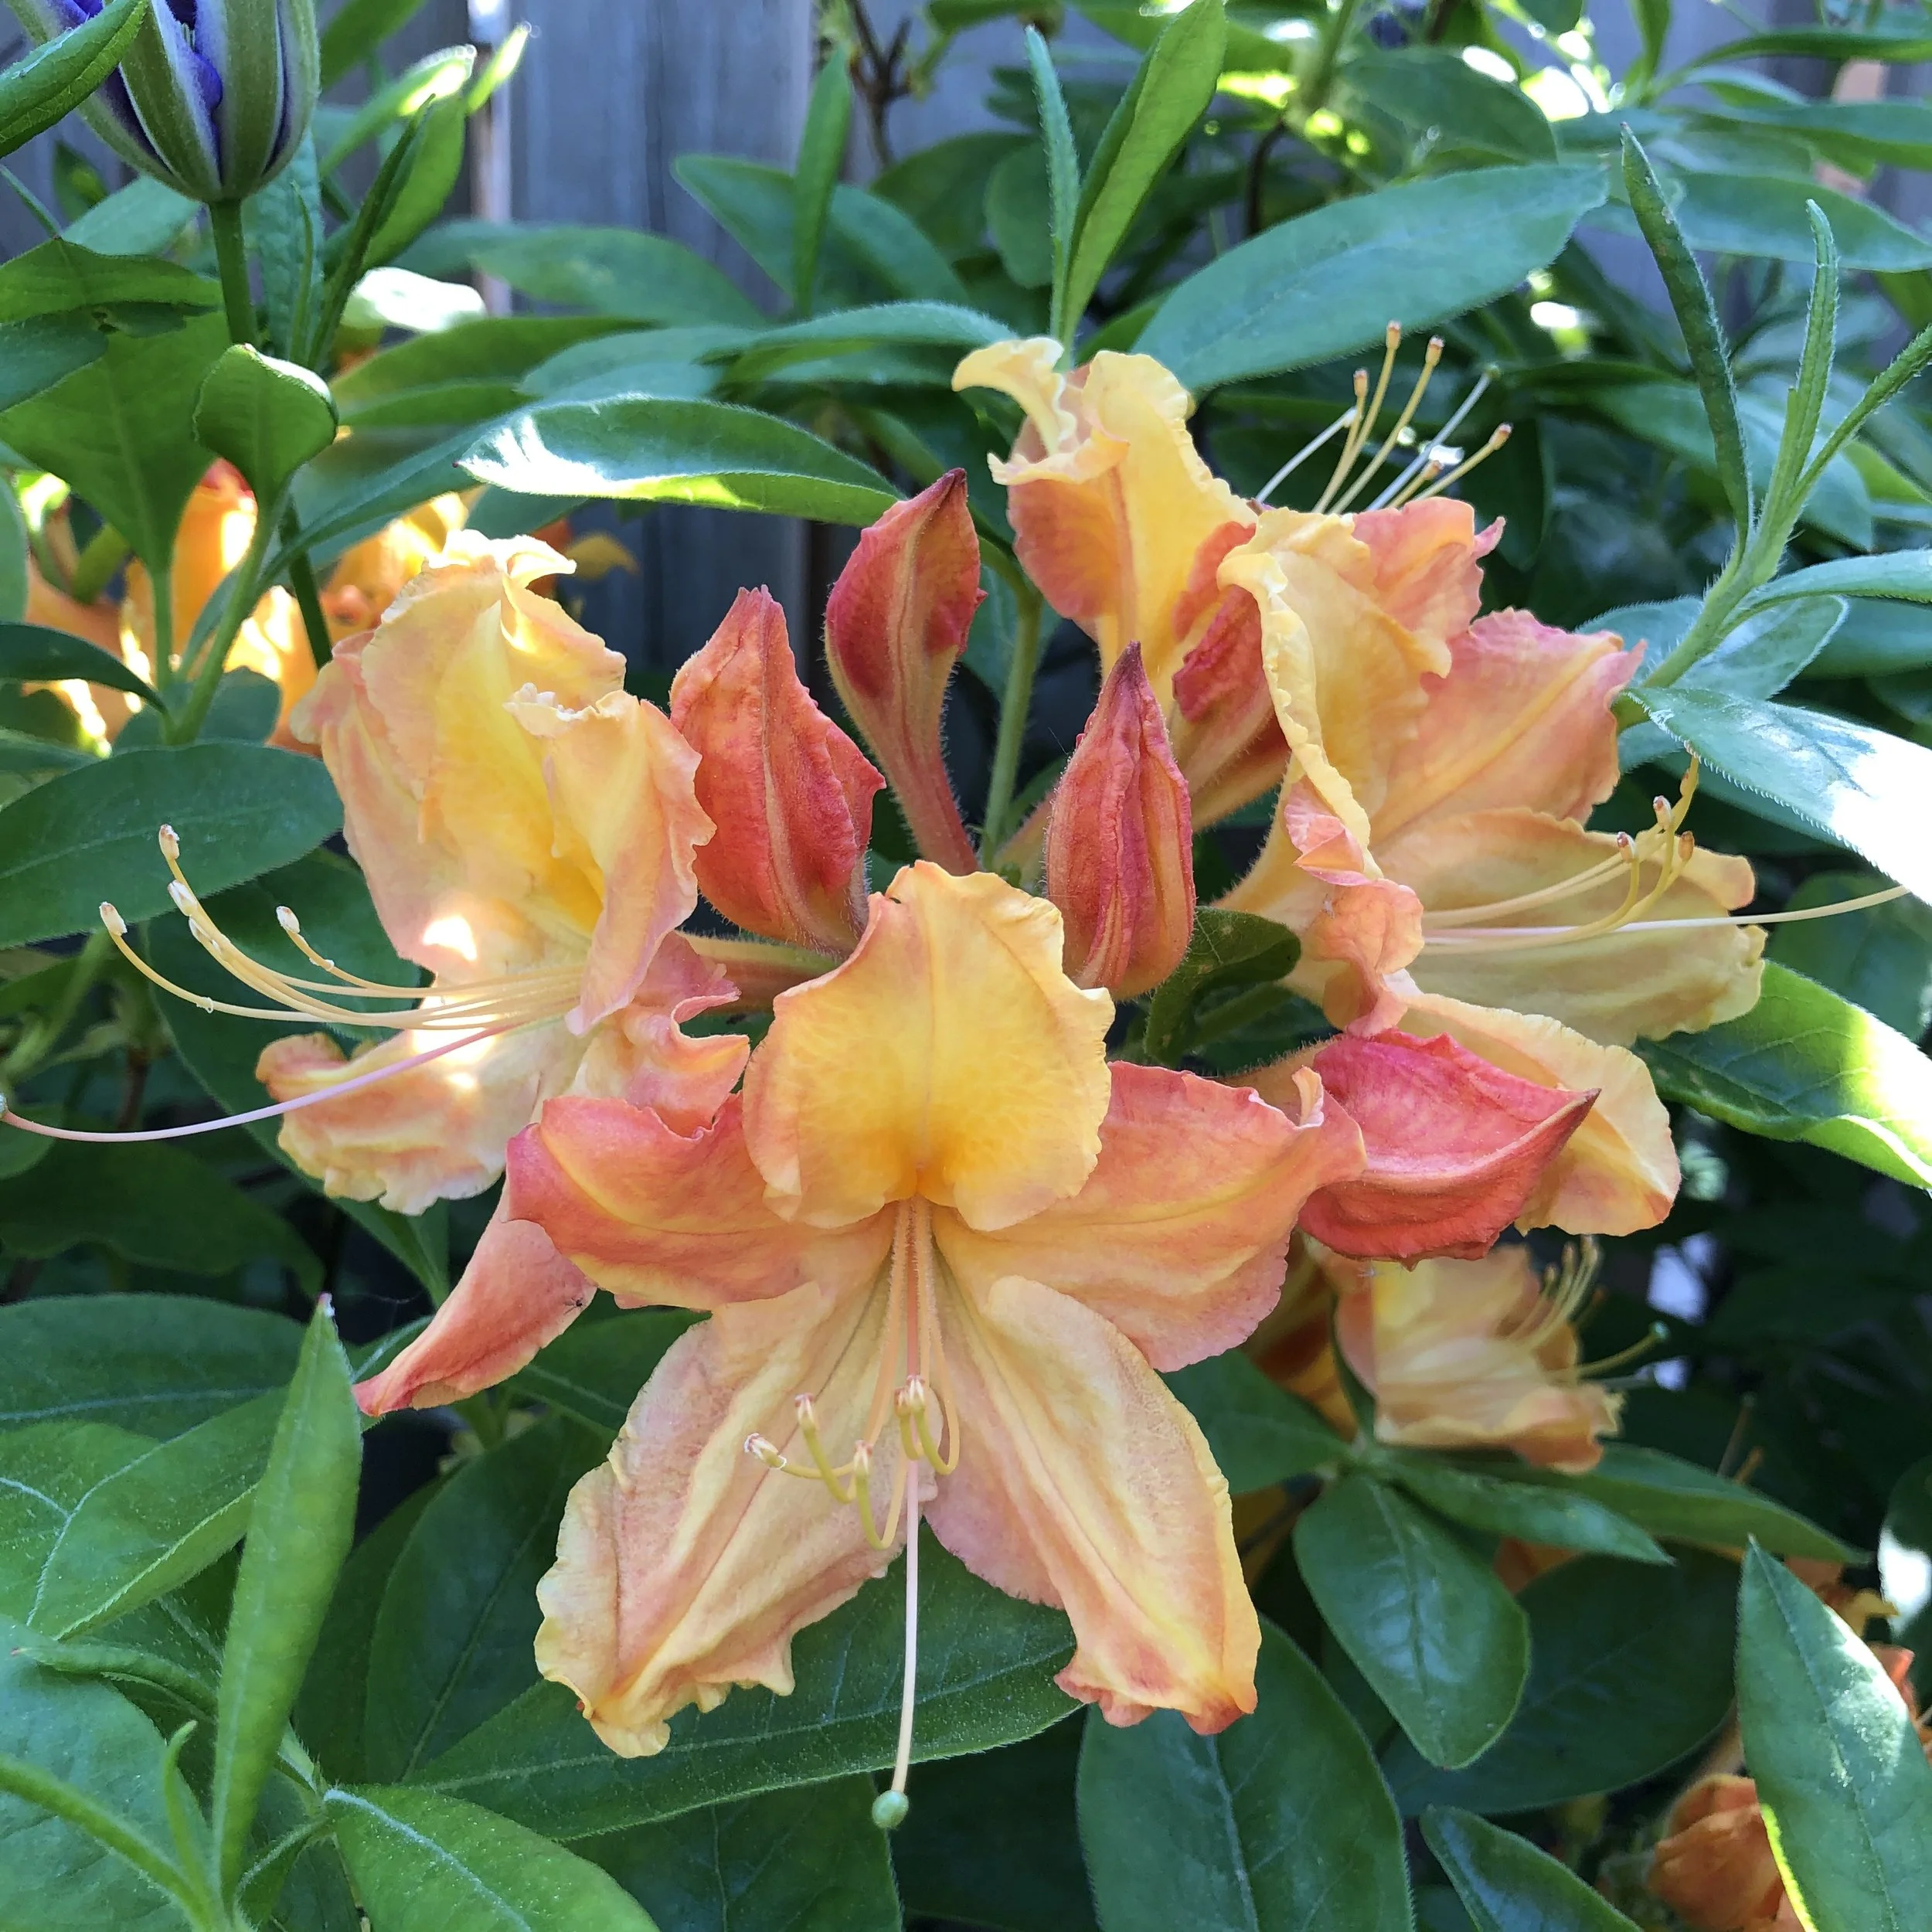
How I long for one of these in my garden! Alas it is not meant to be!

Let’s backtrack.

All plants have their preferences when it comes to growing conditions. Some like sun, some prefer shade; some like ample moisture, while others thrive in dry conditions. There are some plants that prefer humus rich soils while others perform poorly in these conditions. Generally, we factor-in these growing preferences when selecting plants for our gardens. To a certain extent, we can control these conditions- by situating plants in various areas of our yard that have the lighting/moisture conditions suitable to the plant at hand.

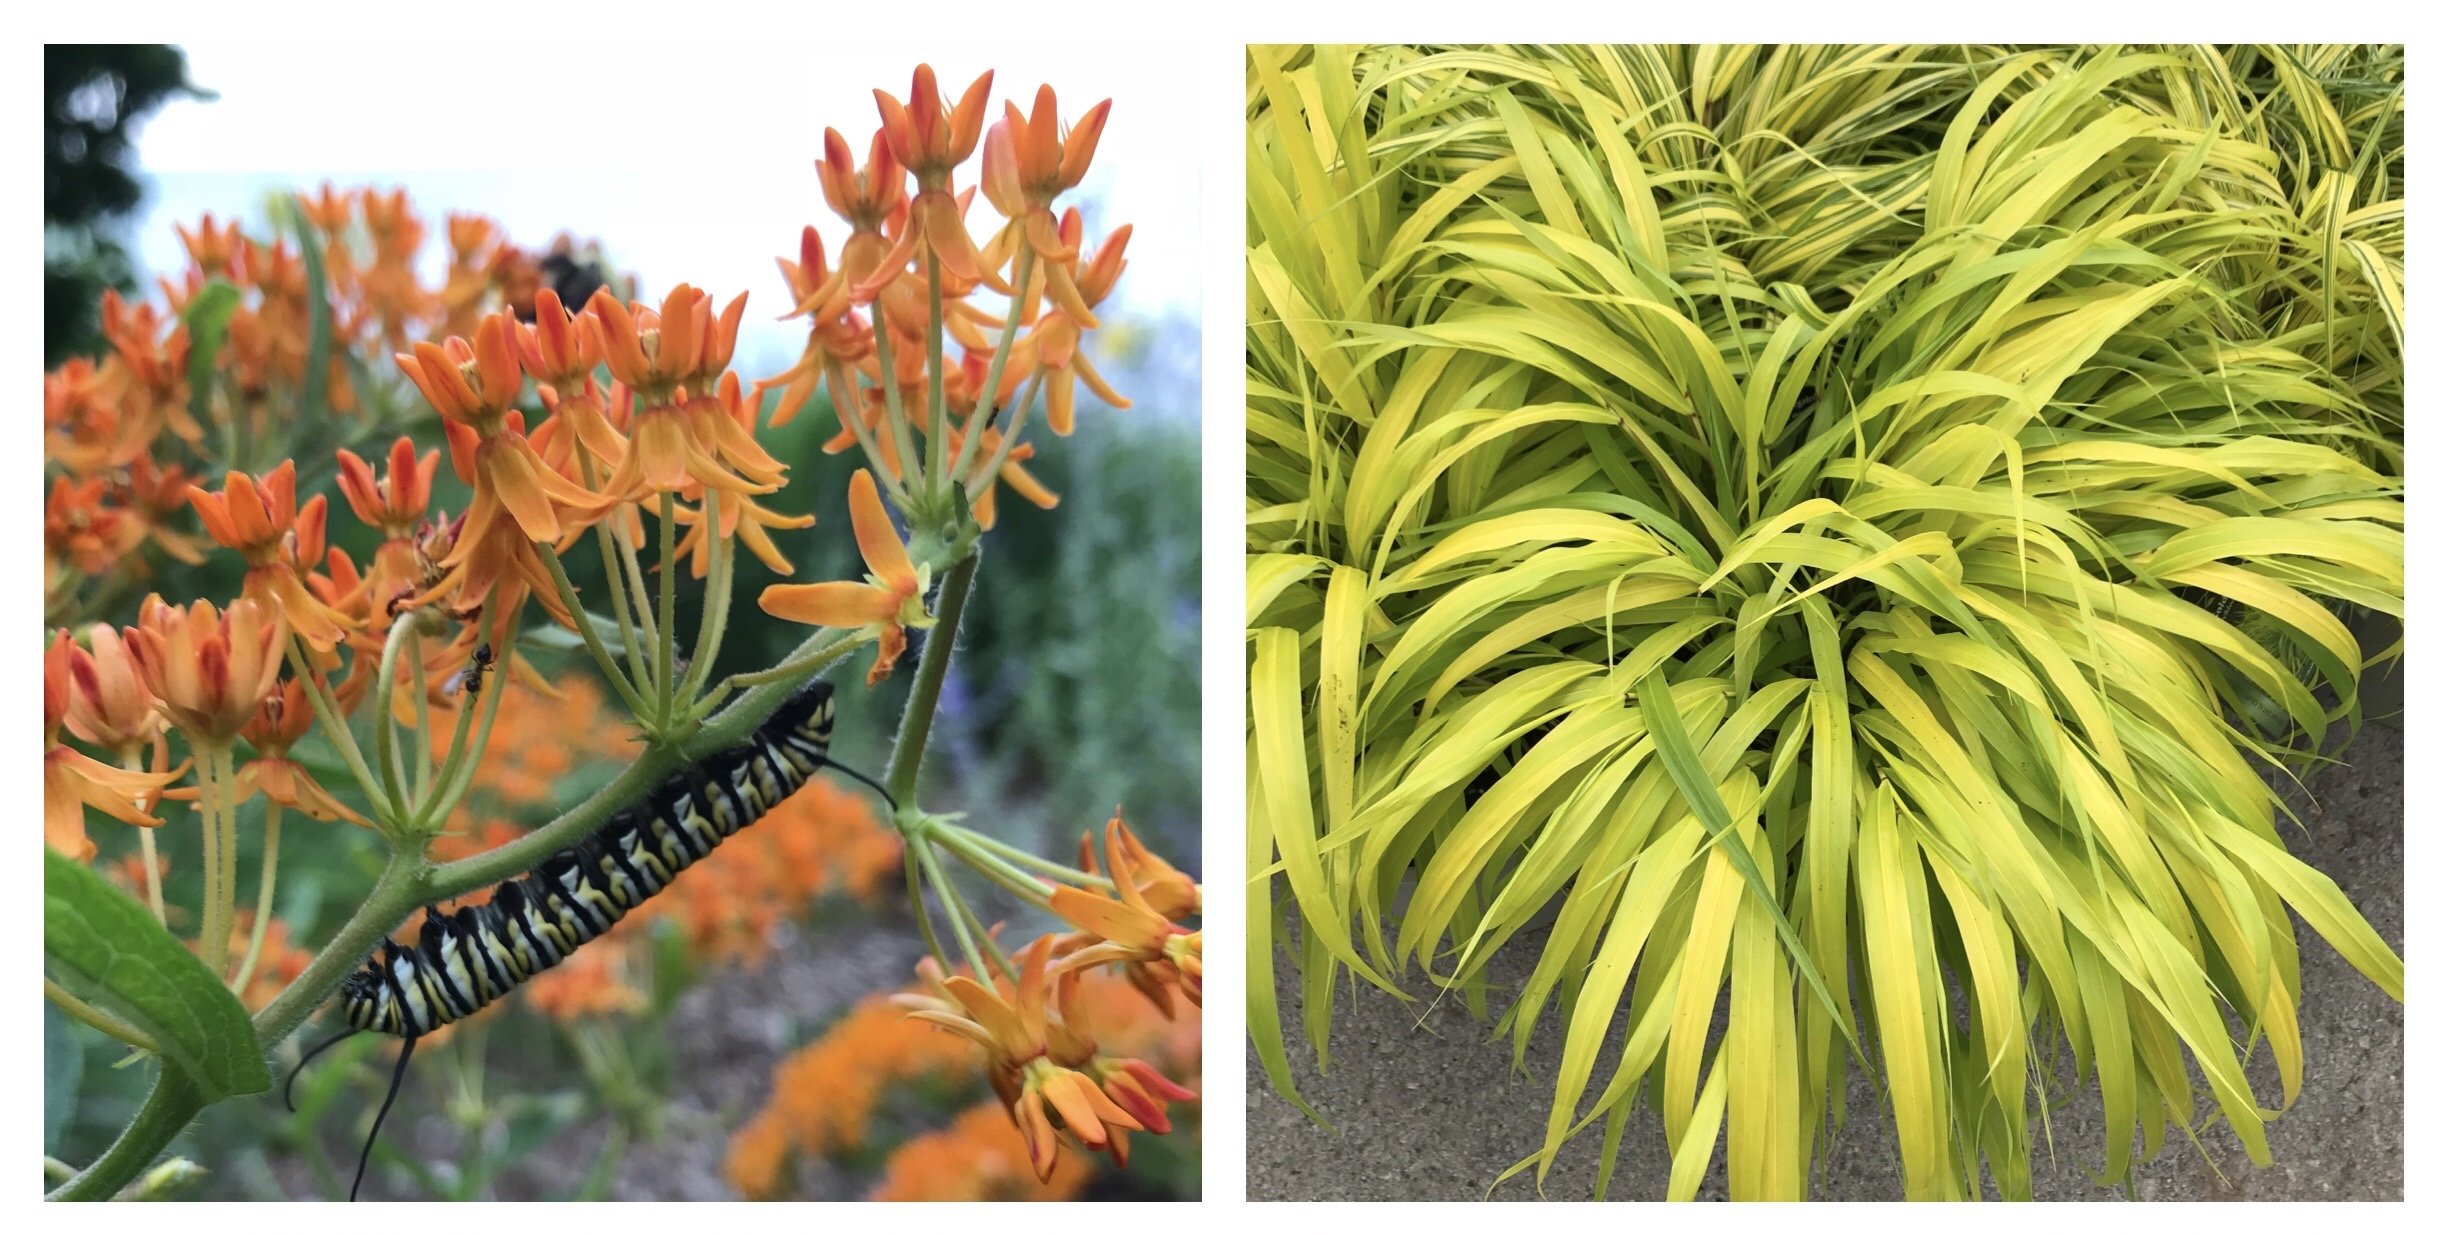
Two plants with very different preferences in growing conditions. Butterfly weed (Asclepias tuberosa) on the left that prefers sunny, dry conditions on sandy soil while ‘All Gold’ Japanese forest grass (Hakonachloa macra ‘All Gold’) shown on the right, prefers partial shade and deep rich soil.

There is one growing preference that is VERY easy to overlook, or even forget about entirely, but it can often be the key to a particular plant’s success or failure in a garden. Furthermore, it is a soil attribute that we have very little control over and essentially no power to permanently change. That attribute is soil pH.

Don’t worry. I am not going to get into any in depth chemistry lessons here. Essentially pH is a measurement (from 0-14) of how acidic or basic a solution is. A pH of 7 is neutral; anything greater than 7 is alkaline/basic (such as baking soda which has a pH of 8); a pH of less than 7 is acidic (such as lemon juice with a pH between 2-3). The optimal soil pH range for most (but not all) plants is between 6-7. Nutrient availability to plants is linked to soil pH and it is in this ‘optimal pH range’ that the nutrients necessary for plant growth can be found in their soluble forms (in ideal amounts) and therefore available for the plants to take in. Outside of this range, various nutrients can become ‘locked up’ in insoluble forms that the plants cannot access and nutrient deficiencies can result. On the flip-side, at certain pH levels, some elements can become ‘too available’ to plants- to the point where they become phytotoxic.

So what does all this mean for ‘us gardeners’? KNOW YOUR pH! A simple test kit can be purchased at your local garden centre. Alternatively, you can send soil samples off for testing at a laboratory. The reports from such tests are really useful as they generally include measurements of soil nutrient and organic matter levels. This can indicate whether or not amendments are required, and what amendments would be needed to optimize your soil for plant growth.

So- let’s go back to my plant lust example: the Rhododendron. These beauties are considered acid-loving plants- a special club whose membership also includes: blueberries (Vaccinium), mountain laurels (Kalmia latifolia), Japanese pieris (Pieris japonica), pin oak (Quercus palustris) and the list goes on. These plants prefer to grow in soils ranging in pH from 4.5 to 6. If soil pH is too high, these plants will exhibit chlorosis (a sign of iron and/or manganese deficiency- two elements that become more ‘locked-up’ at higher pH levels).

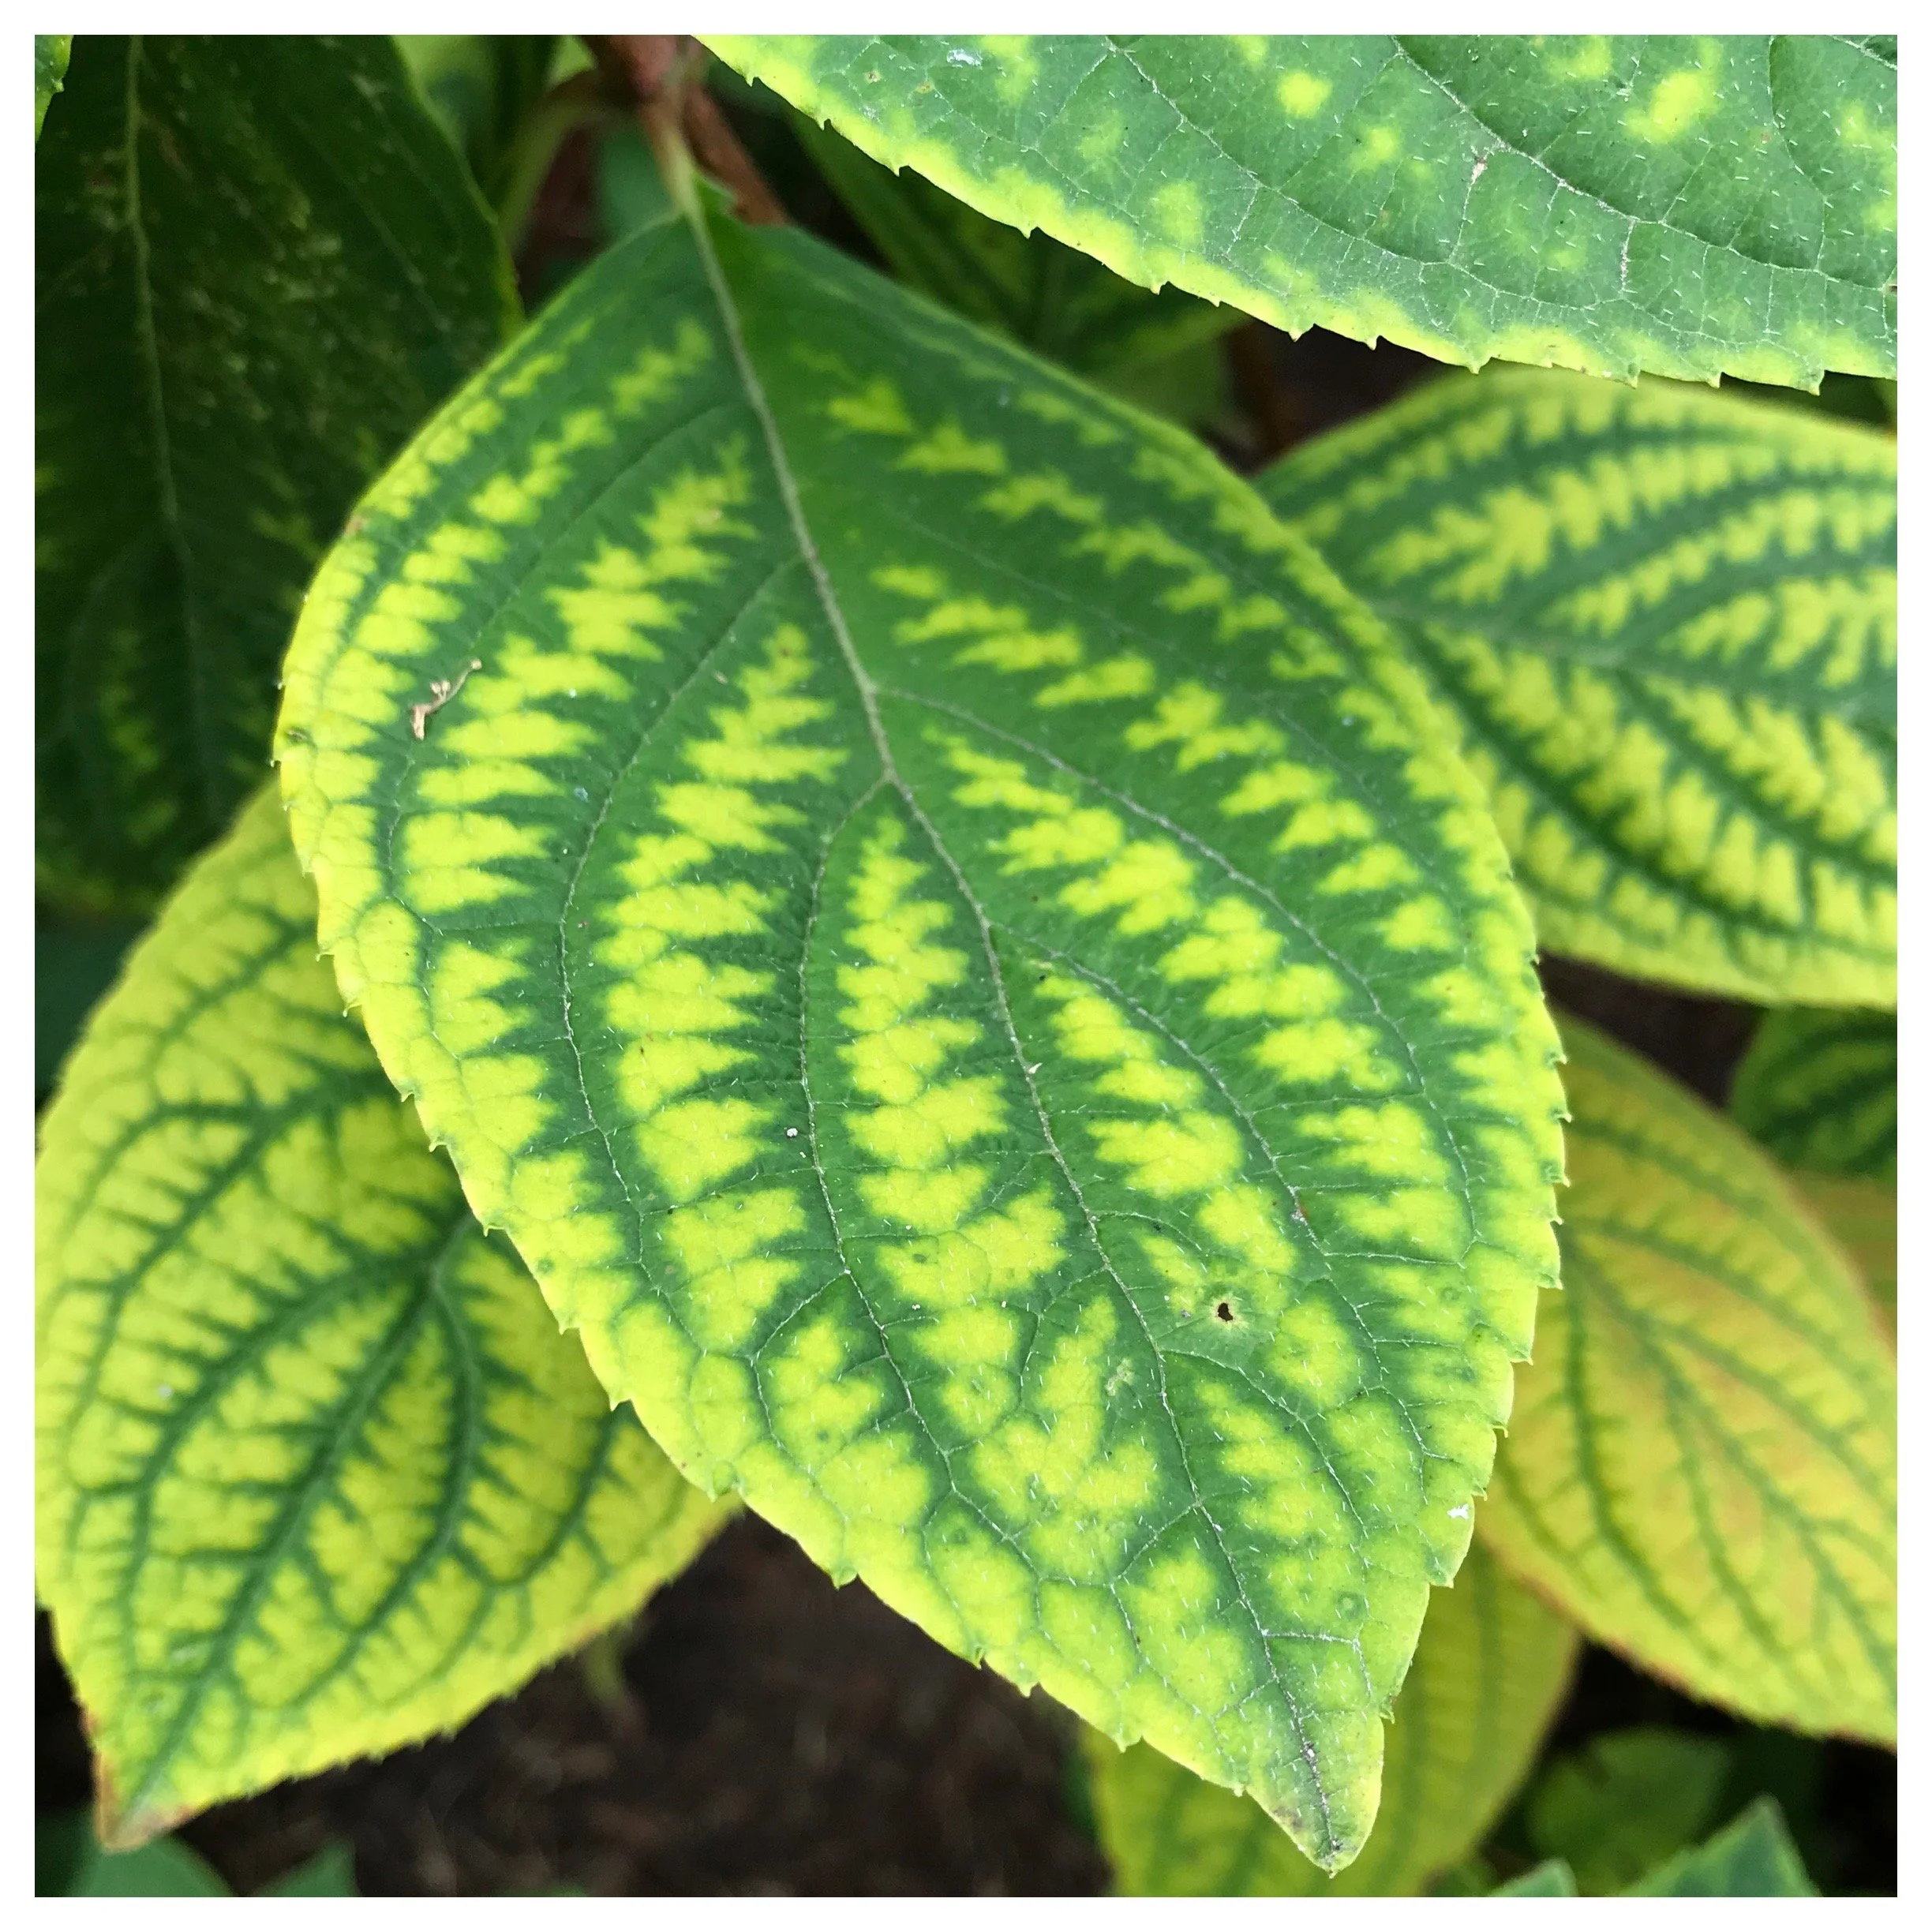
A hydrangea with chlorotic leaves

but I have slightly basic soil. What are my options?

Generally, soil pH is determined by what lies beneath- the parent material. Since pH is essentially guided by the foundation from which the soil was formed, it means that pH is not exactly an attribute that one can permanently change by sprinkling a few pellets or powder on the ground! The overlying pH tendency of the soil will always prevail. Temporary changes to pH can be accomplished through the routine addition of amendments. For example elemental sulfur or aluminum sulfate can be used to acidify the soil while lime can be used to make a soil more alkaline, but this will become a yearly task to add to the gardening ‘to do’ list.

When it comes to soil, I am not really interested in trying to fight my conditions. So in this case I fall back on the mantra that we should all chant as we walk through the temptations that line the aisles of the garden centres:

”Right plant, right place”.

We're all in this together.

(Originally posted: May 11, 2021)

Sick of this phrase yet? I know it’s starting to wear on me too, but as inhabitants of a single beautiful planet that seems to get smaller and smaller with each passing year, we are in a lot of things together… changes in climate, waiting for rocket pieces to fall to earth, and visits from aliens… not aliens from outer space (although given the context, this would be applicable too), I am referring to earthly alien species.

An alien species is a species that has been introduced to an area outside of it’s natural range. Now it is important to note that an alien species is not necessarily a bad thing. In fact many of our cherished landscape plants are alien species that have come to us from the far reaches of the globe, brought together in our gardens in the name of horticulture.

Now that’s a LOT of aliens! Many of these beauties look like they come from another planet; they are certainly not from around here! Growing together in southern Ontario, they can be found on the property of a fellow landscape gardener who happens to have a passion for the rare and unusual.

Alien species become a problem however, when they are invasive- that is they cause ecological or economical harm in their new environment. Unfortunately we know alien invasive pests all too well. They are introduced (either by accident or intentionally) and wreak havoc on species that are near and dear to our hearts: Dutch elm disease (Ophiostoma ulmi) virtually eliminating elms from our landscape, emerald ash borer (Agrilus planipennis) decimating our ash trees, European gypsy moth (Lymantria dispar dispar) defoliating the giants that grow among us, Japanese beetles (Popillia japonica) obliterating our showiest of summer flowers and feeding on the roots of our plants…. phew! Need I go on? And this is just the tip of the iceberg!

The all too familiar sights of some common alien invasive pests. Clockwise from top left: a spongy moth (Lymantria dispar dispar) egg mass (that can contain up to 1000 eggs!), crown die-back on an ash tree associated with the feeding of emerald ash borer (Agrilus planipennis) within the tree, and Japanese beetles (Popillia japonica) caught in a compromising position…

With the constant movement of people and products across our globe, the introduction of invasive pests is a problem that is not going to go away any time soon and unfortunately the landscape industry in Ontario is monitoring a new pest- the box tree moth (Cydalima perspectalis)- an insect that was first detected in Etobicoke in the summer of 2018. This little pest is capable of severely defoliating a boxwood hedge in one growing season. Yikes! Not great news considering the fact that boxwood is a popular and widely planted shrub in the southern Ontario landscape. (For readers outside of the GTA in Ontario, my apologies! While I try to keep my information relevant to a wider audience, this is one topic that is ‘close to home’ that I feel I need to post! Besides, this may someday become your problem too! If you are already dealing with box tree moth in your country…thanks for sharing.)

I am not going to get into the nitty gritty of the box tree moth here, but if you want to know more about this pest and it’s biology, check out this article written by Jen Llewellyn (Ontario Ministry of Agriculture, Food and Rural Affairs Nursery and Landscape Specialist) and posted on the Landscape Ontario Website. It contains great information about the pest and contains fantastic photos too! You can also check out this handy dandy IDENTIFICATION CARD as a ‘Cole’s Notes’ reference source. Finally, Landscape Ontario has also put out a helpful FLYER with more information including photos of box tree moth damage and signs to watch for.

Now before you start feeling helpless and depressed by the seemingly bleak future of our boxwoods, there is actually good news… YOU CAN HELP! Yes you!

Landscape Ontario is looking for volunteers to become ‘citizen scientists’ (that means you don’t actually need to be a scientist!), mainly in the Mississauga, Brampton, Vaughan, Richmond Hill, Markham and Scarborough areas, to monitor for box tree moths on their own properties. Monitoring helps with early detection and control of the pest. It also helps scientists learn more about the biology, behaviour, and population ecology of box tree moth as well as how quickly it is able to disperse across our Ontario landscape; all this information can ultimately guide ‘best management practices’ and/or regulatory actions aimed at controlling/containing the spread of this pest.

Volunteer home owners/citizen scientists with boxwood plants on their properties are needed in the areas located roughly along the purple line.

So what is involved in becoming a citizen scientist for box tree moth monitoring?

In general, citizen scientists would:

  • Host and hang a box tree moth trap (it looks like a green milk carton) approximately 1 meter from the ground, within 20 feet of boxwood plants, from May to September 30th, 2021

  • Open the trap on the same day each week and report the number of box tree moths found (including photos of the moths)

  • Store a packaged pheromone lure in the freezer for later use (it would be unwrapped and placed in the trap in the middle of August to replace the 3-month lure initially loaded in the trap)

  • Continue weekly monitoring until the end of September

So… if you are ready to be a scientist contact me and I will connect you to the appropriate person.

If you are not ready to make the commitment, be sure to monitor your boxwood plants for this new pest. While there are multiple signs to look for, larvae (and their associated feeding damage) can be found between mid-May and mid-June and again between mid-July and mid-August. Findings can be reported to www.inspection.gc.ca/pests

Happy scouting!

When Caring Becomes Meddling

(Originally posted: March 8, 2021)

Well hello there! It’s been awhile. I’ve been hibernating from the internet- it tends to be my habit during the cold winter months. For me, if the activity doesn’t involve bundling up and moving around in a snowy landscape, then it falls by the wayside until the world begins spinning towards spring again.

I love the winter landscape. It is during these (sometimes) snowy months that the world is stripped down to it’s bare bones and a raw beauty emerges- one that can’t be seen when the distractions of foliage and flowers fight for our attention. In the winter, form and structure prevail (accentuated by a blanket of freshly-fallen snow)… and it is glorious!

Winter is also an interesting time of year because landscape issues tend to really stand-out in the barren world: poor branching structure that arises from incorrect pruning is no longer masked by foliage, evidence of disease in landscape plants can often be revealed as sight-lines into tree and shrub canopies open up, and finally, questionable horticultural practices can stare us in the face.

On one wintry run I stumbled upon this…

Now orange emerging from a trunk is not exactly a normal thing to see, especially during the winter, so this definitely stood out like a sore thumb. Sure, some fungal diseases produce bright orange fruiting bodies during the growing season (i.e. various rust diseases or Chicken of the Woods/Sulphur fungus) but this was something different. This was an intentional placement of spray foam into a cavity within the tree… and it wasn’t just this one little spot, the tree was full of these patch jobs!

Let’s backtrack for a minute and take a look at wounds and cavities…

Cavities of various sizes and locations on the tree can be found everywhere!

Cavities are the result of decay (which in turn is caused predominantly by fungi and also bacteria). Improper pruning techniques as well as storm or construction damage are just a few examples of injury that can result in decay within a tree. In general, trees are able to ‘compartmentalize’ decay- separating diseased wood from healthy wood with a type of barrier within the tree. While the process of decay is one that a tree cannot halt, it is one that the tree can effectively slow through compartmentalization (with some tree species better at it than others). Trees will also react to decay by trying to outgrow it- adding more wood to the area near the problem (a way of reinforcing the weakened area).

Cavities in the making: the removal of large branches coupled with poor pruning cut locations means that the tree’s ability to heal itself has been compromised. Without being able to heal, the wound site/excess material begins to decay and this eventually leads to cavity formation (The photo on the right illustrates more advanced decay giving way to a cavity).

Gardeners, homeowners, and tree lovers tend to be meddlers. We look at cavities and decay and instantly feel the need to do something to help the tree. The thing is, the tree doesn’t necessarily need our help and it is quite possible that we can make things worse. If we do anything that compromises the barrier between diseased and healthy wood, we can speed the progression of decay within the tree (this is obviously bad!).

So what’s up with the expanding foam?

The rationale behind the use of expandable foam is that it can keep animals and moisture-holding debris out of the cavity. It also fills the space where water could otherwise collect. Moisture is necessary for the proliferation of decay organisms so the idea behind the expandable foam is to eliminate this scenario.

Being a flexible and non-abrasive material, it is also thought that expandable foam is kind to the interior of the cavity as the tree sways and grows around it- it will not rub and break through the ‘barrier’ between healthy and compromised wood- a concern with concrete or bricks- fillers that have been historically implemented to fill cavities. (Concrete, brick, mortar and stones have NO place inside the cavity of a tree! Incidentally, our case study tree had also been filled with concrete in some places. Poor thing.)

With all that said- if the expandable foam is not applied correctly, it can trap moisture within the cavity and hold it there. It can also prevent a tree from properly healing over. The type of foam used, how the foam is pared down to the cavity, as well as the coating used over the foam are all considerations for proper application of this technique. For these reasons, I would argue that the use of expandable foam in cavities is an arboricultural practice that should only be prescribed and implemented by a professional (ISA certified arborist) in very select cases. Even with that, I can not find any recent scientific research that suggests expandable foam is a valuable cavity repair technique. Finally, it is also important to keep in mind that when “decay is at play, get the professional’s say” (yes, I made that up just now)- decay can affect the structural integrity of the tree, so it is important that an arborist is brought-in to examine the extent of the decay and determine if any actions are required to mitigate the problem.

In the case of the ‘foam tree’ above, many of the cavities (and resultant patches) are small- there really was no need to meddle. There are also very large cavities and areas of significant decay on both the trunk and primary branches of this tree- these issues would certainly not be solved by expandable foam and require the attention of an ISA certified arborist. So in the end the liberal placement of foam patches has accomplished nothing for this tree except the creation of a blight on the winter landscape… and the inspiration for a blog post ;)

Stay tuned… while we are talking about meddling, no discussion would be complete without addressing wound dressings… coming up in a future post!

The sun is setting on winter… thoughts now turn to spring!

References:

American National Standard for Tree Care Operations- Tree, Shrub and Other Woody Plant Management- Standard Practices (Pruning). ANSI A300 (Part 1)-2008.

Gilman, Edward F. 2002. An Illustrated Guide to Pruning, 2nd Edition. Delmar, Cengage Learning.

Lilly, Sharon J. 2010. Arborists’ Certification Study Guide. International Society of Arboriculture.

Smiley, E. Thomas. Bartlett Tree Experts. (n.d.) Research Laboratory Technical Report: Cavity Filling. https://www.bartlett.com/resources/cavity-filling.pdf

University of Florida. (2020, January 21) Landscape Plants. Hollows and Cavities. https://hort.ifas.ufl.edu/woody/cavity.shtml