Perennial Care

It’s not as morbid as you think…

(Originally posted: July 16, 2019)

Deadheading. It sounds more like a Halloween post than a gardening one but this is one of the most common tasks that a landscape gardener will undertake during the growing season. It is meditative, fun, and really forces you to get to know how your plants grow!

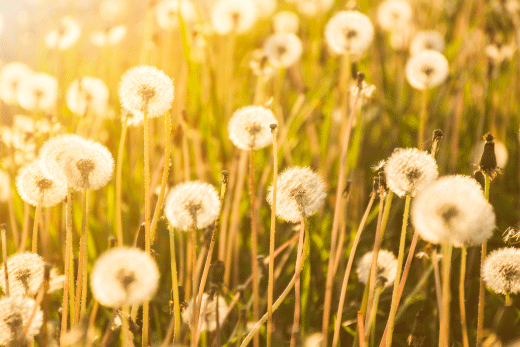
So what is a deadhead? Essentially it is a dead flowerhead. Deadheading is the process of removing spent flowers. This is done for a few reasons:

  • it tidies up the plant

  • it can prevent a plant from seeding in the garden (if seeding is undesirable)

  • it conserves the plant’s energy; setting seed uses valuable energy that could otherwise be put toward

    • maintaining nice foliage

    • producing more blooms (so the bloom period is extended)

    • sending out a second flush of blooms later in the season if the plant is a rebloomer- not all plants are!

Deadheads, deadheads everywhere… snip them off without a care! Cheesy? I think so. Sorry

Over the course of the next few weeks, I will feature different types of deadheading. I will also try to include some videos to help illustrate the techniques.

So get ready to have some fun with the secateurs, and start thinking like the queen of hearts… just be sure to use your ‘inner voice’ if you feel like shrieking ‘off with their heads!’

Mulching: The Finishing Touch

(Originally posted: July 11, 2019)

As promised, I am following up my previous post about edging with a post about mulching- it is the ultimate finishing touch that helps make a garden look fabulous. There is a LOT to say about this topic, so I am dividing it into two parts: a mulch primer, followed by tips for doing a top notch mulching job.

OK. Let’s start with a little discussion about mulch shall we?

Aside from really setting off the plants in your garden and giving the garden beds a nice uniform look, the value of mulch goes well beyond aesthetics. It has some really important environmental benefits too. Here is a brief low down:

Benefit #1:

A layer of mulch acts as a sort of semi-permeable barrier when it comes to water. It allows rain/irrigation water to seep through to the soil but it also helps to slow down water lost from the soil due to evaporation- delaying the need to add supplemental water during dry periods… thus conserving this precious resource! (This ability to conserve soil moisture is also why we don’t want to apply mulch to water-logged spring soils… for the health of our plants, we want to encourage these soils to dry out a little before ‘locking in the moisture’!)

As summer weather hits, our minds shift to water conservation. In a garden, mulch is an important piece of the ‘water conservation puzzle’.

Benefit #2:

A layer of mulch can absorb the impact of driving rains thus preventing your garden soil from washing away or splashing up on your plants- a relevant concern given the weather we have been experiencing as of late! Mulch fibres tend to weave together which helps the layer stay in place in conditions that would otherwise wash soil away. (It is important to keep in mind that when mulch fibres become too interwoven, the layer has a tendency to repel water- this is where ‘fluffing’ the mulch every now and then is a good idea.)

Benefit #3: Exposed soil just screams “Hey weeds! Land available- make your home here!” The barrier provided by mulch can help control weeds in two ways. First of all, a good mulch layer (around a 3” depth) can prevent existing weed seeds in the soil from taking hold by eliminating the sunlight required for them to germinate. The layer of mulch is also not conducive to rooting, so seeds blowing into the area will have little success at ‘laying claim’ to the land. With that said, it is important to weed your garden before applying mulch. You may think you have won the war by covering up your unwanted plants, but most likely you have not. Sorry. Existing weeds will often grow right through the mulch… forcing you to actually deal with the problem instead of covering it up!

Attack of the weeds! Mulch can be used as a weapon in the war against weeds in your garden.

Benefit #4: Mulch is a natural product that, when it breaks down, it adds organic matter to the soil (which in turn adds nutrients to the soil, increases the water holding capacity of the soil as well as the ability of the soil to retain nutrients). Organic matter can also help break up clay soils and ‘beef-up’ really sandy soils (in general, it improves the structure of the soil). In this way, mulch is another way we can ‘give back’ to our gardens during the growing season!

Benefit #5: Mulch can help moderate soil temperatures, buffering plants from the heat of summer and the cold temperatures of winter. This can be the difference between the survival or demise of more tender plants (or plants growing at the edge of their climatic limits).

Clematis is a plant that benefits from a generous layer of mulch to moderate soil temperatures.

Types of Mulch and How Much to Use

Organic mulches are really the only type of mulch to consider for a garden. Of the organic mulches, the most readily available ones for the home gardener are the shredded bark mulches that are found in bags at your local garden centre. Usually it becomes a choice between pine and cedar. There is also a choice in colour as dyed mulches are available in brown, black or red (gag!).

Bagged shredded cedar mulch. Note the shredded/fibrous texture of this mulch.

So how does one choose? Here are some points to consider when choosing a mulch for your garden:

  • Pine mulch tends to be lighter in colour and breaks down faster than cedar mulch (this is not necessarily a bad thing since you will need to reapply mulch on a yearly basis anyway; I personally like a mulch to break down quickly so that it is incorporated into the soil sooner.)

  • Pine is more acidic than cedar

  • Cedar mulch tends to have a naturally reddish colour to it

  • The stained mulches may look nice when first applied but they tend to fade (in full sun situations they can start looking very ‘tired’ quite quickly)

  • Black mulch shows every single piece of debris that lands on it

  • Red mulch is just wrong and shouldn’t even be considered an option! (This is the hideous orange-red mulch that tends to be used in parking lot and gas station gardens. If you love your garden and want to show it off, I am begging you…DON’T USE THIS MULCH!)

Some other variations are available when buying mulch in bulk. If you are happy to get a pile of mulch dumped on your driveway, this is certainly the most economical way to go! I personally like a composted pine bark mulch. It has a more uniform consistency than the shredded mulches and it doesn’t tend to weave together. This does make it more susceptible to swimming away in driving rains… but considering the downpours we have seen in recent years, I have found it to hold up extremely well!

Composted pine bark mulch. Note the more consistent texture of the mulch particles compared to the shredded bark mulch. This mulch lacks the fibrous quality of the shredded bark mulches and the particles do not weave together.

I realize there are even more options when it comes to mulching (straw, compost, shredded leaves, wood chips to name a few) but I will save these for future posts. Let’s get on with the task at hand… applying mulch to our gardens! (Which just happens to be covered in the next post…)

A Little off the Top

(Originally posted: June 6 2019)

Growing season is well underway and it is time for some plants to get a little haircut!

Think back to last season… seems like a long way away now, but if you flip through the files in your memory banks, perhaps you remember some floppy perennials in your garden? Ones that grew nicely at the start of the season and then upon flowering, or after a driving rain the plants decided to split open in the middle and lie down on the ground in all directions?

Perhaps this is ringing a bell and you are now thinking “ah, yes… those plants drove me CRAZY!”

Aside from staking up floppy plants (something that we will do later in the summer), there IS a solution for some plants to prevent ‘the flop’. It is a little technique called ‘cutting back’ (or ‘pinching’ if only the tips of the plant are removed).

The Technique

Essentially, ‘cutting back’ is exactly that- cutting back the stems of a perennial. Not all perennials can tolerate a prune like this but there are some common ‘floppy’ perennials that can, such as Sedum

A clump of Sedum before and after being cut back (along with the clippings to illustrate how much of a ‘haircut’ the plant got!)

I also used this technique on some catmint (Nepeta racemosa ‘Walker’s Low’)…

Nepeta x faassenii (catmint) before and after being cut back.

So how does ‘cutting back’ combat ‘the flop’?

By cutting down the stems of a perennial, the plant is forced to direct it’s growth elsewhere- which would be the next remaining buds on the stem (shown in the photo of the catmint below). When these buds begin to grow, the plant ‘branches out’ from these new growing points, ultimately leading to a fuller/bushier plant. The denser plant allows for the stems to rely on each other for some support to stay upright. [Now sing with me… “Lean on me… when you’re not strong…”}

A catmint stem before and after being cut back. The red dots show the new growing points for that stem. The cutting back of the stem ultimately forces one stem to branch into two.

Cutting back a perennial also leads to a shorter overall stem height. By forcing the plant to branch, the plant’s energy must be used to grow a greater number of stems. I like to think of it as each stem vying for the same resources. With more stems trying to grow, there is less energy available for each stem- which ultimately leads to a shorter stem height (as well as smaller flowers).

It is the combination of a shorter height and fuller plant that translates to a sturdier perennial that can resist flopping over!

An Added Benefit

Cutting back perennials has another consequence and that is a delay in flowering. Cutting back can be considered a ‘set-back’ to the plant, so it should be no surprise that it will take time for the plant to rebound from the prune and begin growing again from new buds. It must do this before it can actually attempt to flower! The time it takes the plant to rebound from the prune is responsible for the delay in flowering.

On the surface, this delay of flowering could be seen as a negative consequence but it can actually be used to your advantage! First of all, in the case of both the Sedum and the Nepeta, I have not pruned all the plants in my garden. That way some of the clumps will flower at their usual time and the pruned ones will flower later. (For example, two weeks after the initial prune of the catmint, the unpruned clump is ready to flower, the pruned clumps are still rebounding from being cut back.) The result? A longer overall flowering period for these perennials! This doesn’t just translate to a longer floral display for my appreciation. These plants happen to be located in a pollinator-friendly garden which means the longer bloom time presents a longer period of time when the ‘floral buffet’ is open for these important creatures. Dig in!

Catmint in a pollinator garden. The unpruned clump is on the verge of flowering, the other two clumps have branched out and begun growing from their new growing points (shown by the arrows). These two pruned plants will be delayed in their flowering. This forced staggering of flowering periods can help prolong bloom times for pollinators.

So far, I have only cut back Sedum spp. and Nepeta this year. Some of the more common perennials ‘on deck’ for a haircut include:

  • Balloonflower (Platycodon spp.)

  • Aster

  • Chrysathemum

  • Beebalm (Monarda spp.)

  • Russian Sage (Pervoskia atriplicifolia)

Some other perennials that can be cut back to prevent ‘the flop’ (clockwise from top left): Platycodon spp. (balloon flower), Chrysanthemum spp. Aster spp., Veronica spp. (speedwell) and Echinacea spp. (coneflower)

For more information on this topic, check out the amazing book by Tracy DiSabato-Aust called The Well-Tended Perennial Garden. (2006, Timber Press Inc.). In this book you will find a LOT more detail with respect to pruning perennials, as well useful lists that outline what perennials can tolerate pruning and at what time. Some all around good bedtime reading :)

More posts on perennial pruning in the weeks ahead!