Deadheading

Deadheading Technique #3: Pruning to a Lateral Bud

(Originally posted: August 17, 2019)

Well hello there… it’s been a while! No, I have not given up on this blog or had writer’s block, I have simply been relatively unplugged for the last couple of weeks, save for the GROW Instagram account. Despite the time away, believe it or not, not much has changed in the gardening world. In reality, the tasks I am completing today are essentially the same as those that I was completing two and three weeks ago… deadheading, deadheading and more deadheading!

So, with that said, I think it is time to address the last main deadheading technique that gardeners use, and that is deadheading to a lateral bud/flower.

This technique is really easy, once you know what you are looking for. So let’s start with the basics… what on earth is a lateral bud or flower?!

Let’s have a look at this Echinacea below… if you follow the main stem from the ground up, you will notice that the stem terminates in a flower. It should be no surprise that this is called the terminal flower (which originated from a terminal bud).

Now follow the stem back down until you notice a branch of sorts. This is a secondary growing point that originated from a lateral bud (a bud that sends growth sideways); in the photo below, that sideways growth is well on it’s way to becoming a lateral flower.

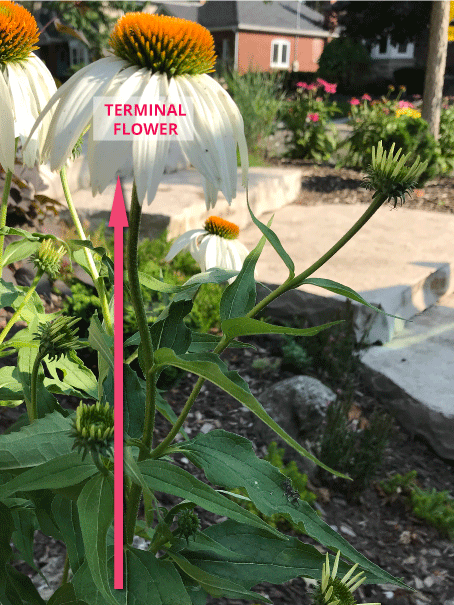
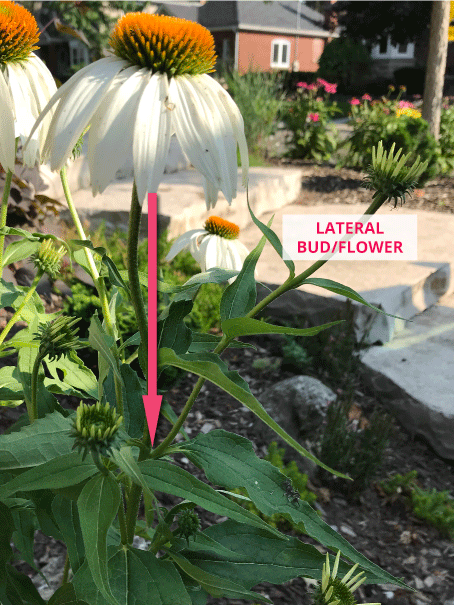
As this Echinacea flower stalk enters it’s blooming period, the flowering will begin at the terminal flower bud and work downward. As flowers wane, the spent flowers can then be deadheaded to the bud that is next in line. For the Echinacea, the cut would be here…

Not all lateral buds are as obvious as those on the Echinacea. Have a look at the Monarda (beebalm) in the photos below… if you follow down the stem from the top flower you come across two buds nestled into the stem.

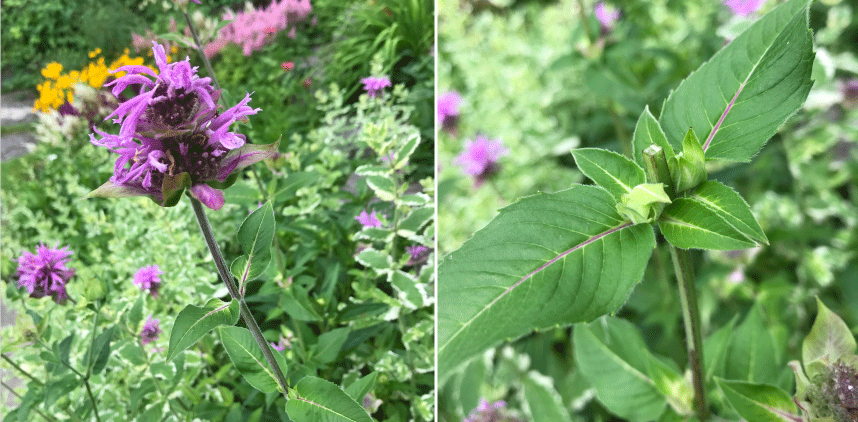
Pruning to the lateral buds involves cutting the stem of the spent blossom just above those buds…

Deadheading of Monarda (bee balm) to lateral buds- this can extend the bloom period of this perennial.

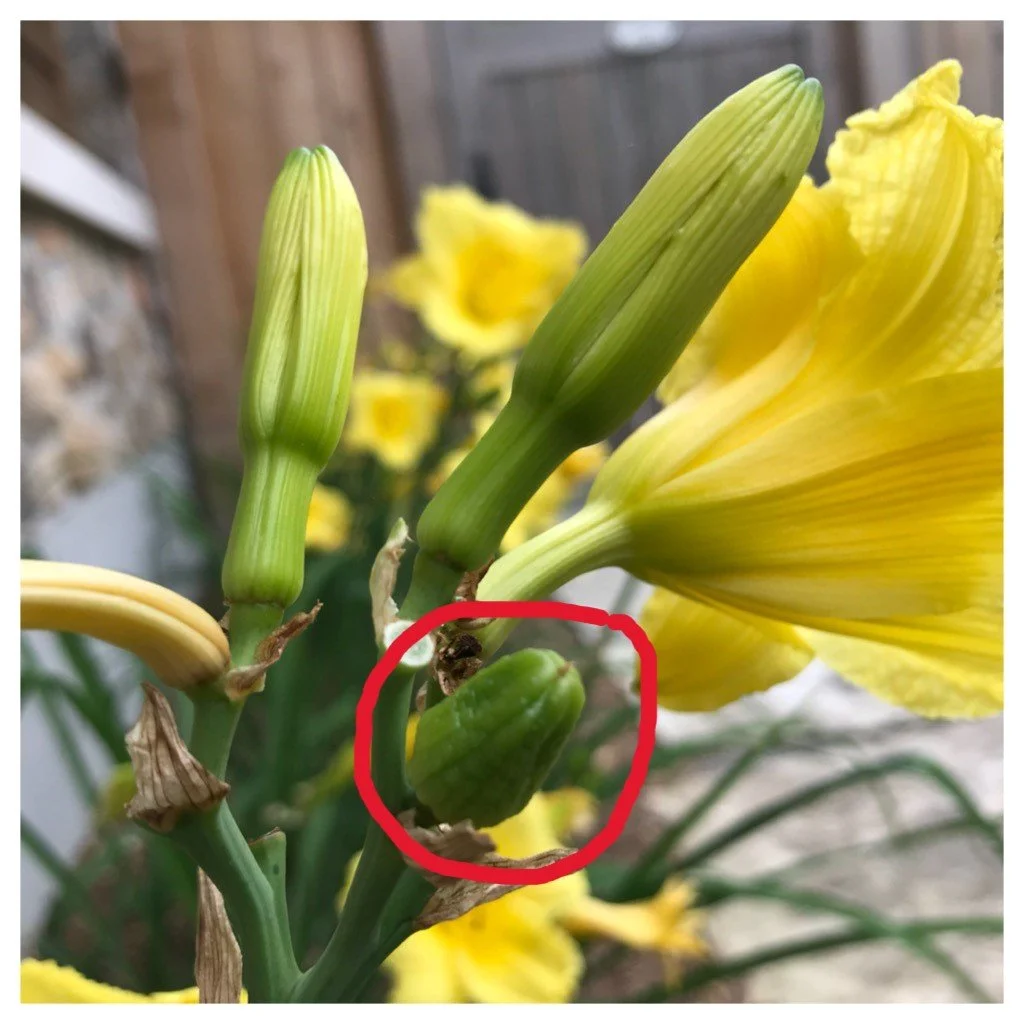
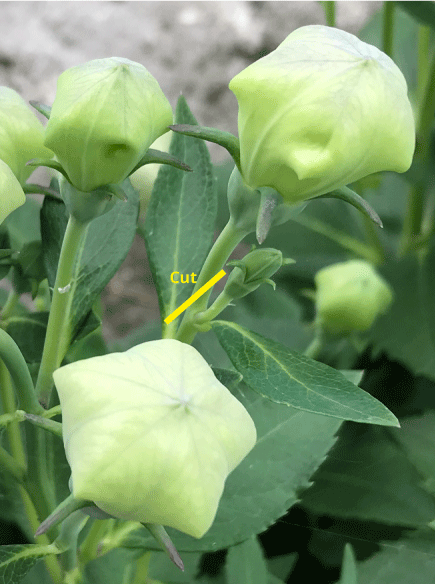
Even trickier are plants such as Platycodon (balloonflower). The buds for new flowers are actually right next to the old blooms. In this case it is just the spent bloom that gets removed, while being careful not to snip any buds in the process! The photo below shows the flower buds of balloonflower. The largest one will bloom first, get snipped off at the yellow ‘cut’ line and the smaller bud is next in line.

In general, a lateral flower bud is not always a guaranteed bloom. This deadheading technique encourages these lateral buds to flower and therefore this technique helps to extend the bloom period of many perennials.

What is the mechanism at play here? Think of it this way… a plant’s main purpose is not to put on a pretty floral display for us, it is to reproduce. If a plant flowers and is allowed to set seed, it can consider it’s mission complete- no need to send out more blooms! The plant’s resources get allocated towards seed production, instead of additional flower production.

I like to think of deadheading to a lateral bud as a way of freeing-up that lateral bud to bloom.

One Final Step

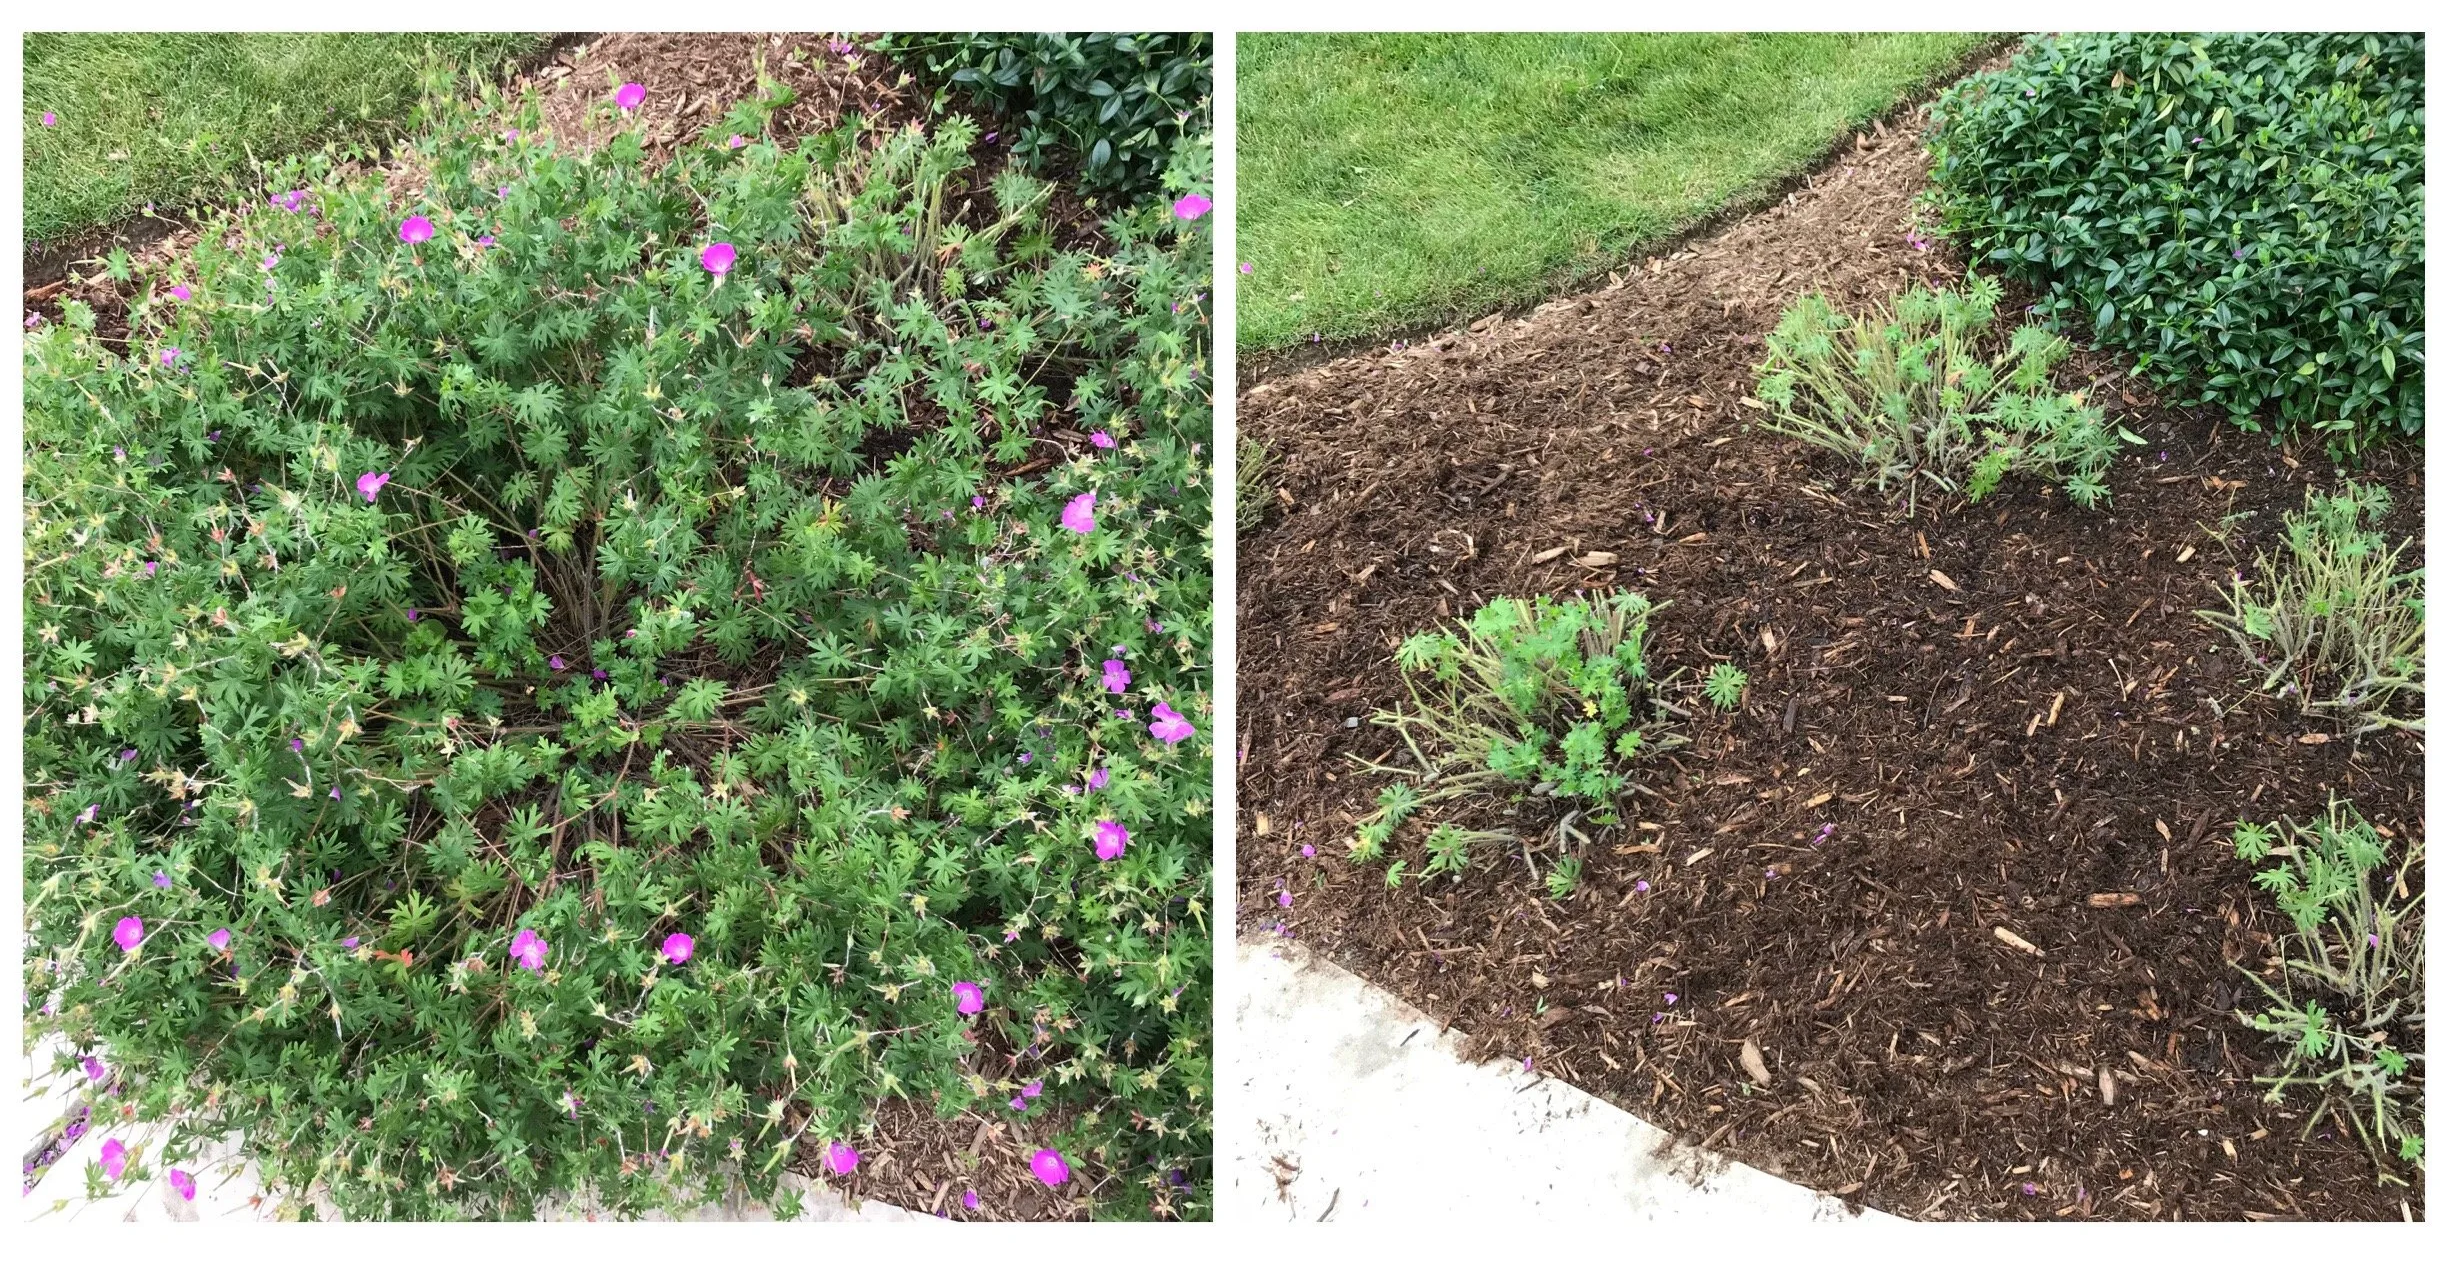
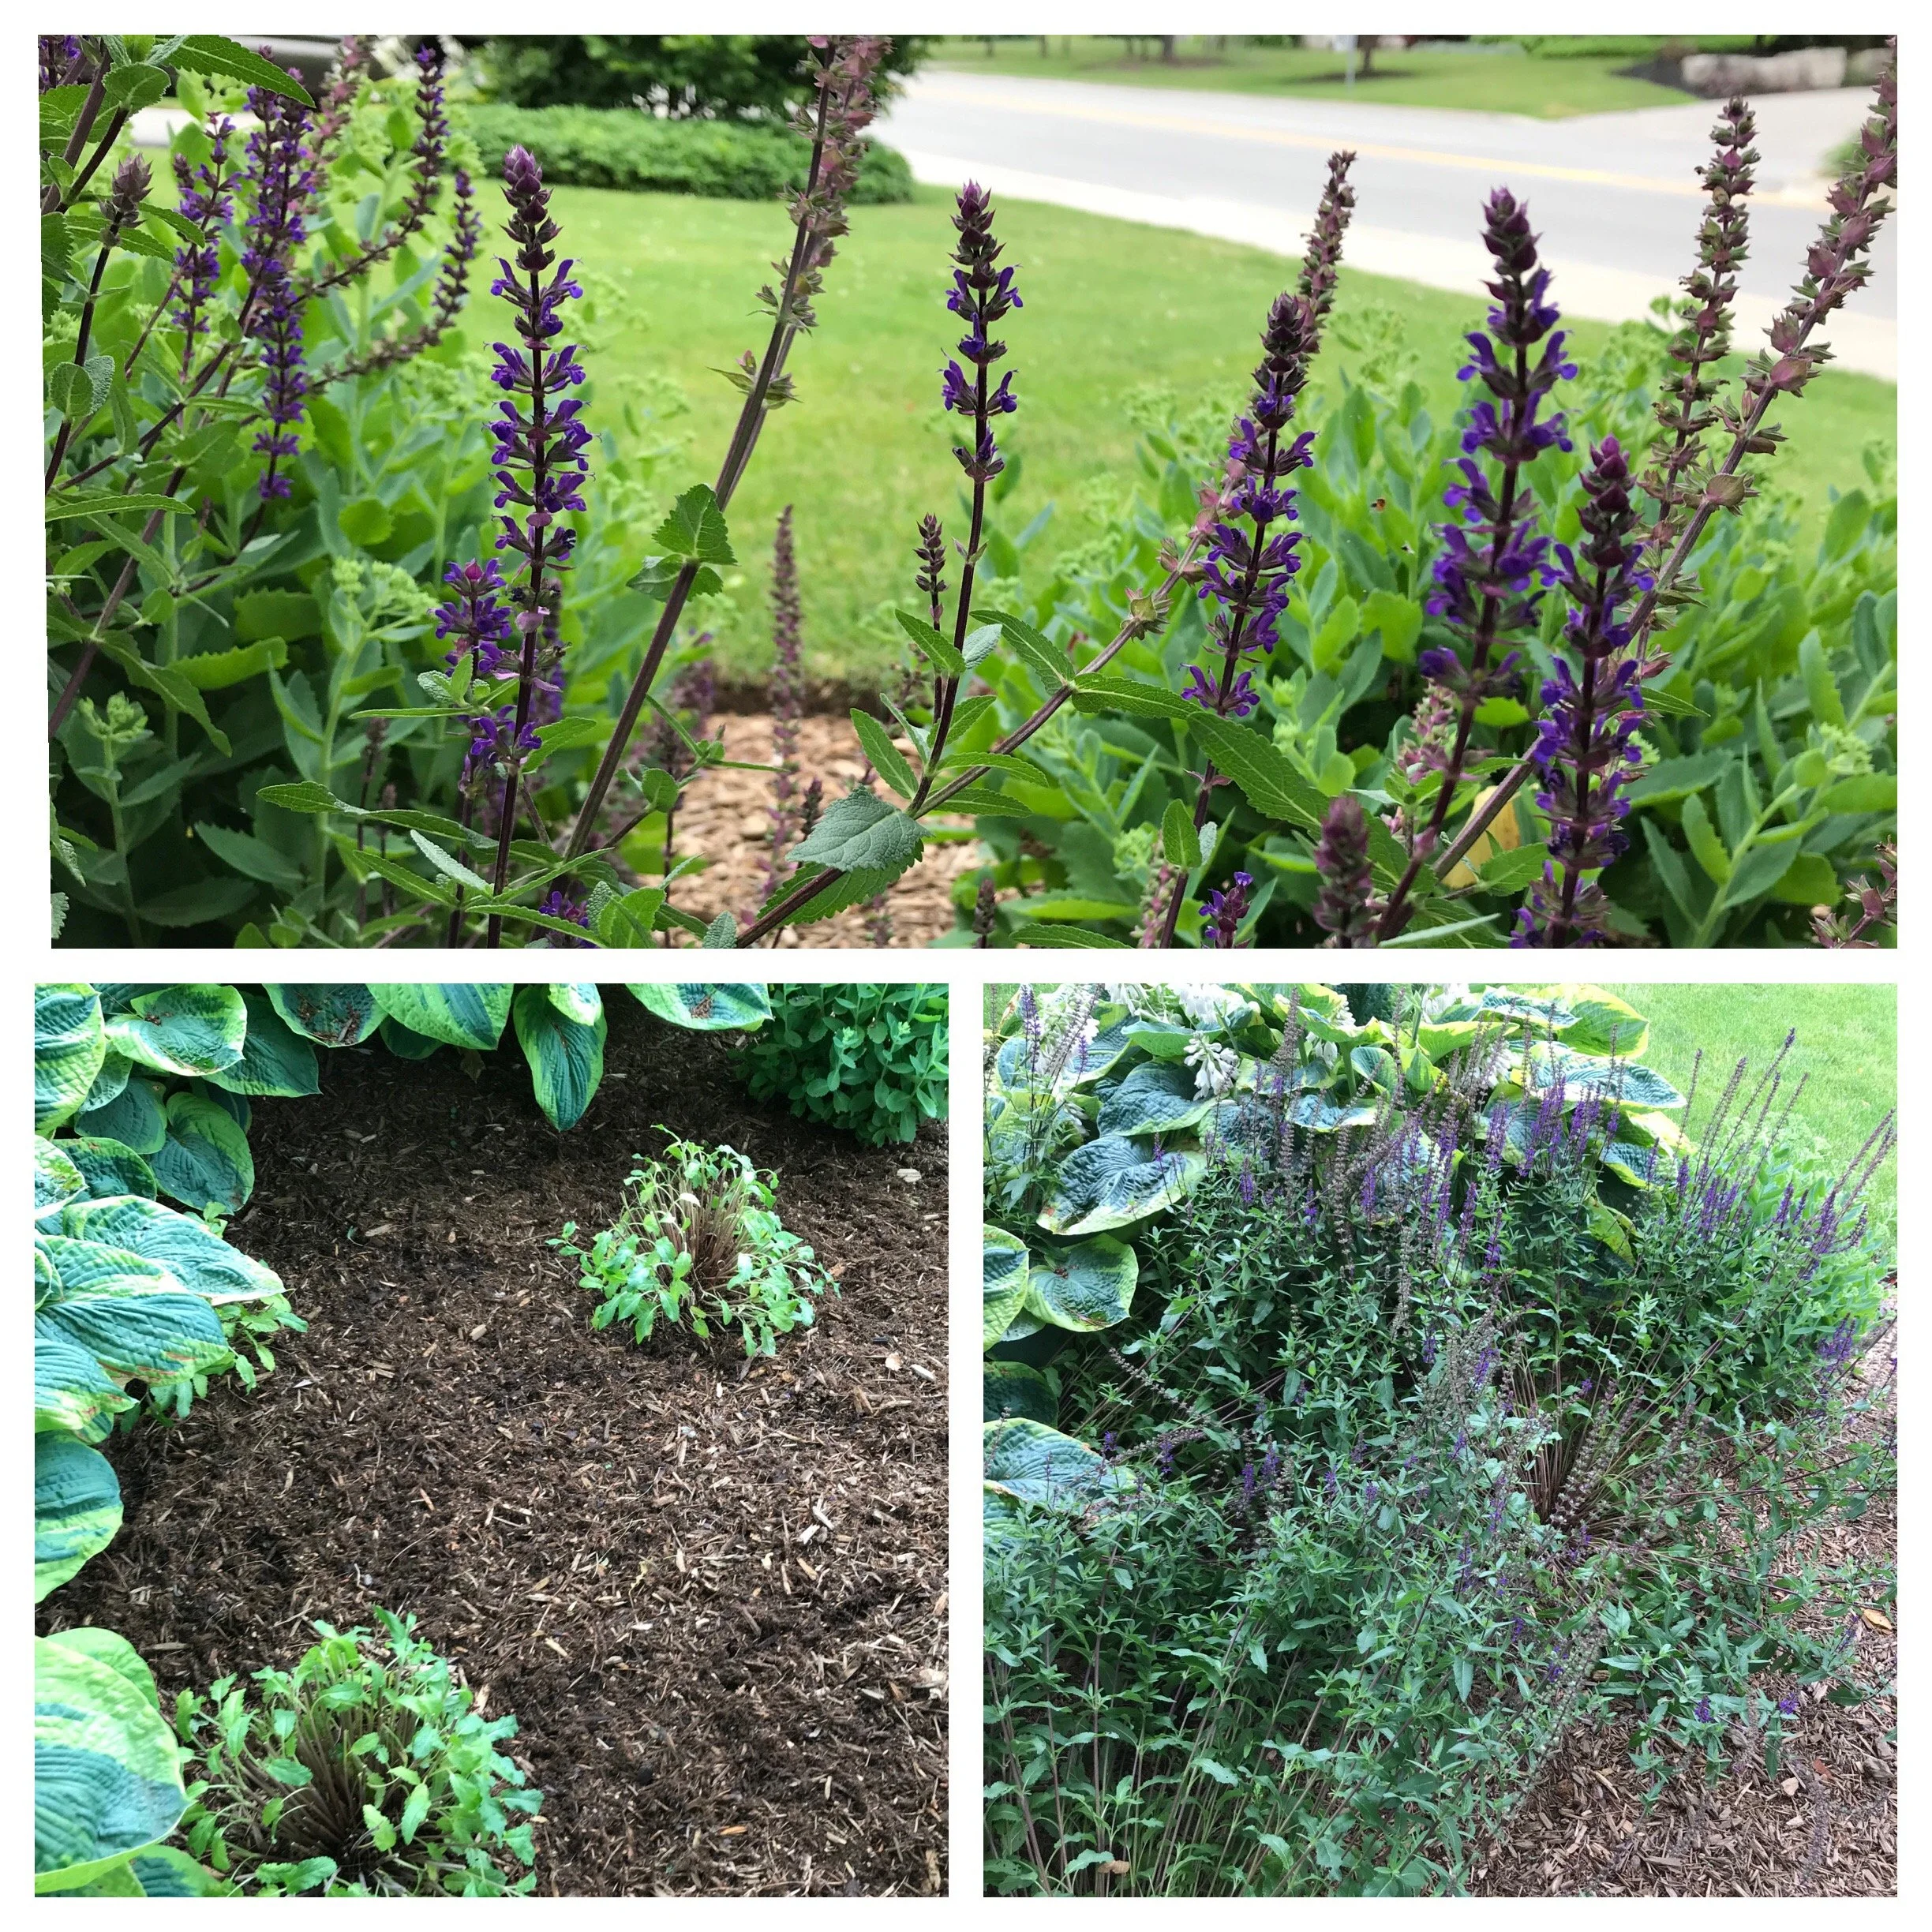
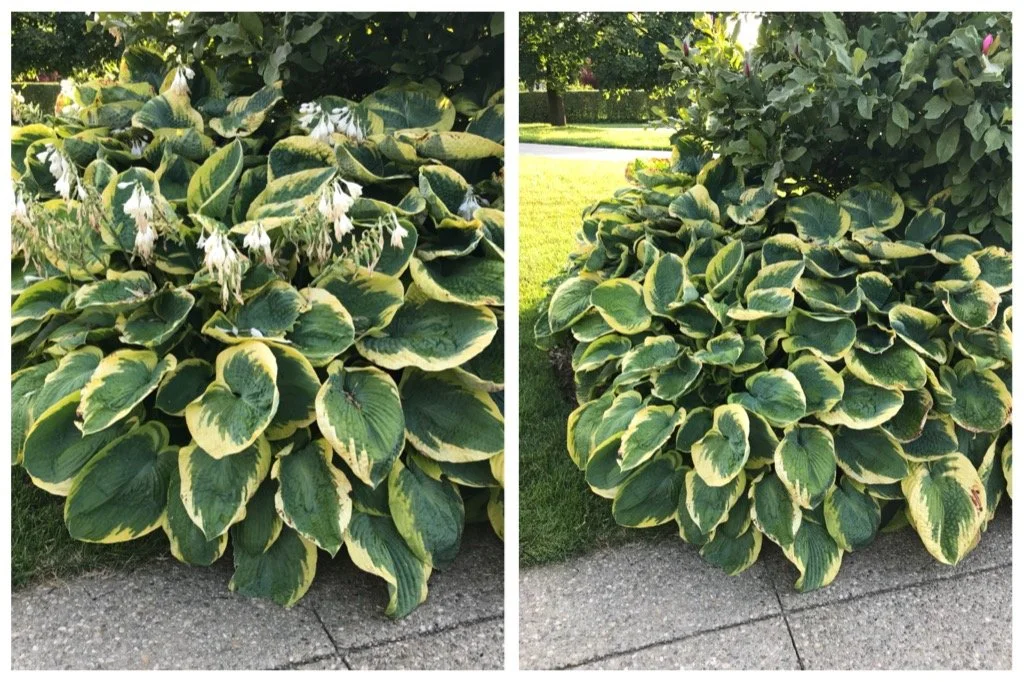
Once the blooming period is complete, some perennials (ones that have a clump of foliage at the base of the plant- known as basal foliage) will get one final snip. For these plants, the spent flower stalks are cut down to the basal foliage. This often tidies the look of the plant. With that said, I tend to leave flower stems standing on plants that provide food (in the form of seeds) for wildlife; plants such as Echinacea (coneflower) and Monarda (beebalm) are only a couple in this category. Additionally, I will leave plants standing if they have attractive seedheads. Yes, I will admit, I am thinking about winter here, but it is important to keep in mind that winter is, in fact, a season and seedheads are a really great way to have interest in your garden during the months of frost and snow!

So…there you have it! Deadheading to a lateral flower or bud. Now it’s time to get out in the garden and inspect your perennials… take a good look at how they grow. If you get close enough, they will speak to you and tell you how to prune!

Deadheading Technique #2: The Haircut

(Originally posted: July 27, 2019)

We are still in the thick of summer deadheading- the constant attempt to tidy perennials, prolong their bloom or encourage a repeat bloom (depending on the perennial). If you like non-precise gardening tasks, this type of deadheading is for you! I call it ‘the haircut’ but it is also called shearing.

Remember our catmint (Nepeta) friends?

Well here are the three amigos again; one plant has already been sheared (a week prior to taking this photo), and two are still waiting in the foyer, reading their magazines, patiently waiting for the hairstylist (me)… who is taking her sweet time in completing the task!

I am going to keep this super easy: this deadheading technique involves grabbing a handful of stems and cutting them shorter. If there is new growth emerging from the base of the plant, you will want to avoid cutting this growth- it will be responsible for rejuvenating your plant! Once everything has been cut back, you can shape the clump if you wish. It really doesn’t get simpler than that! You can use secateurs for this task or hedge shears. I find hedge shears make a much bigger mess that requires cleaning (unless a drop sheet is put down first… something that I am known to do). I also find that I have much less control over the finished product with hedge shears so secateurs are certainly my ‘go to’ for this type of work.

Back to the task at hand…

Here are a couple photos of the finished ‘catmint project’. If you are thinking that the newly sheared plants look horrible, you would be correct. With that said, all you have to do is look at the middle plant to see how much better the plants will look in one short week. Also note how the clumps have been shaped to be slightly ‘dome-shaped’. I do this because I find it looks tidier overall.

Let’s do one more example of shearing… this time it is Geranium getting the haircut. In this case, the new growth coming up from the centre is left untouched- with this new growth, the plants will fill-in in no time!

If this method of ‘whacking things back’ is a little too crude for your liking, you can always cut each stem individually to a point just above a leaf (also called a node). It is from this point that the plant will branch and send out new growth. I tend to do this for Salvia spp. so that I don’t end up with unsightly ‘chopped-up’ leaves that are left on the plant; for larger-leaved perennials like Salvia, I find that looks especially bad! This plant tends to reach a point in the growing season where the removal of spent flowers to lateral flower buds (next post!) starts to make the plant look funny. Taking down the stems helps provide a reset.

Here are some common perennials that can be sheared:

  • Cranesbill (Geranium spp).- the ones that get long and sprawling after flowering; spreading/dwarf varieties do not get sheared. If your Geranium is rambling over-top of other perennials, it is eligible to be sheared!

  • Oriental poppy (Papaver orientalis)- cut to the ground including foliage

  • Thread-leaf tickseed (Coreopsis verticillata)- when there are more spent flowers clinging to the plant than nice ones, it is time to give the plant a light shearing

  • Spurge (Euphorbia spp.)- CAUTION! The milky sap that comes from the cut ends of this plant is an irritant to skin and eyes. Be sure to wear gloves, long sleeves, and eye protection. Euphorbias also harmful if eaten.

  • Lavender (Lavandula spp.)

  • Artemesia spp.

So there you have it! Quite possibly the simplest gardening task that can really clean-up the look of your perennials. Get out those hedge shears or secateurs and let the make-overs begin!

Deadheading Technique #1: Leave no Evidence!

(Originally posted: July 19, 2019)

Well the time has come for daylilies (Hemerocallis spp.) to shine…blooms of all sorts of colours rising above their grassy foliage. Then, just as quickly as they begin to shine, they start to ‘un-shine’ (if this is not a word, I would like to propose it as a new one). Afterall, Hemerocallis translates to ‘beautiful for a day’. These perennials look SO MUCH better when they are deadheaded to the point that, when I walk by a property with daylilies that haven’t been deadheaded, it takes everything in me to not pull out some pruners and get to work. I’ve even gone through the conversation in my head:

Hey! What are you doing?!’

Your daylilies don’t look very pretty and they are begging to be tidied up. Plus this is free labour!

I don’t really care. Get off my property and please don’t come back.

OK. Sorry.’ (Said while thinking: ‘you really should care because they really don’t look very good’)

…as the inner dialogue never ends up with a positive outcome, I decide not to trespass.

Now that we established that your daylilies will likely NOT be miraculously tidied by a crazy gardener, it means you should learn the techniques so you can do the work yourself!

There are a few steps to tidying daylilies. The first step is done during the bloom period. Old withered flowers are removed, as are the seed capsules. Be careful not to confuse the seed pods with flower buds. In general, seed pods are more roundish and flower buds are elongated. Once you have identified the parts to be removed, tidying the plant is easy! The withered flowers and seed pods simply snap off by hand.

A daylily with lots of flower buds and a seed pod (circled in red).

Once the last flower has faded from a particular flower stalk we move on to the next step of tidying up the plant. This is perhaps the easiest deadheading technique which I term the ‘leave no evidence’ approach, otherwise known as cutting back the whole flower stem. Essentially you are removing the entire stem to a point below the foliage- removing all evidence that the plant ever had flowers. It is a technique used for daylilies, hosta, iris, coral bells, scabiosa among others.

A before and after look at a hosta in need of deadheading. The photo on the right is of a hosta breathing a sigh of relief that it’s unsightly spent flowers have been removed… or maybe that was my sigh of relief.

So have a look at your garden- if you see any of these common landscape plants with spent flowers still clinging to them, do your plants a favour and give them a little facelift… with some simple deadheading!