Aesthetics

Drawing the Line

(Originally posted: June 25, 2019)

Well the growing season is well underway and chances are you have not only been keeping your gardens tidy but you have also been doing the odd makeover as well. Perhaps you’ve swapped out some undesirable, struggling or dead plants with some ‘gotta-have’ ones or perhaps you have needed to create some room for said plants and you’ve decided to expand your beds.

(New gardeners be warned: lack of space is a common problem among gardeners- as a result, the proportion of one’s property devoted to garden beds generally increases steadily over time… it’s a little known not-so-scientific fact!)

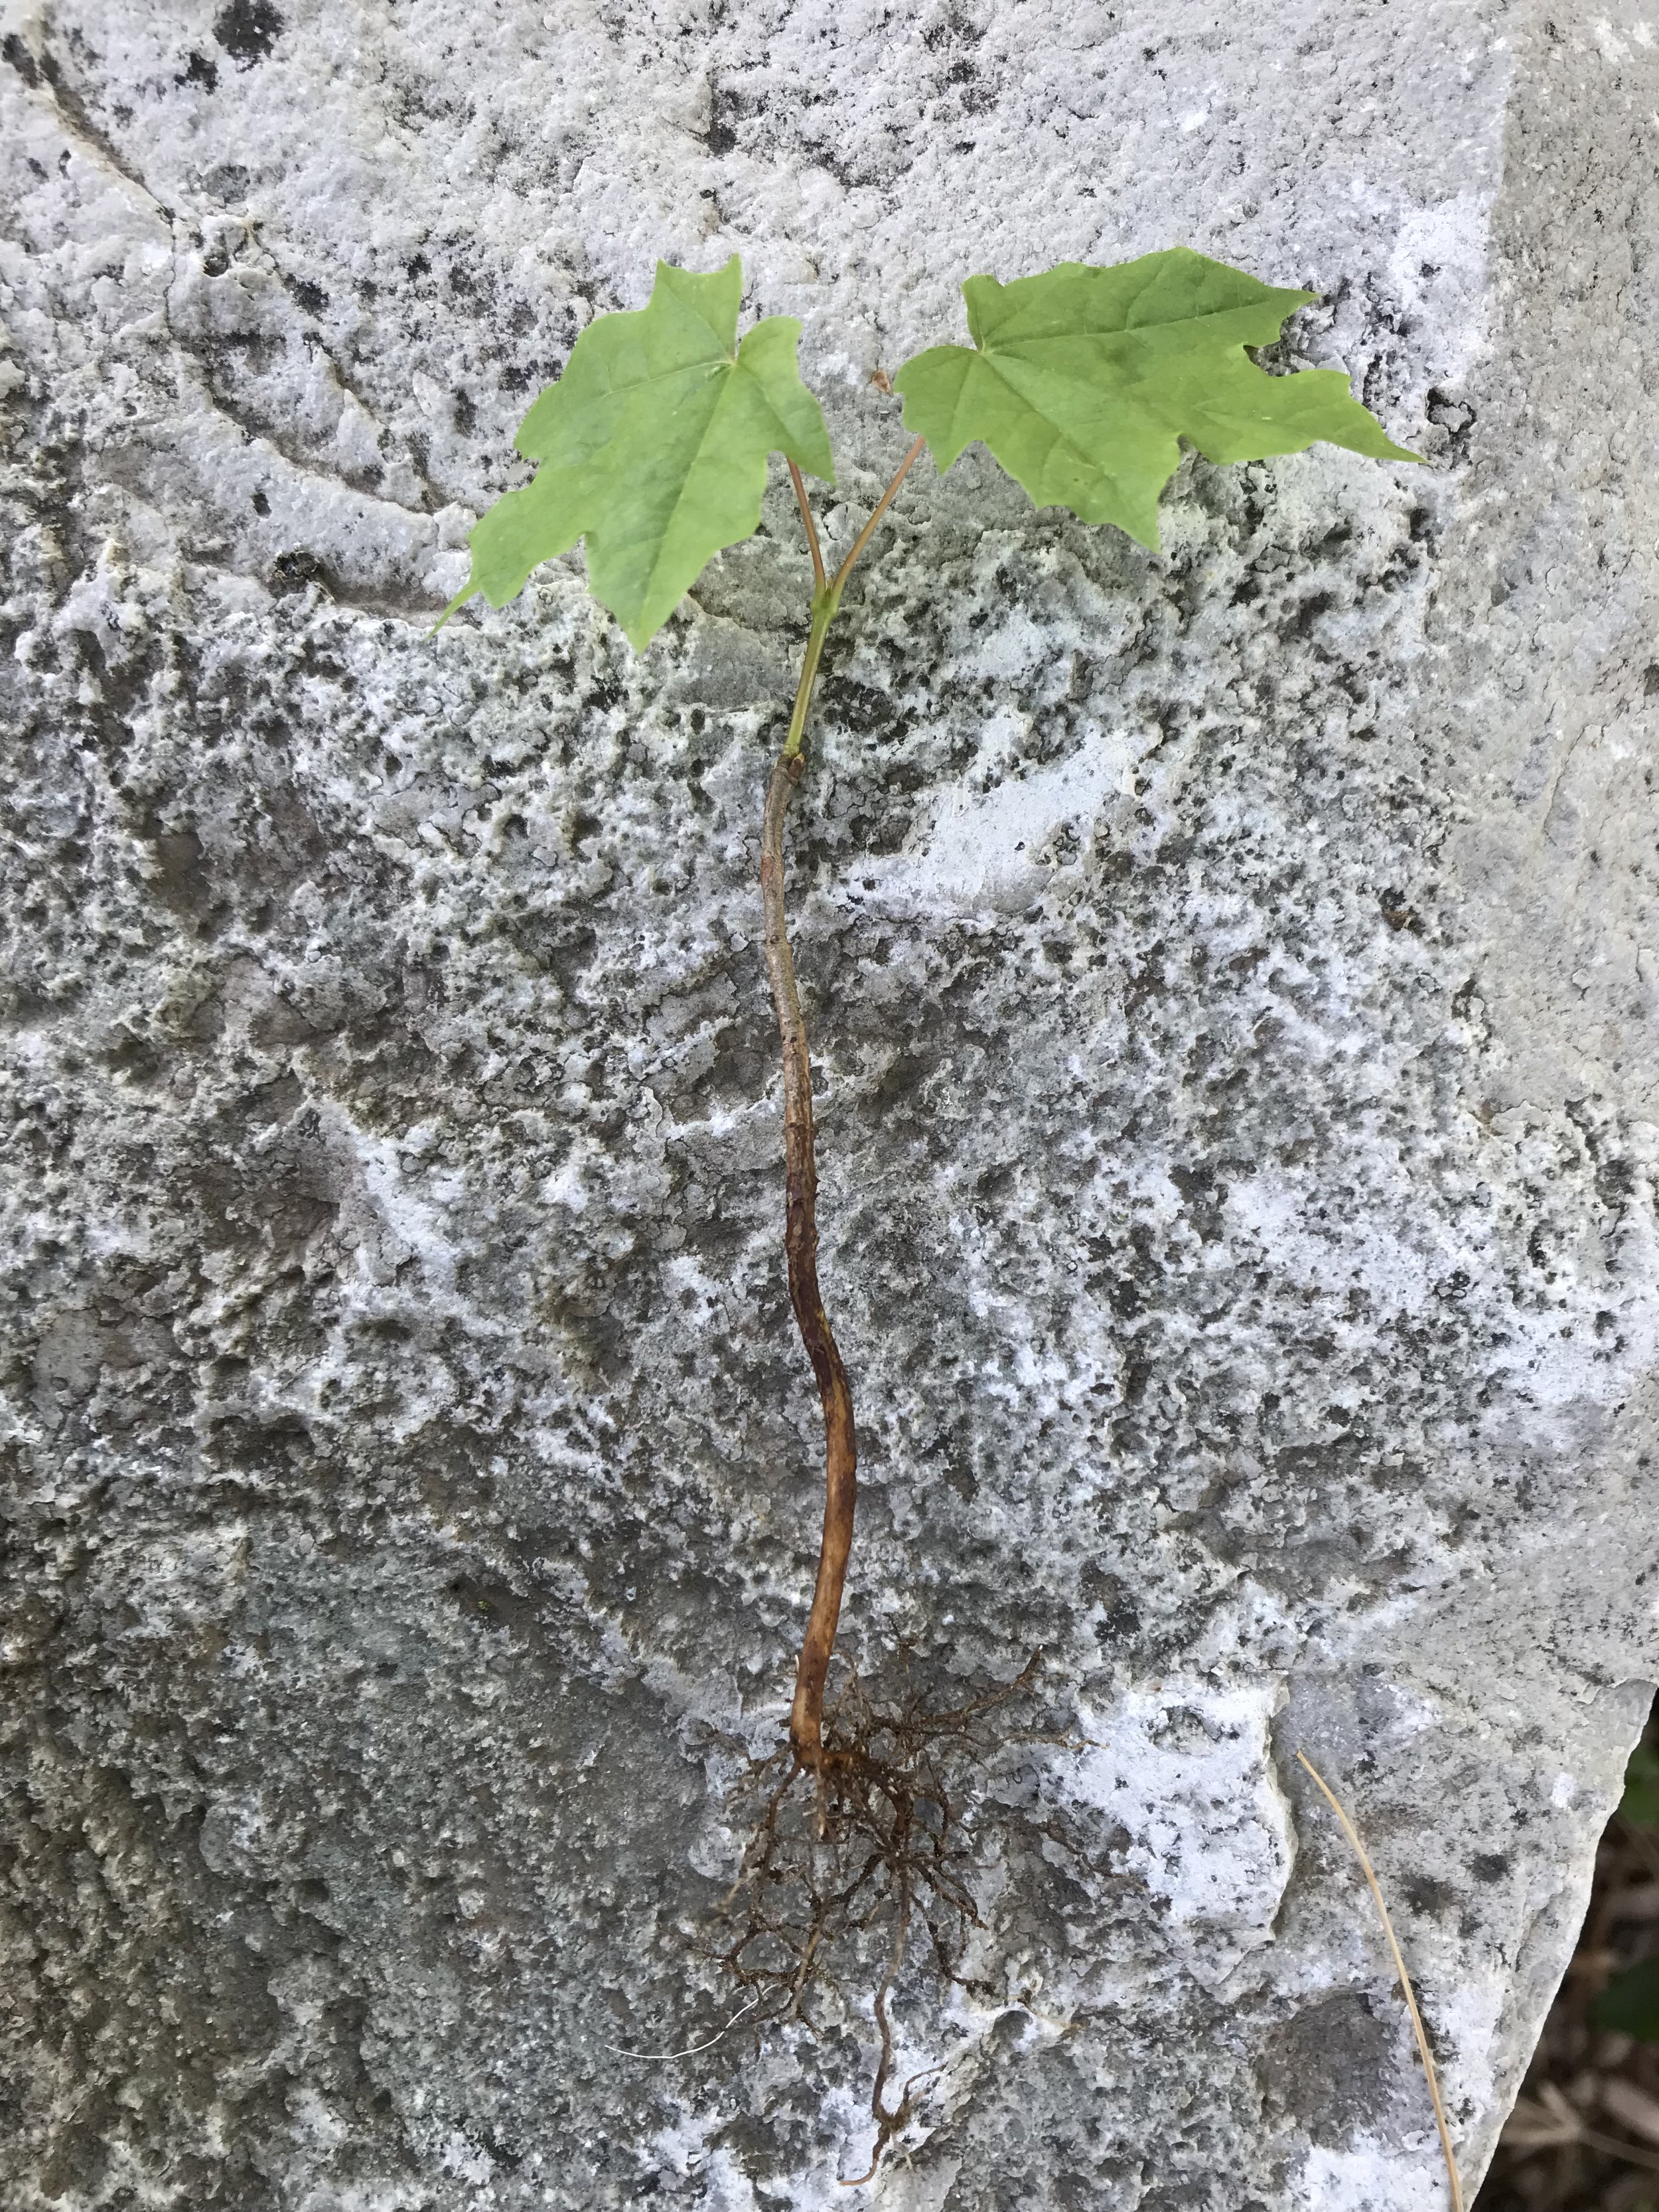
Hmmm… where to fit this combination into the garden???

This time of year makes me think back a couple years when I was helping my sister with her garden. She was a little overwhelmed with the amount of work to be done as she had recently purchased a house and, as a result, inherited a garden with every aggressive spreader known to man. Let’s put it this way- I didn’t envy her! She tackled one project after another to bring some definition back to her plantings and, being a non-gardener going into the season, she emerged a month later with me wanting to hire her.

After my sister established her ‘alpha-female’ dominance over Mother Nature (which is a total farce… but I wasn’t about to burst her bubble!) she was ready to mulch her beds. WAIT!!! There is one VERY important step that comes before mulching! It is one thing to gain a certain level of ‘control’ within the garden beds but it is another to gain control of the garden beds themselves. After putting in SO much effort within the gardens, it was time to set-off all her hard work by setting her gardens apart from the rest of her yard. It was time to create a clear definition between garden and turf through the use of edging. I pulled out ‘that half-moon tool’ and set to work.

Steps for Edging a Bed

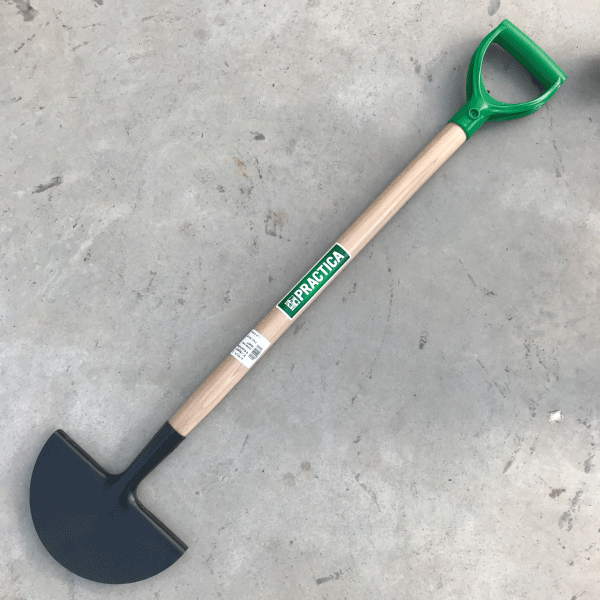
‘The half-moon tool’ otherwise known as an edger.

STEP 1: Facing your garden, place the curved edge of the edger down where you would like your garden bed to start, step on it to vertically slice into the turf, pull the handle toward your body to slightly lift and loosen the turf. Do not pull the edger out of the ground!

STEP 2: Bring the handle back to vertical and move the edger sideways a few inches; step down on it to slice the turf again; once again pull the handle toward your body. Repeat this for the length of your garden bed. By keeping the edger in the ground and inching along, you will get a much smoother/continuous line than if you were to remove the edger between cuts. (There are also electric edgers that you can use that can help make gorgeous lines.)

STEP 3: Pull up the grass that you cut and loosened with the edger, shake out the dirt from the roots and dispose of the grass.

STEP 4: Edge again- this time using the edger to flick the excess dirt into the bed.

STEP 5: Break apart any clumps of dirt and remove any grass that was tossed into the bed. Finish the task by smoothing out the surface of the bed. I do this by hand.

The end result should be a close to vertical edge where the grass meets the garden bed.

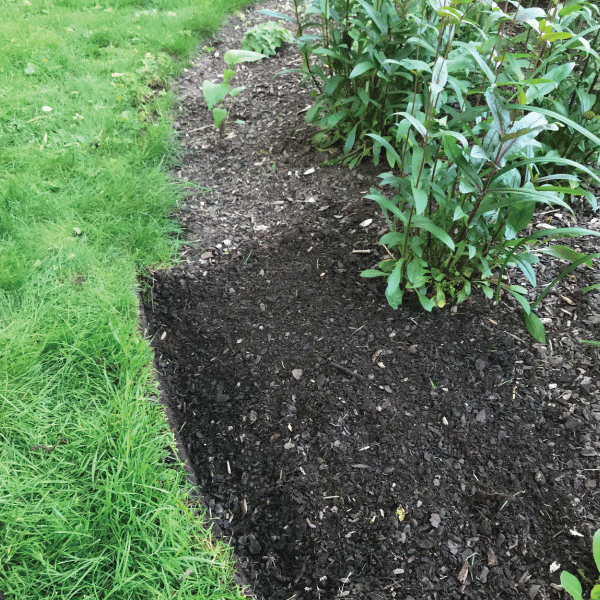
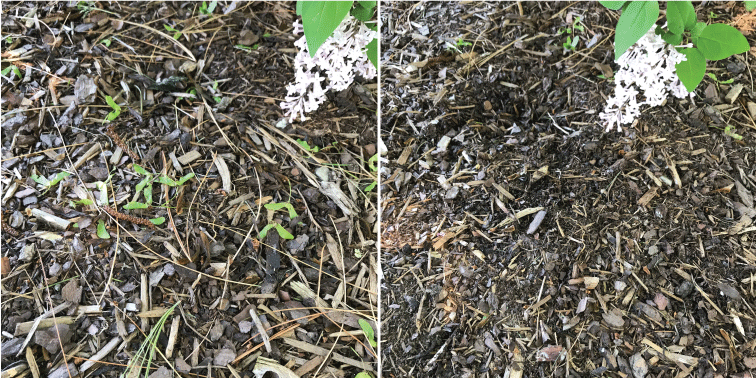
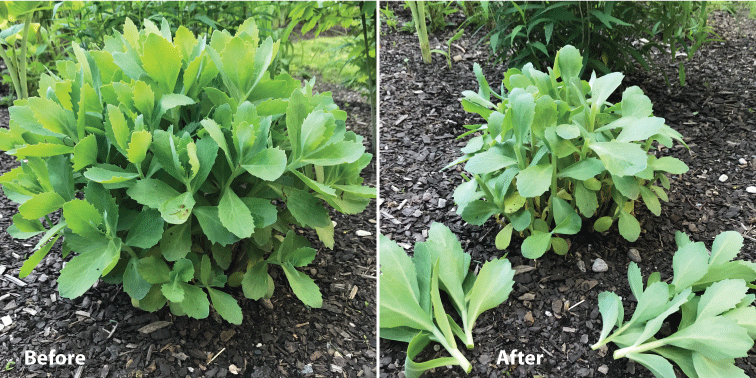
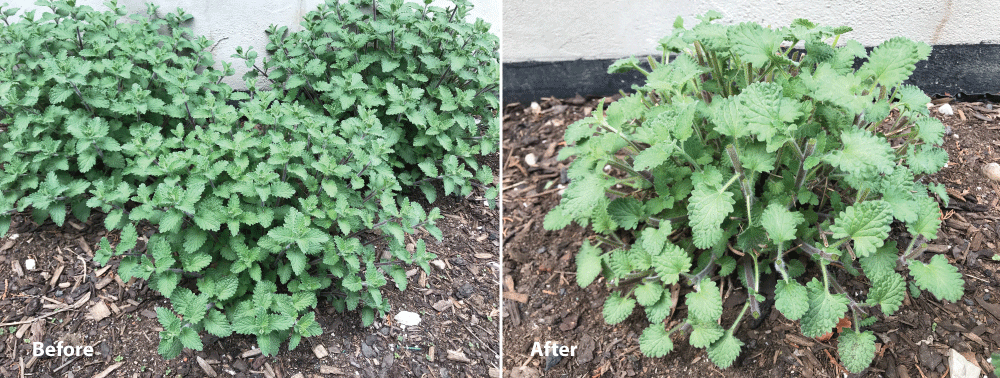
Before and after: adding an edge to a garden really helps give a garden definition. Even if the garden isn’t much to look at, the visual tidiness of a nice clean line makes a world of difference!

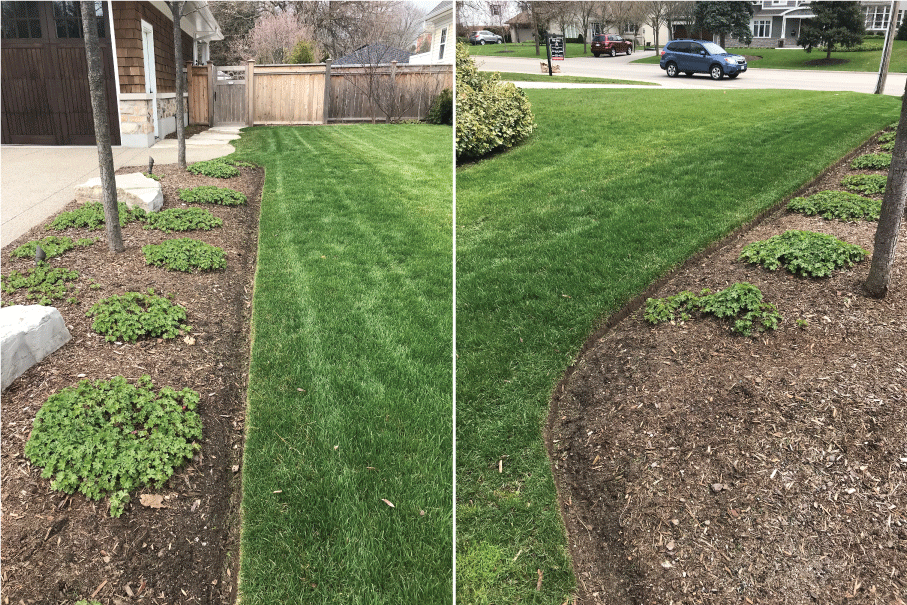
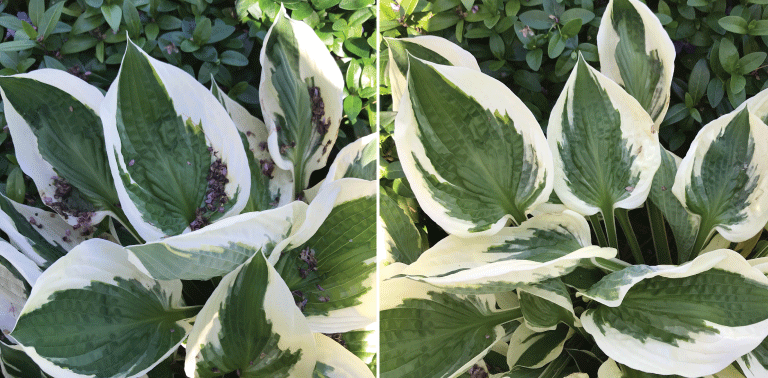
Some picture-perfect early season edging courtesy of Appleby Landscapes.

Looking back on that day, my sister reflects that the edger was her biggest ‘ah-ha’ moment. It was a very easy-to-use technique that could really set off her hard work and make her garden ‘pop’ from the rest of the yard. A nice clean line was the perfect finishing touch (aside from mulching… that, I will leave for my next post).

***SIDE NOTE: I have had this post written for a couple weeks now and cannot seem to get a half-decent video of the edging technique. I figured I would post it and, in the meantime work on my technological ineptness when it comes to video recording and editing. I will add to this post as soon as I create something worth viewing! My apologies to all you visual learners out there. I feel your pain. I am of your tribe. (2026 Update: Still no video. I think I’ll stick to writing.)

The Sky is Falling!

(Originally posted: June 9, 2019)

Actually, it’s not… but everything else is. Petals, samaras (such as the ‘helicopters’ that spin down from maple trees; a.k.a ‘maple keys’), spent catkins (flower clusters), fluff, even last years leaves from trees reluctant to release them last fall (young beech trees, hornbeam, English oak to name a few)… everything seems to be raining down on the garden right now and it feels like all that work put into Spring clean-up was for nothing. For someone particular like me, it’s enough to drive you nuts (which, incidentally will be raining down in the months ahead… thanks to all those butternuts, black walnuts, beech, oaks and hickories)!

Spent Betula sp. (birch) catkins and maple samaras

Catkins from a hybrid butternut tree (Juglans sp.). We somewhat-affectionately call this ‘the invasion of the worms’.

So what does this mean? It means another round of cleanup is in order. Afterall, removing all the fallen ‘debris’ will do wonders to clean up the look of your gardens.

It doesn’t take much to clean up the ‘look’ of a garden bed. Just a light rake-through of the surface with the fingers to remove the main culprits!

And it is not just the ground that may need a tidy, large-leaved perennials such as Hosta are notorious for capturing debris in their foliage. It not only looks unsightly but the debris holds onto moisture. This is not ideal since prolonged periods of leaf wetness can promote foliar diseases on plants. Additionally, critters such as slugs LOVE eating Hosta leaves (this is bad); they also like moist environments. Don’t lay out the ‘welcome mat’ for these pests by making the environment especially favourable to them!

Spent Cercis canadensis (redbud) flowers captured by Hosta leaves; the same plant with the soggy petals removed.

As for seeds raining down- it may seem like a hastle to remove them from the beds (I usually rake through the surface of the beds with my hands to collect them) but your efforts will be well worth it in the long run as it will save you from having to pull lots and lots of seedlings down the road.

Acer sp. (maple) seedling.

If you have a compost pile, you can put the petals and leaves you collect into it. As for the seeds? You can compost those too- you may have some seedlings cropping up but at least they will be contained; or you can put seeds in the brown yard waste bags and out to the curb for municipal compost (if available in your area) so that you are not pulling trees from the compost heap (or from the garden if you spread the compost prematurely).

Alternative ‘Garden Hack’

By now you are probably wondering if there is a shortcut to this second round of garden clean-up. Well, if you haven’t mulched your garden beds yet and intend to then you are in luck! You can always cover up any ‘non-seed debris’ (such as petals and catkins) with mulch. Just remove any debris that has collected on or within the base of your plants. This will not only look better visually, but it will be better for the health of your plants. If you are dealing with seeds that have rained down on your beds (such as ‘maple keys’), I do not recommend mulching overtop as you will most certainly be pulling out a large number of seedlings from your gardens in the future! (Sorry!)

A Little off the Top

(Originally posted: June 6 2019)

Growing season is well underway and it is time for some plants to get a little haircut!

Think back to last season… seems like a long way away now, but if you flip through the files in your memory banks, perhaps you remember some floppy perennials in your garden? Ones that grew nicely at the start of the season and then upon flowering, or after a driving rain the plants decided to split open in the middle and lie down on the ground in all directions?

Perhaps this is ringing a bell and you are now thinking “ah, yes… those plants drove me CRAZY!”

Aside from staking up floppy plants (something that we will do later in the summer), there IS a solution for some plants to prevent ‘the flop’. It is a little technique called ‘cutting back’ (or ‘pinching’ if only the tips of the plant are removed).

The Technique

Essentially, ‘cutting back’ is exactly that- cutting back the stems of a perennial. Not all perennials can tolerate a prune like this but there are some common ‘floppy’ perennials that can, such as Sedum

A clump of Sedum before and after being cut back (along with the clippings to illustrate how much of a ‘haircut’ the plant got!)

I also used this technique on some catmint (Nepeta racemosa ‘Walker’s Low’)…

Nepeta x faassenii (catmint) before and after being cut back.

So how does ‘cutting back’ combat ‘the flop’?

By cutting down the stems of a perennial, the plant is forced to direct it’s growth elsewhere- which would be the next remaining buds on the stem (shown in the photo of the catmint below). When these buds begin to grow, the plant ‘branches out’ from these new growing points, ultimately leading to a fuller/bushier plant. The denser plant allows for the stems to rely on each other for some support to stay upright. [Now sing with me… “Lean on me… when you’re not strong…”}

A catmint stem before and after being cut back. The red dots show the new growing points for that stem. The cutting back of the stem ultimately forces one stem to branch into two.

Cutting back a perennial also leads to a shorter overall stem height. By forcing the plant to branch, the plant’s energy must be used to grow a greater number of stems. I like to think of it as each stem vying for the same resources. With more stems trying to grow, there is less energy available for each stem- which ultimately leads to a shorter stem height (as well as smaller flowers).

It is the combination of a shorter height and fuller plant that translates to a sturdier perennial that can resist flopping over!

An Added Benefit

Cutting back perennials has another consequence and that is a delay in flowering. Cutting back can be considered a ‘set-back’ to the plant, so it should be no surprise that it will take time for the plant to rebound from the prune and begin growing again from new buds. It must do this before it can actually attempt to flower! The time it takes the plant to rebound from the prune is responsible for the delay in flowering.

On the surface, this delay of flowering could be seen as a negative consequence but it can actually be used to your advantage! First of all, in the case of both the Sedum and the Nepeta, I have not pruned all the plants in my garden. That way some of the clumps will flower at their usual time and the pruned ones will flower later. (For example, two weeks after the initial prune of the catmint, the unpruned clump is ready to flower, the pruned clumps are still rebounding from being cut back.) The result? A longer overall flowering period for these perennials! This doesn’t just translate to a longer floral display for my appreciation. These plants happen to be located in a pollinator-friendly garden which means the longer bloom time presents a longer period of time when the ‘floral buffet’ is open for these important creatures. Dig in!

Catmint in a pollinator garden. The unpruned clump is on the verge of flowering, the other two clumps have branched out and begun growing from their new growing points (shown by the arrows). These two pruned plants will be delayed in their flowering. This forced staggering of flowering periods can help prolong bloom times for pollinators.

So far, I have only cut back Sedum spp. and Nepeta this year. Some of the more common perennials ‘on deck’ for a haircut include:

  • Balloonflower (Platycodon spp.)

  • Aster

  • Chrysathemum

  • Beebalm (Monarda spp.)

  • Russian Sage (Pervoskia atriplicifolia)

Some other perennials that can be cut back to prevent ‘the flop’ (clockwise from top left): Platycodon spp. (balloon flower), Chrysanthemum spp. Aster spp., Veronica spp. (speedwell) and Echinacea spp. (coneflower)

For more information on this topic, check out the amazing book by Tracy DiSabato-Aust called The Well-Tended Perennial Garden. (2006, Timber Press Inc.). In this book you will find a LOT more detail with respect to pruning perennials, as well useful lists that outline what perennials can tolerate pruning and at what time. Some all around good bedtime reading :)

More posts on perennial pruning in the weeks ahead!