Leaf Blower Lament

(Originally posted: April 15, 2021)

Oh the sounds of spring are here! It is a wonderful time of year to be in the garden just listening to nature. For me, it is the songbirds that steal the auditory show- a new call seemingly added to the choral collection every day- some whose voices I can identify, but many more that I (sadly) cannot. The collection of songs is exuberance for life put to sound. Hearing them makes it seem as though the whole world is shouting out ‘Rejoice! Rejoice! It’s spring!’

The American Robin- A sure sign of spring both in sight and sound. Photo courtesy of wirestock on www.freepik.com. (What can I say, like bird call identification, bird photography is just not my strength!)

And then it inevitably happens- I am ripped from my blissful bubble of birdsong by a low chugging noise followed by some revving and repetitive crescendos of a screaming engine. Two, three, even four more often join in on the obnoxious party. Asynchronous and without rhythm they create a dreadful chorus that drowns out all other sounds and thoughts.

Oh leaf-blower. How I despise your sound and so many other things about you!

Am I being harsh? Maybe. After all, leaf-blowers have made fast, light work out of many once onerous gardening tasks. But, is it really worth it? There are some serious drawbacks to the indiscriminate use of leaf-blowers in a garden. Let’s have a look at a few of them:

Loss of Soil

How often have you seen a landscape crew rip through a yard during a spring or fall clean-up shrouded in a cloud of dust and mulch pieces? For me the answer is: ‘way too often’.

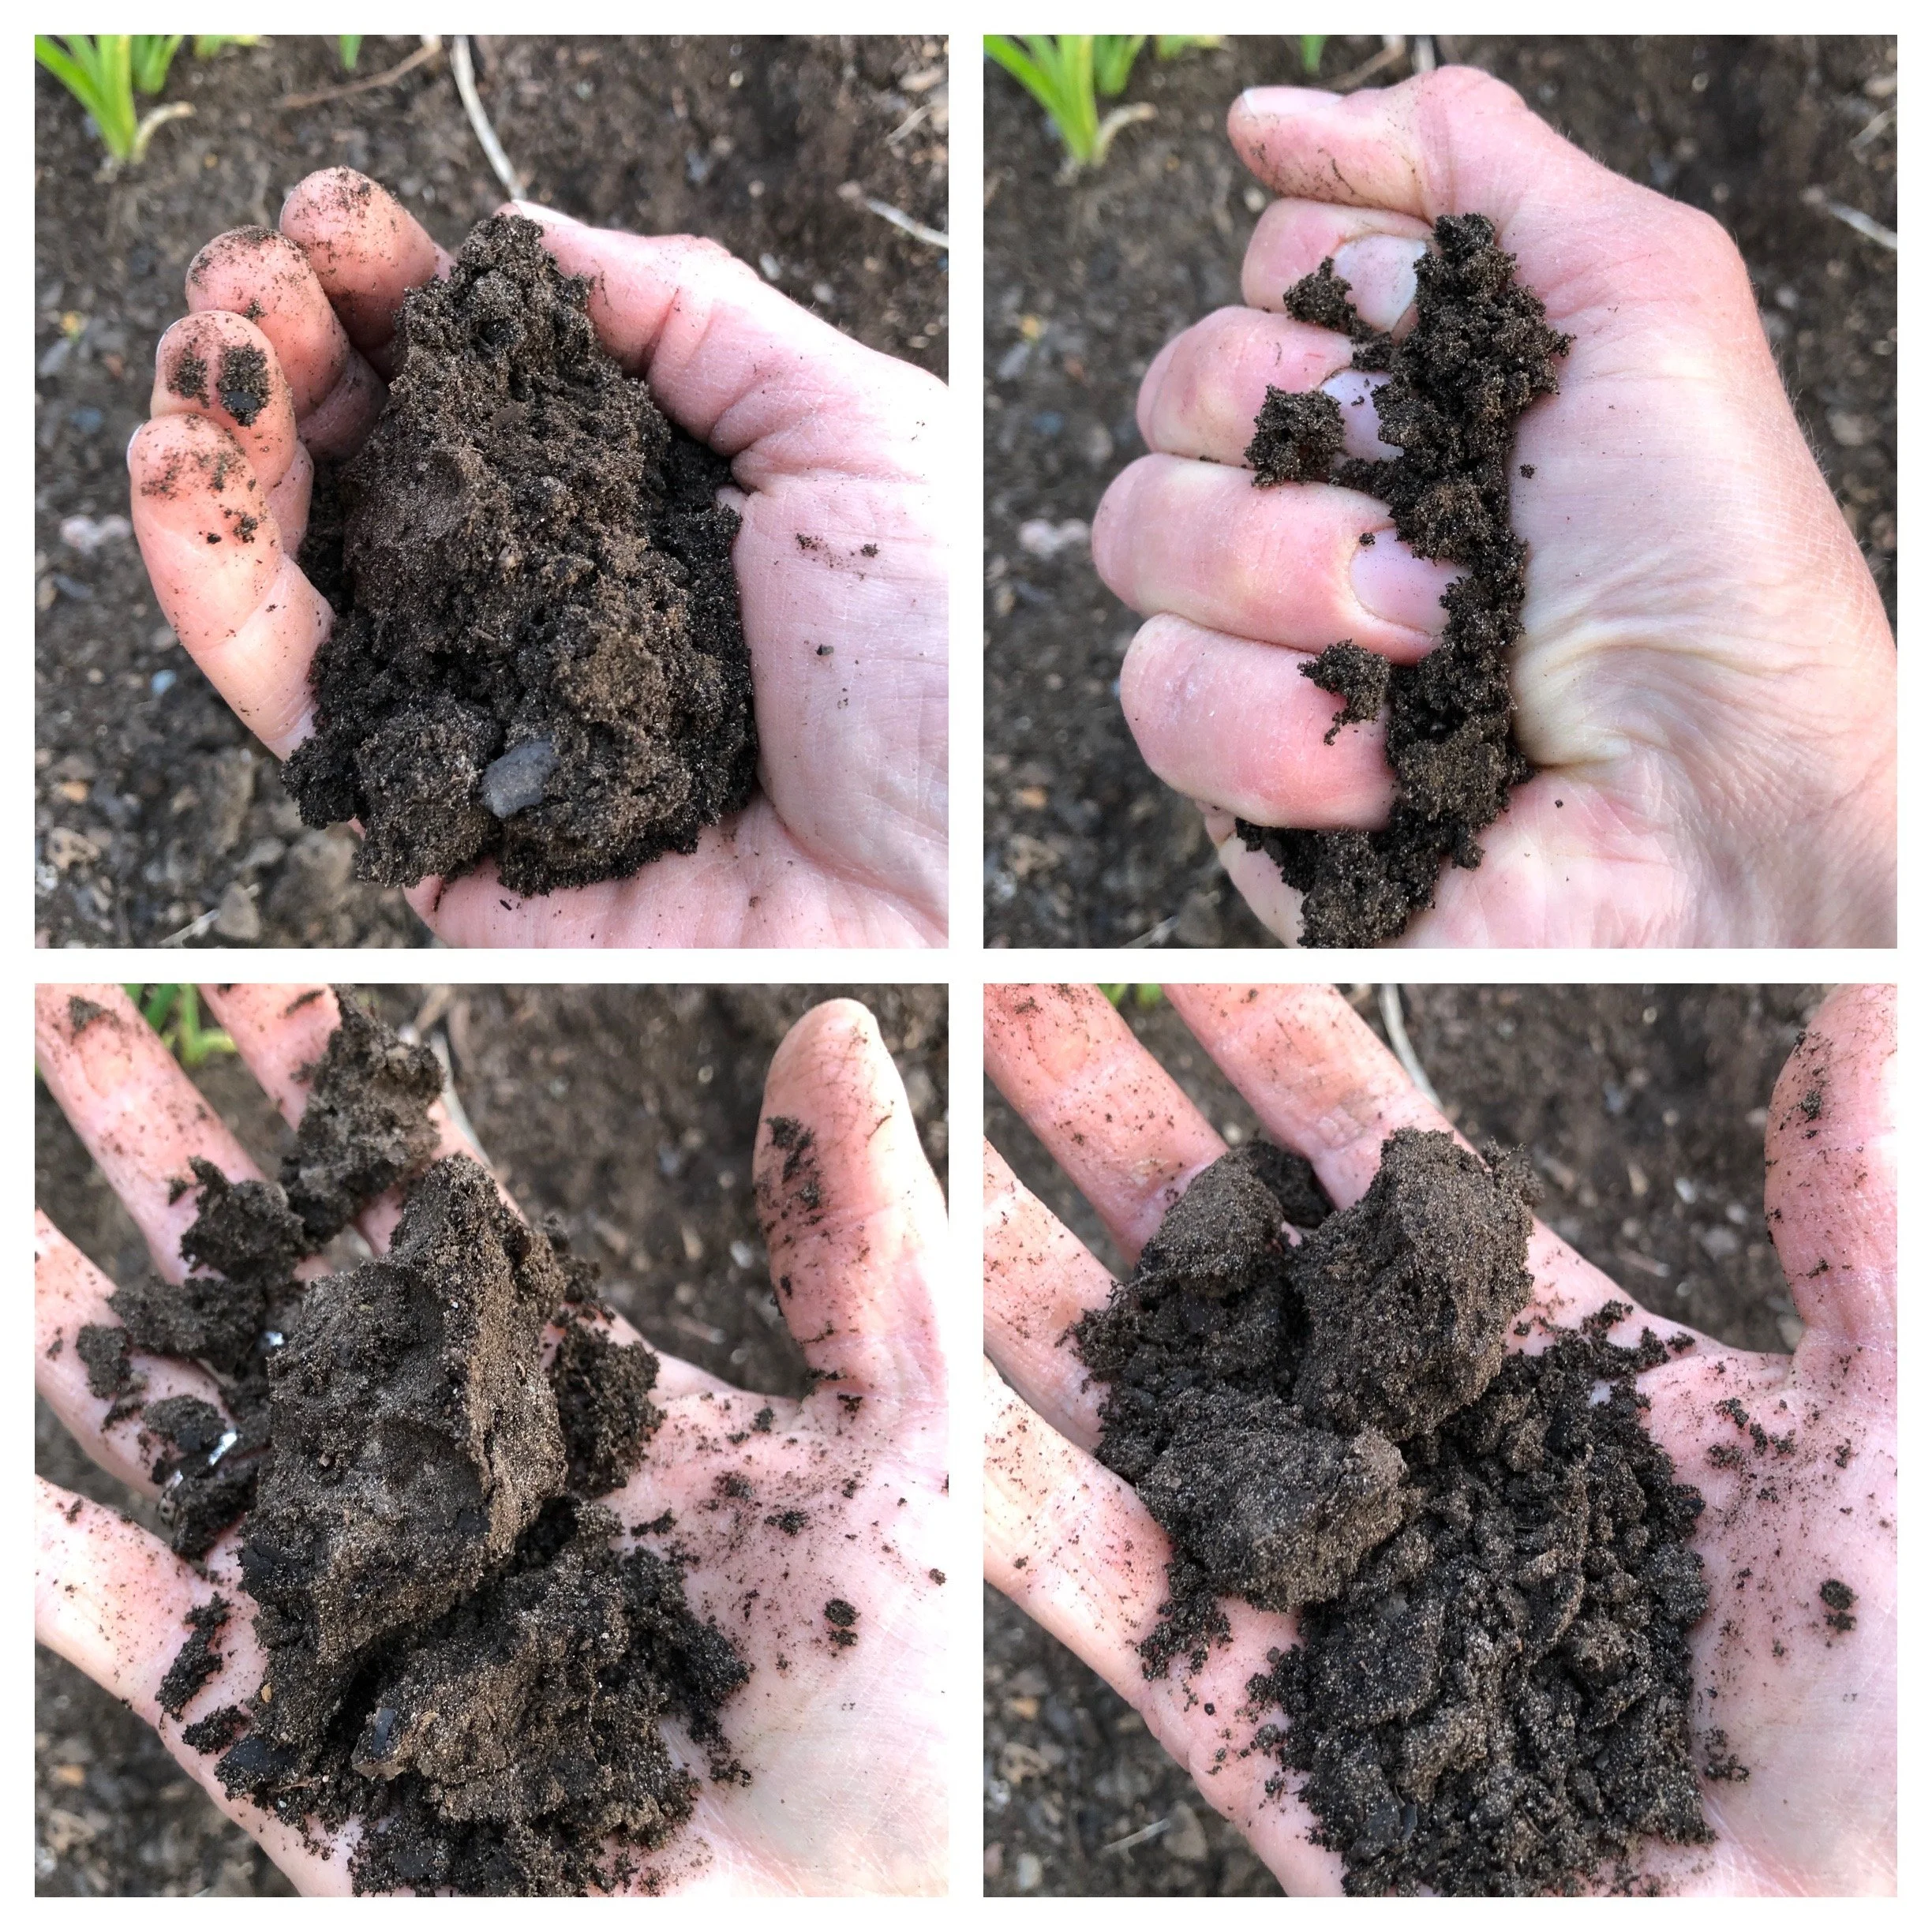
The top layer of garden soil is the garden’s most valuable layer. It is where the majority of plant roots reside, where the majority of soil organisms live, it is also the layer with the highest organic mater and nutrient content. Essentially it is the topsoil (including the organic layer that lies on top of it) that sustains life. As gardeners, we spend so much time building up this layer by adding compost, manure, shredded leaves, and/or mulch- why would we want to blow all that away?

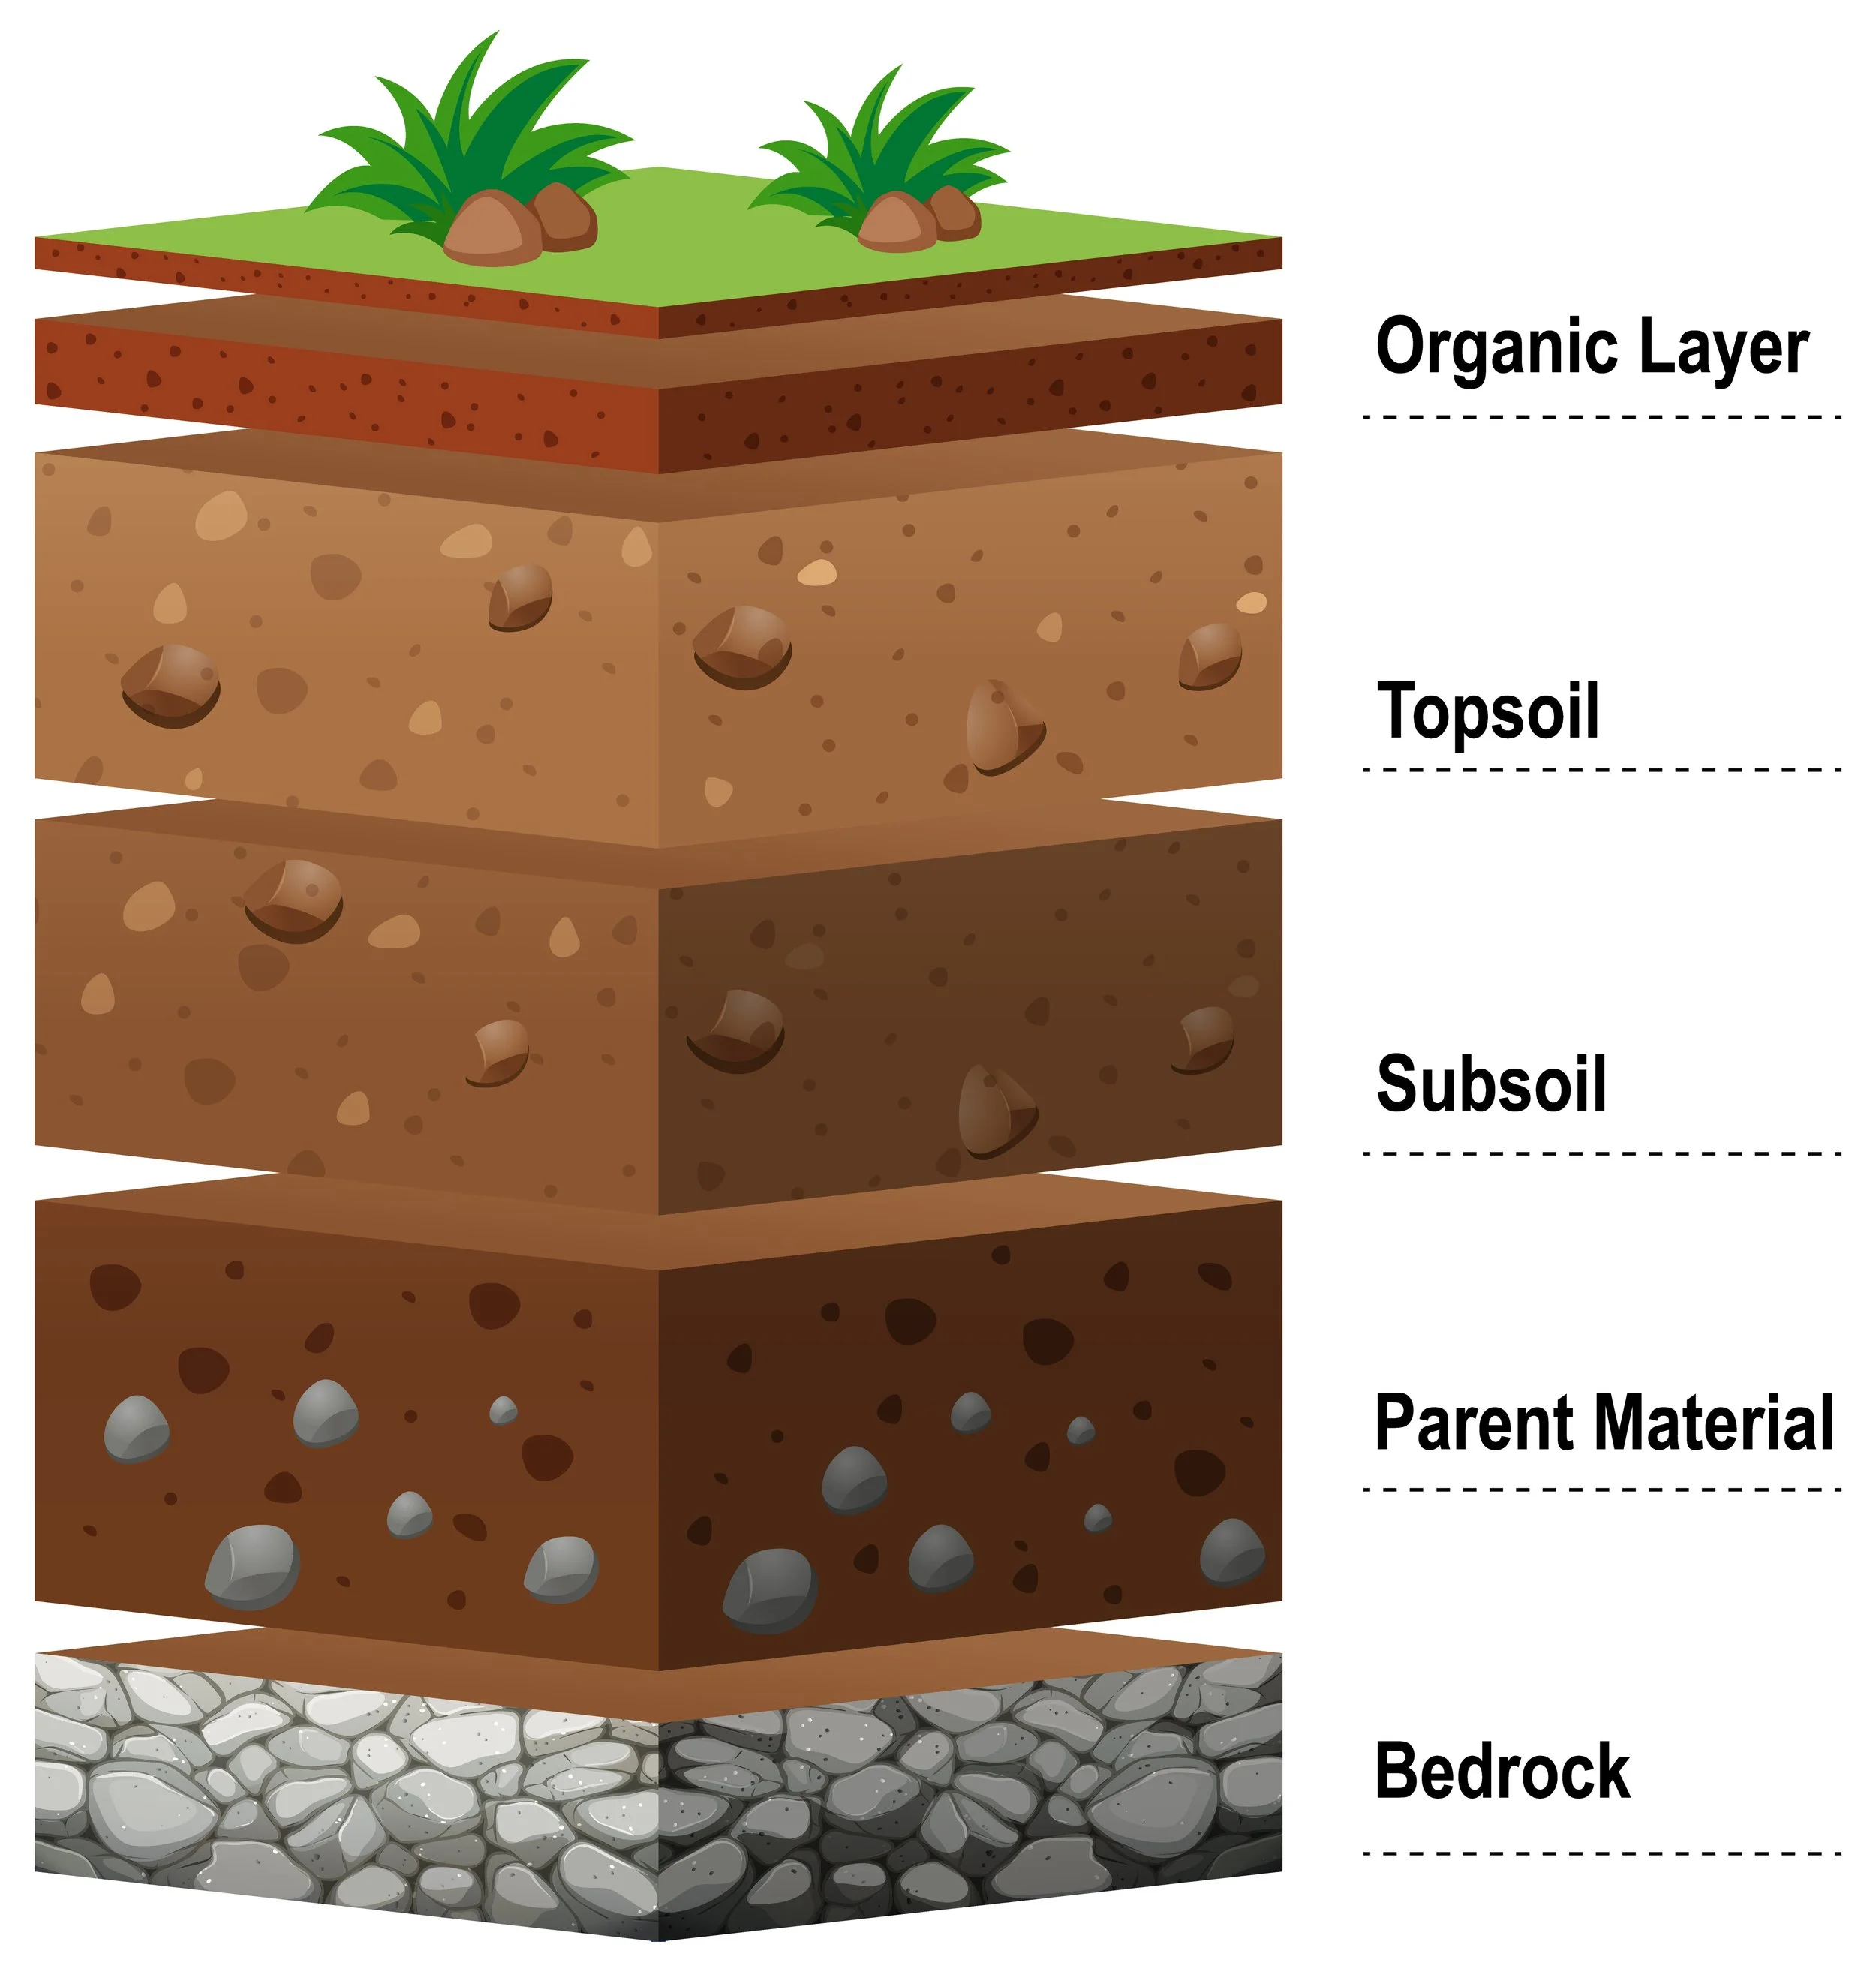
A little graphic that depicts a very generalized soil profile. In a garden setting, unless groundcovers have been planted, the organic and topsoil layers are exposed, making it really easy for leaf blowers to blow away these layers!
<a href='https://www.freepik.com/vectors/education'>Education vector created by brgfx - www.freepik.com</a>

Damage to Plants

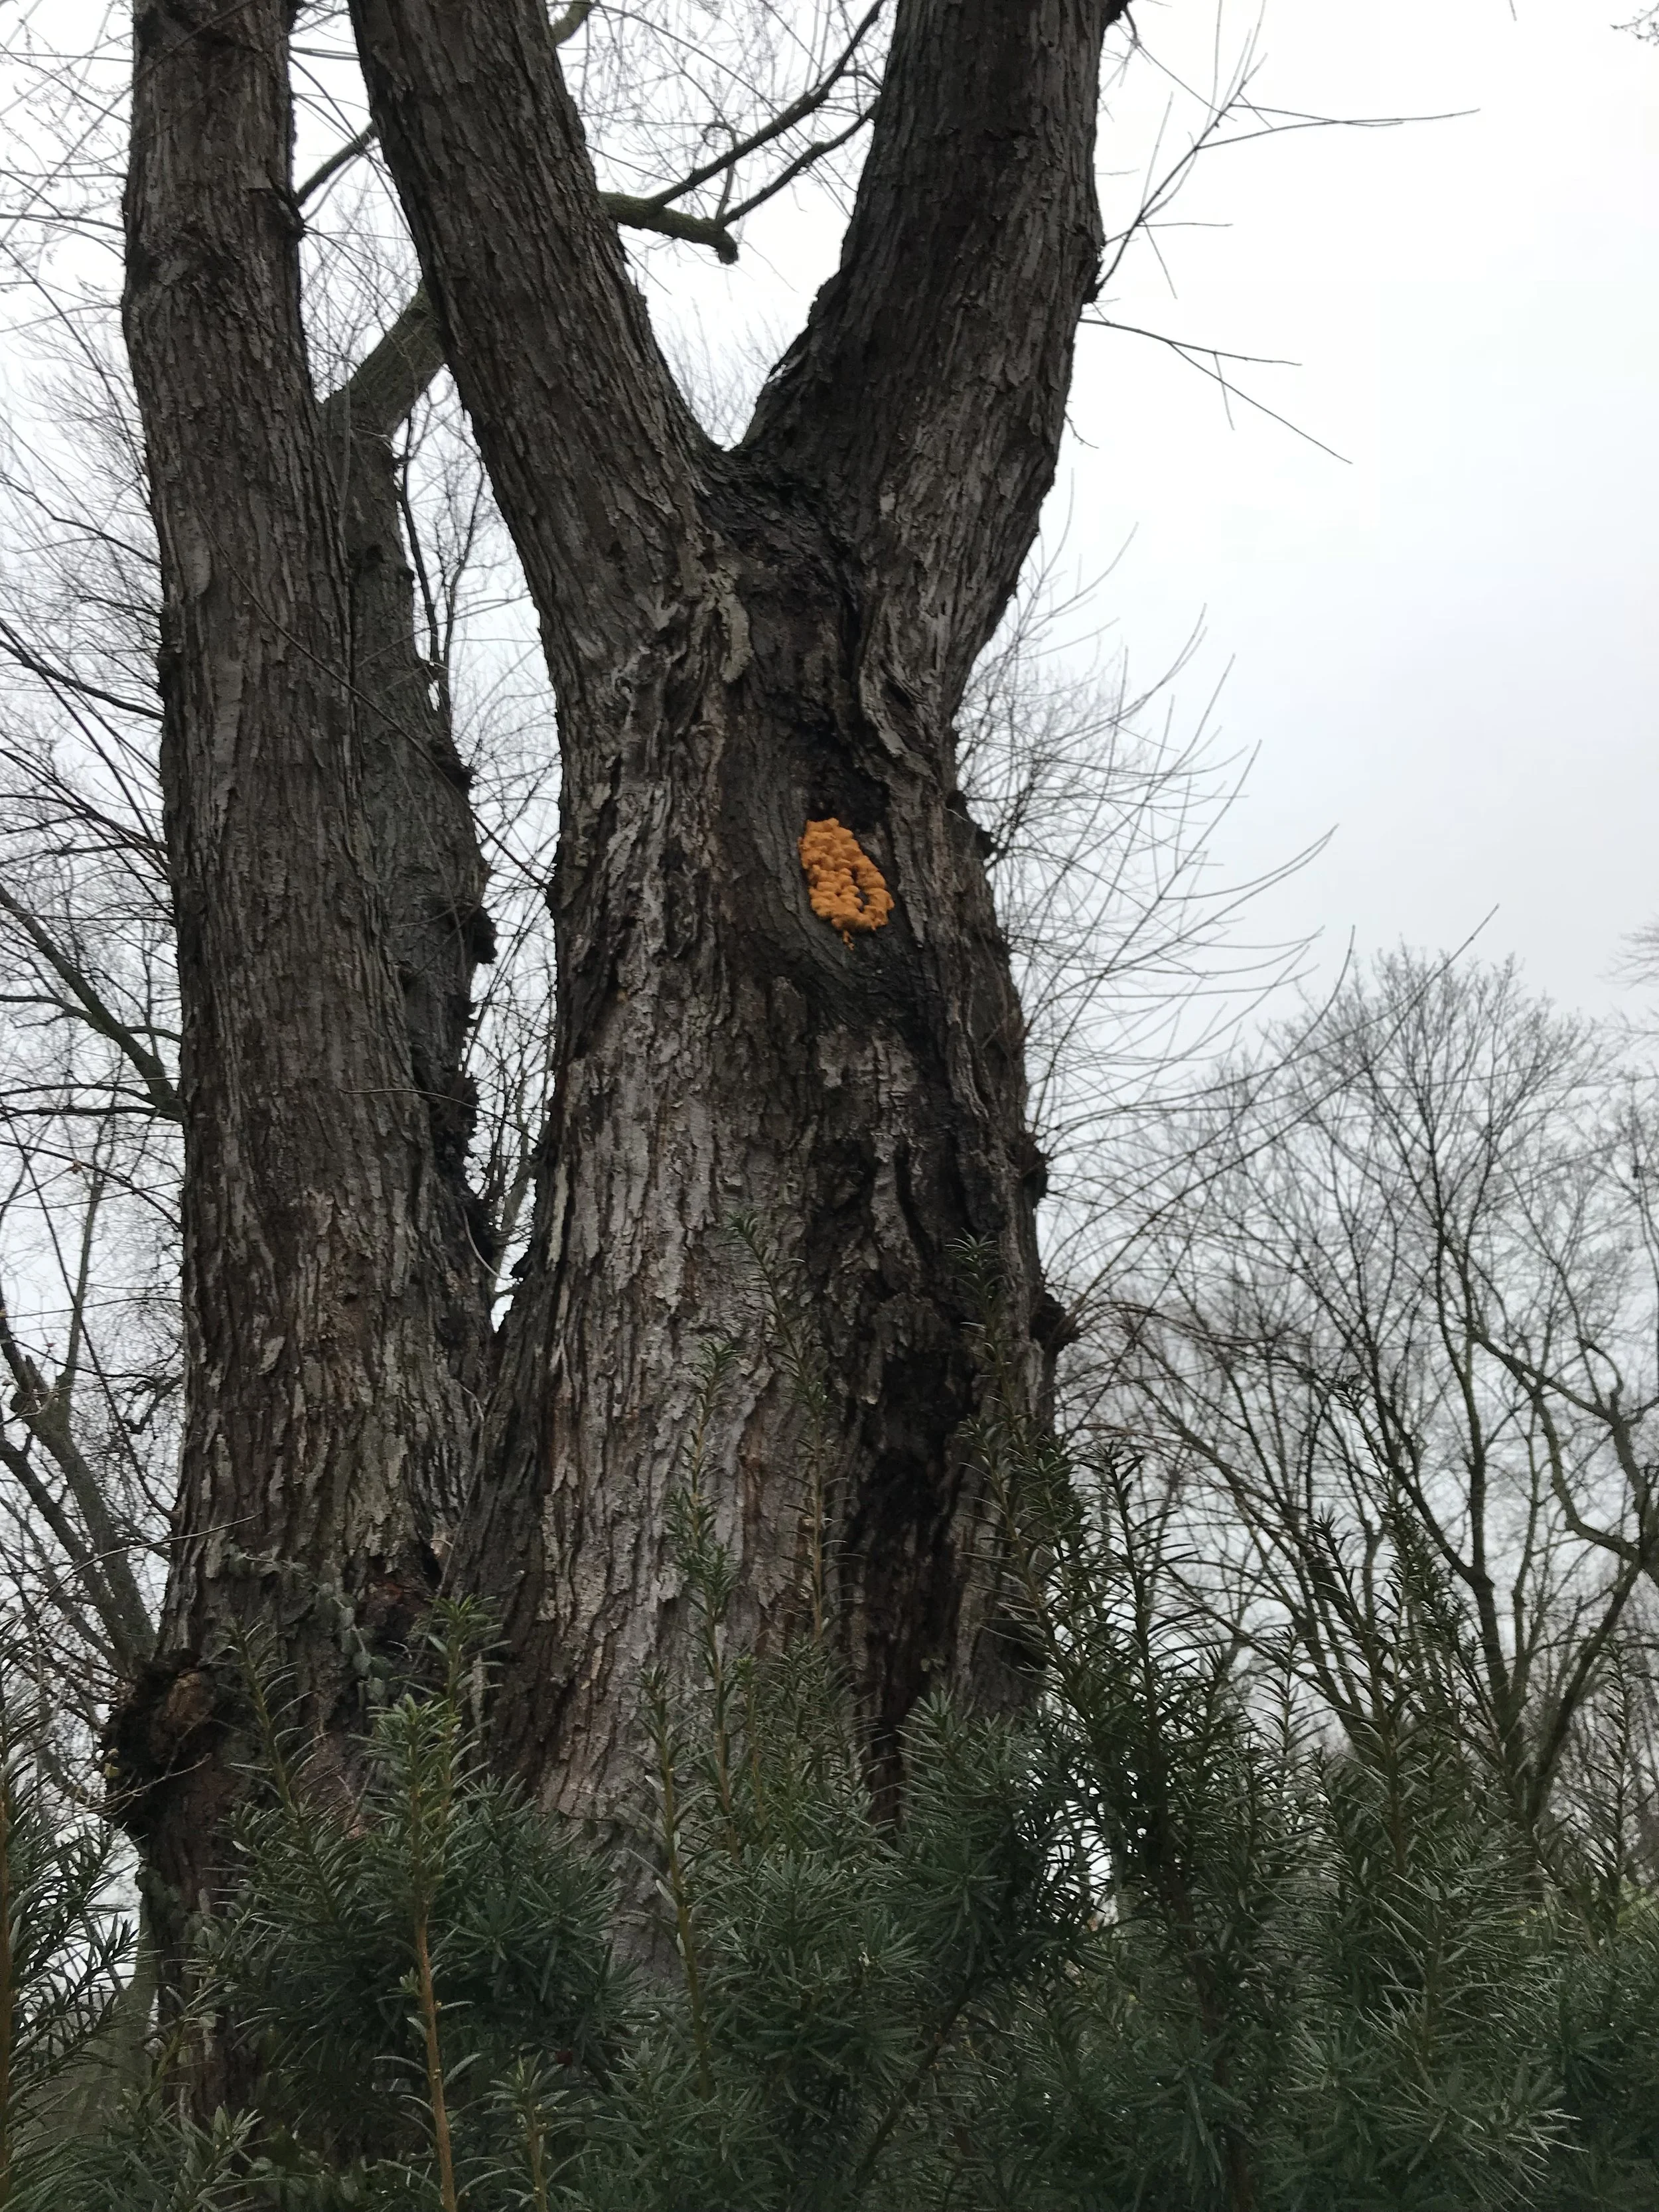
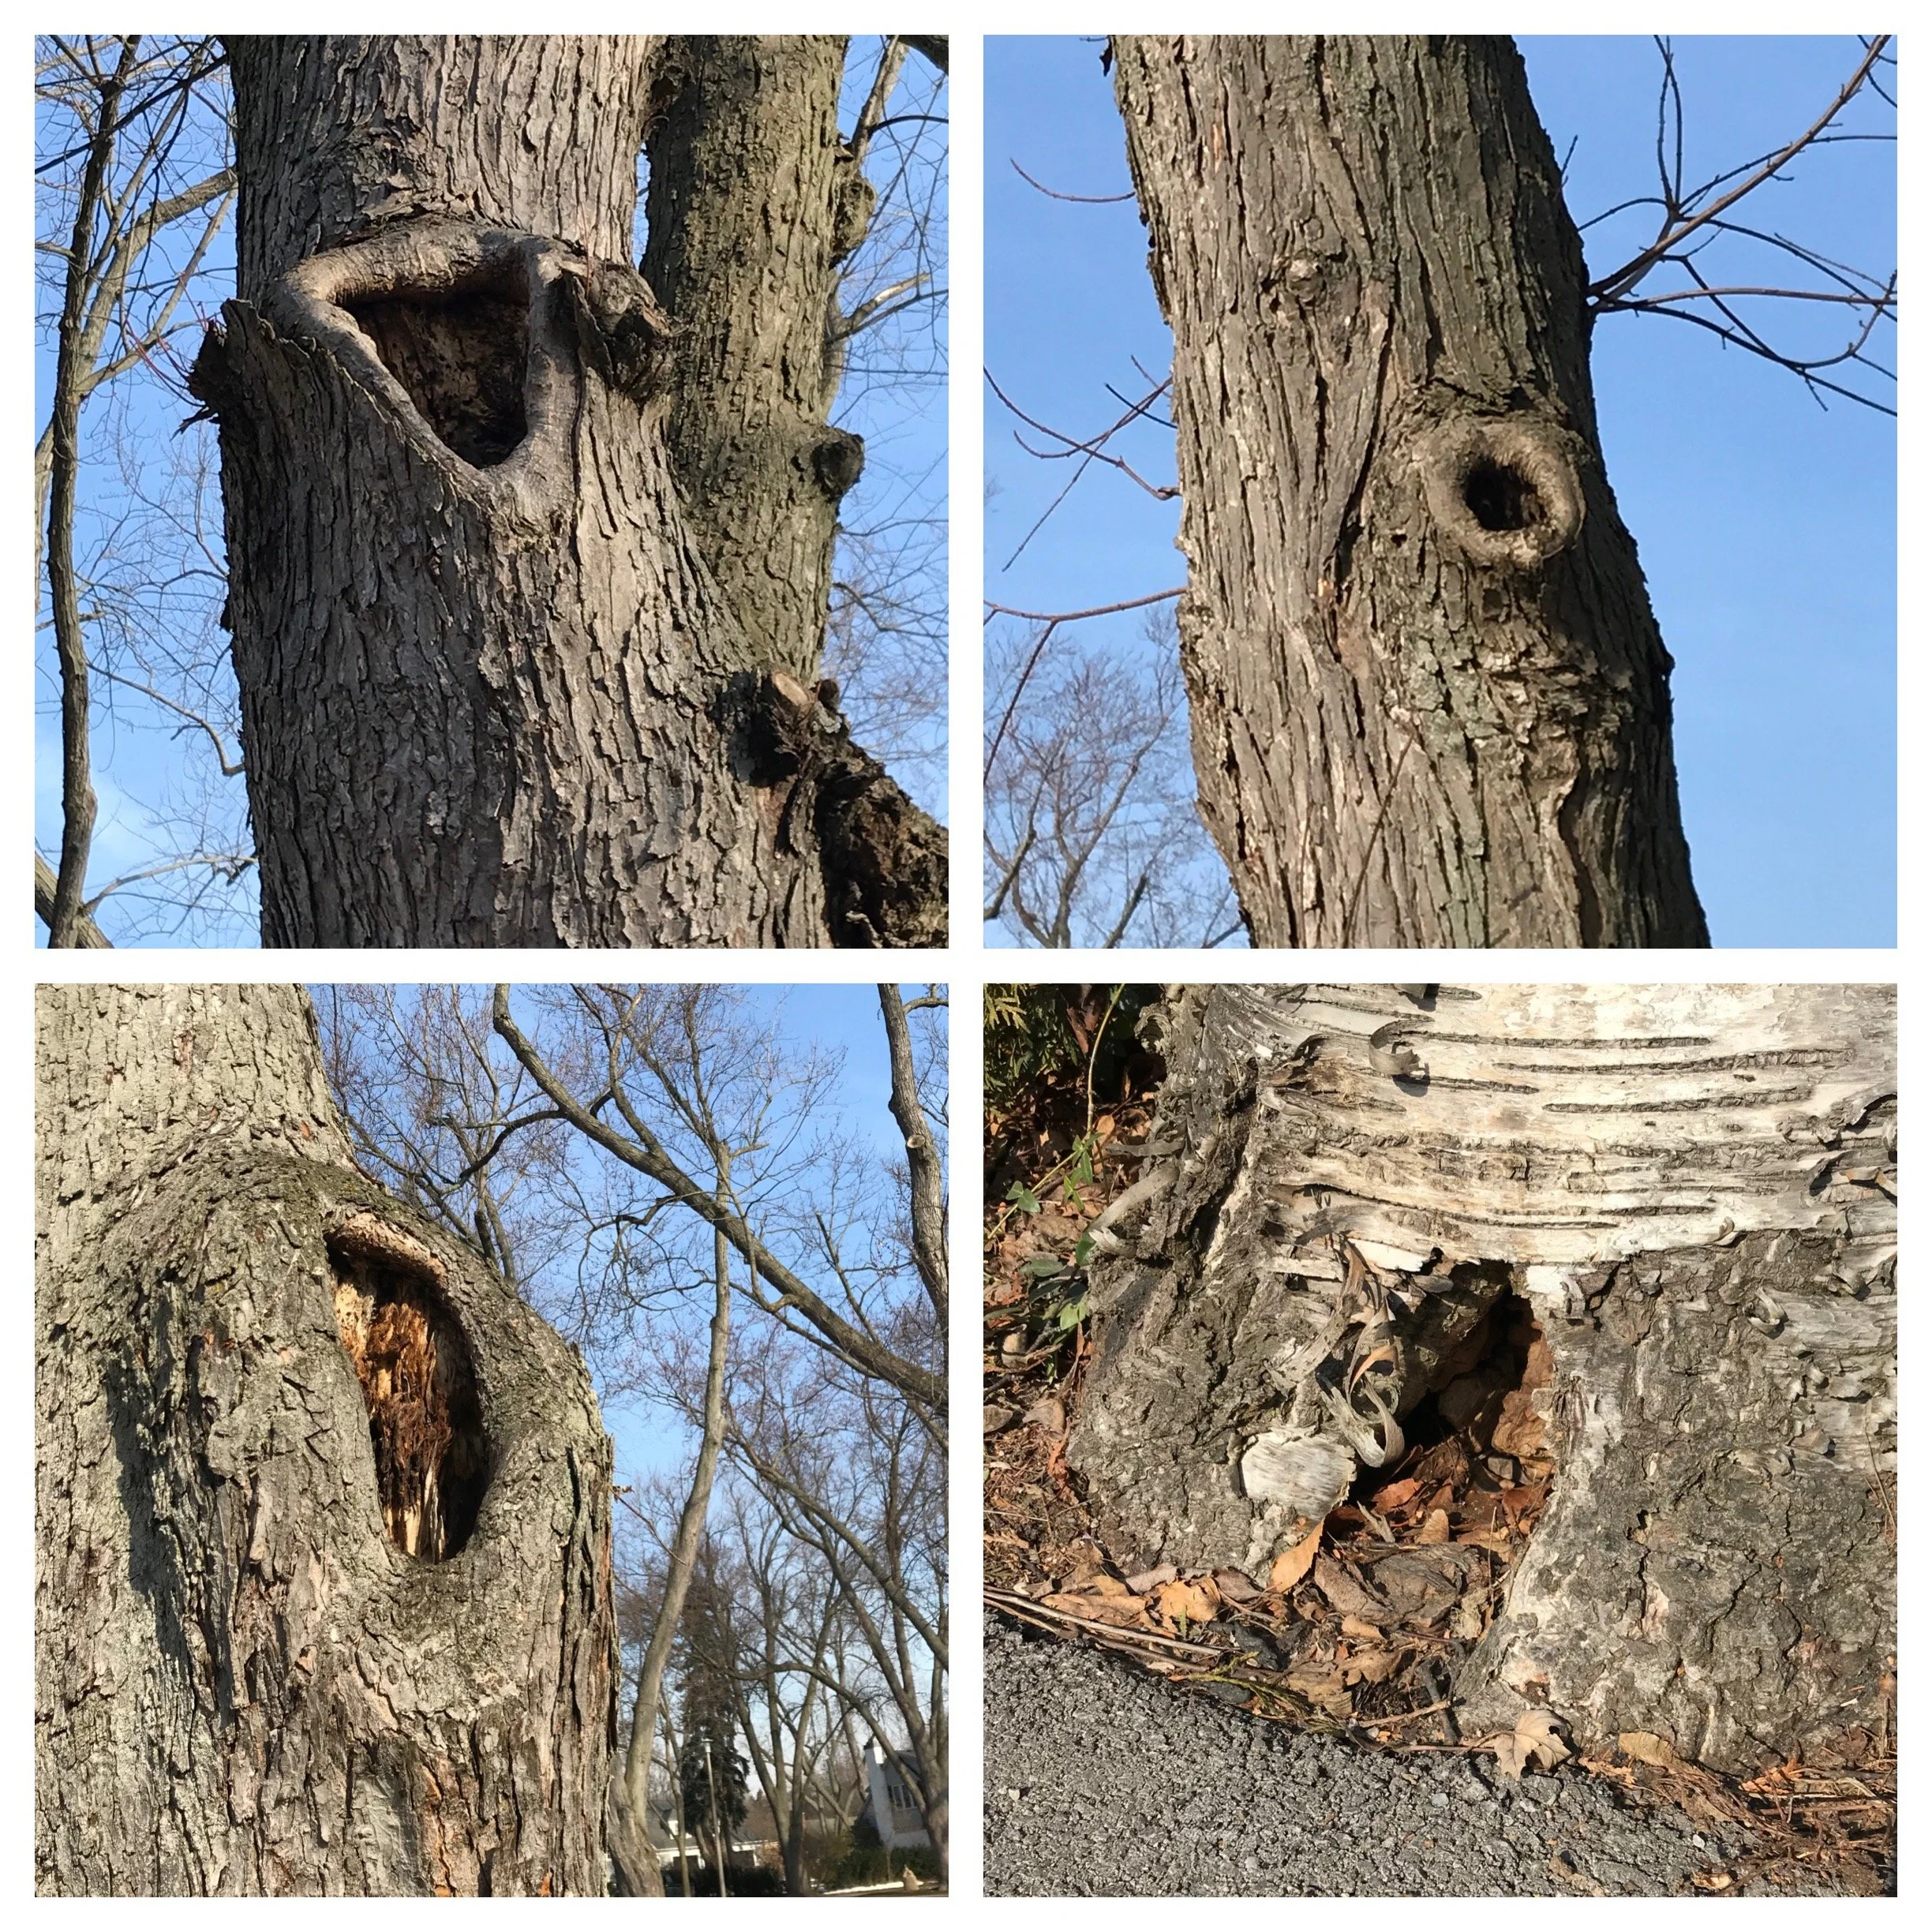
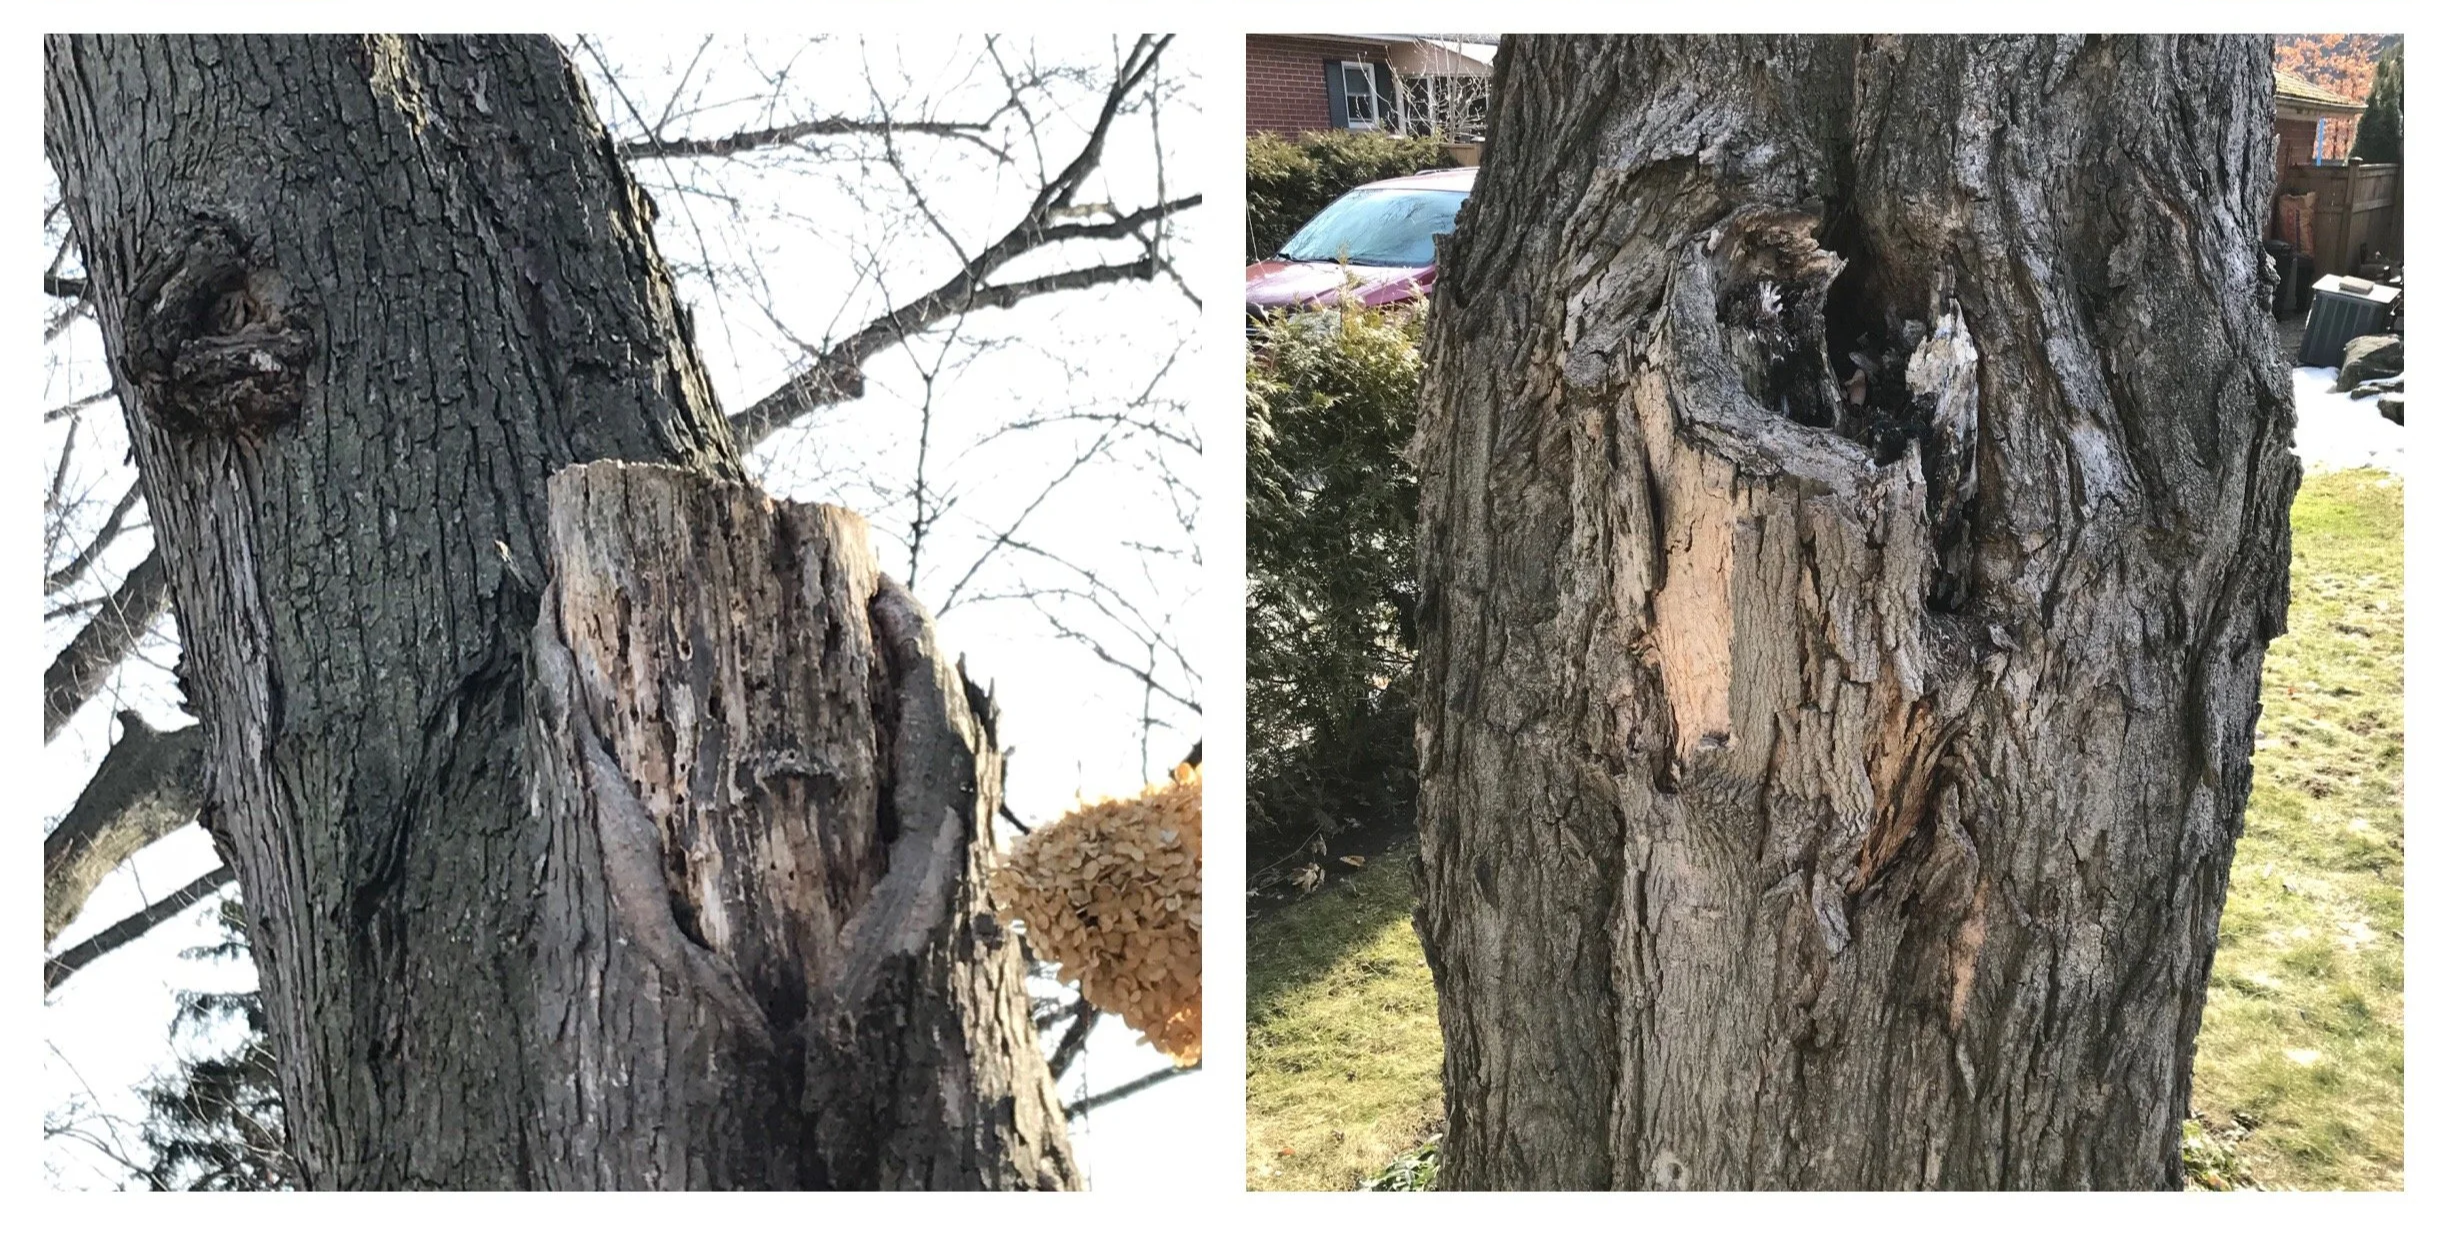
In addition to losing valuable organic matter and nutrients, blowing away the surface of our beds can also expose the roots of some of our more shallow-rooted plants (such as Rhododendron, Hydrangra and Buxus just to name a few). When roots are exposed to air, they ultimately die and this loss of roots can be a stressor on our plants. To take this one step further, plants that are under stress are more susceptible to attack by pests such as insects and disease-causing organisms.

Damage to the Pocketbook

Blowing away mulch and topsoil (as well as other products previously bought to incorporate into the soil) is essentially sending money into the wind. Nothing like spending money and getting nothing in return!

Fossil Fuel Use
Leaf-blowers are terrible for the gas they consume both from the standpoint of fossil fuel consumption, as well as the fumes that the operators must endure.

Noise!

Did I mention that I can’t stand the noise of these blowers?! I am sure I am not alone in this sentiment. Electric and battery powered blowers are far quieter to operate, which is nicer for neighbours, and kinder on the eardrums of the operators too!

FINDING THE BALANCE

Despite this rant, I will admit, I have a leaf blower (gasp!). Not a gas powered beast, just a battery powered piece of equipment. It is a valuable tool in my truck. It makes the cleanup of hardscape a breeze. It is much more effective to blow off (rather than sweep) the mess of potting soil that extends out 10 feet in all directions from any pot I plant-up (hey, what can I say, I’m a messy planter!). It is also way more efficient to blow off a driveway rather sweep it!

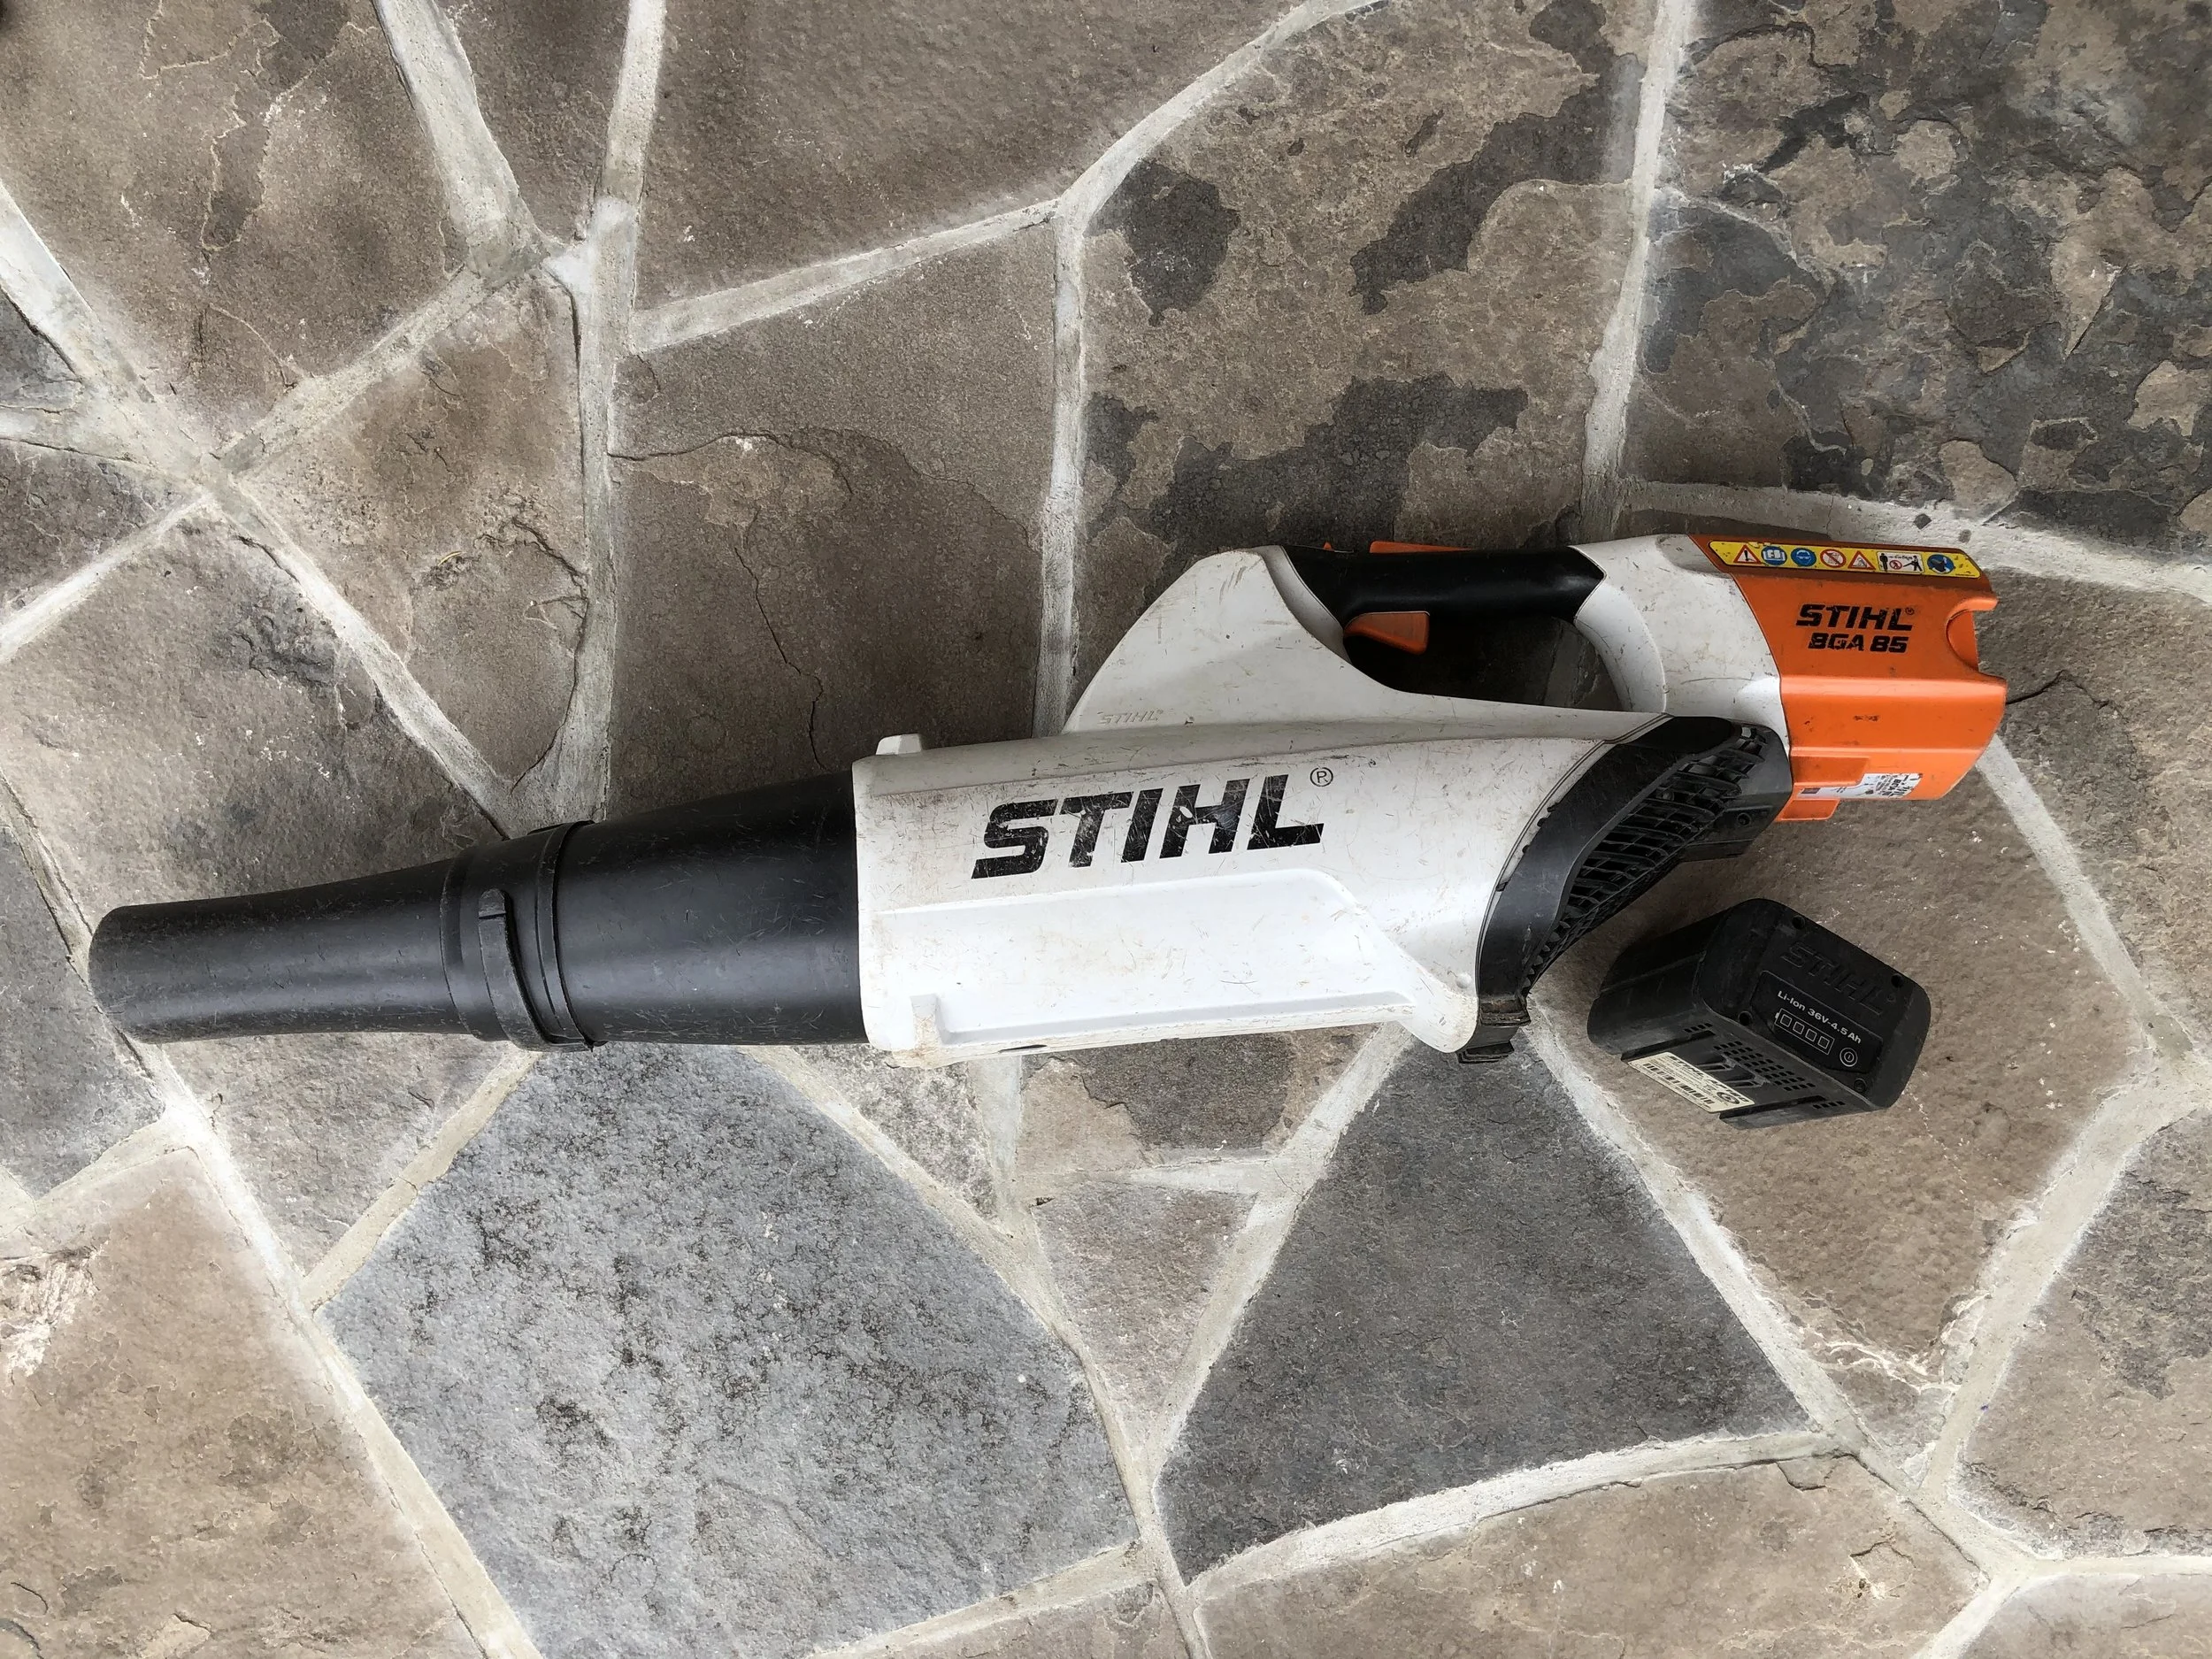
My well-used battery powered blower has been worth every penny. It makes hardscape clean-up a breeze and is gentle on the soil when I must use it within the softscape. (I am not affiliated to Stihl in any way!)

Ok, so the good ‘ol blower is great for hardscape, but what about the softscape? Do I use this tool in the garden? Sometimes… and sparingly. Now I will start by saying my blower is not as forceful as it’s gas powered cousins and it has a great range of air speeds that I can easily control. For my needs, this is a good thing as I find soil tends to stay put when I use my blower on it. Additionally, I do not use my blower to make a garden spotless, I generally use it as a rough and quick ‘inital pass’ on the beds (usually only during spring and fall clean-ups) and I leave the detail work to be done by hand, which ensures that garden mulch and soil remains in place. Picking out debris by hand has the added benefit of putting me into the garden where I am better able to spot issues within the beds or on the plants.

Well thanks for hearing out my rant! If anything, let this post be ‘food for thought’. A reminder that all our actions will have consequences that affect our gardens and even small adaptations to how we conduct ourselves can make a difference in the overall health of our garden soil and therefore plants.

Now, back to my symphony…

It's Gardening Season- Dig in!

(Originally posted: April 9, 2021)

Spring is upon us and gardeners everywhere are chomping at the bit to get their hands dirty and turn winter dreams into reality. With all this unbridled enthusiasm in the air during the early days of spring, it is no surprise that the most common question to arise in conversation tends to be: “how soon can I start planting?”.

My answer, to the shock (and sometimes horror) of many people, is “if you can get a shovel in the ground, then you are eligible to plant!”

Now this may seem like a nice concise answer and the end of the blog post, but by now I think you know that I am not exactly a short-winded writer. Like all gardening statements, this one comes with some caveats that we should really take a few moments to discuss.


Soil Workability vs. Suitability

While the lack of frozen soil is an indication that the ground is workable and able to receive some new plant material, the question becomes whether or not it is suitable to be working in the garden. One common condition that makes soil unsuitable for gardening (which can occur during any season but is frequently a problem after snowmelt and spring rains) is that it is too wet. Trampling on wet soil is an easy way to cause soil compaction (bad!), not to mention that planting in waterlogged soil does nothing to start new plants off on the right foot! In fact, it is a good way to essentially drown them.

Not sure if your soil is too wet? Try the ball test! Scoop up a handful of soil with a trowel and squeeze it into a ball. Now ask:

Does the soil leave a mud impression on my hand/does the soil stick to my fingers?

Do I see free water squishing out from the soil when I squeeze it?

Does the ball remain in tact if thrown in the air?

If you answered yes to any of these questions, the soil is too wet to be worked and it should be allowed to dry out to the point that it is able to crumble after being squeezed into a ball, or break apart when thrown into the air. Obviously if you garden in heavy clay soil, the ball test is much less straightforward as clay particles have an uncanny ability to stick together. Therefore, in the case of clay soils, the presence of water/soil staining on fingers becomes a very useful observation when determining soil moisture levels.

The ‘Ball Test’ (clockwise from top left): a scoop of soil is collected from about 12” down, it is squeezed into a ball, the ball cracks upon the opening of my hand, the ball completely crumbles after tossing it in my hand. Visually the soil is not excessively wet and I have very little staining my fingers. Looks like I’m good to go!

Suitability of Plants

While dormant trees, shrubs, and perennials can be planted at the first opportunity that soil conditions will allow, plants that have leafed out may not be ready for the ‘outside world’ if they have spent the entire winter and early spring being coddled in the highly controlled environment of a greenhouse. They are wimpy and need an adjustment period to acclimate to the harsher conditions (more intense sunlight, presence of wind, and temperature swings) that are found outdoors before they are permanently relocated to a garden home. At this time of year, when purchasing plants, you can ask the garden centre if the plants are ready to be transplanted outside; alternatively you can play it safe and ‘harden off’ the plants on your own by gradually increasing their daily time spent outdoors (bringing them indoors at night), and gradually increasing their exposure to sunlight over the course of about a week. A quick Google search on “hardening off” will provide you with numerous reputable resources if you are not sure how to do it.

Beautiful in dormancy, Cornusstolonifera ‘Arctic Fire’ awaits relocation to a garden home where they can continue to shine!

As a final note on plant suitability, we must keep in mind that while temperatures are warming up quickly, there is still a risk of frost for weeks, or even months to come. Plants that cannot tolerate hard frosts should not be planted outside until at least the last frost date has been reached. With that said, there is still the probability of frost after this date so it is best to wait longer before installing tender plants. To illustrate this point: the last spring frost date in my area (according to The Old Farmer’s Almanac) is listed as April 20, but it is standard practice to not widely plant tender summer annuals until mid to late May to be ‘on the safe side’. So going back to my blanket statement about planting when the soil is workable… well that comment has absolutely no validity when it comes to tender plants!

Colourful annuals have no place in the garden for at least another month and a half!

Well, for me, annuals are a distant speck on my radar at the moment, but I just happen to have big plans for adding trees, shrubs, and perennials to the garden this year. With the arrival of the planting season in my neck-of-the-woods, it is now time for me to make my shopping lists, do some stretches, and get ready to work the dirt. (Yeehaw!)

Additional Resource:

United States Department of Agriculture. Natural Resources Conservation Service. No date. Program Aid Number 1619. Estimating Soil Moisture by Feel and Appearance. https://www.cdpr.ca.gov/docs/county/training/inspprcd/handouts/soil_moist_feel_test.pdf (GREAT PHOTOS!)

When Caring Becomes Meddling

(Originally posted: March 8, 2021)

Well hello there! It’s been awhile. I’ve been hibernating from the internet- it tends to be my habit during the cold winter months. For me, if the activity doesn’t involve bundling up and moving around in a snowy landscape, then it falls by the wayside until the world begins spinning towards spring again.

I love the winter landscape. It is during these (sometimes) snowy months that the world is stripped down to it’s bare bones and a raw beauty emerges- one that can’t be seen when the distractions of foliage and flowers fight for our attention. In the winter, form and structure prevail (accentuated by a blanket of freshly-fallen snow)… and it is glorious!

Winter is also an interesting time of year because landscape issues tend to really stand-out in the barren world: poor branching structure that arises from incorrect pruning is no longer masked by foliage, evidence of disease in landscape plants can often be revealed as sight-lines into tree and shrub canopies open up, and finally, questionable horticultural practices can stare us in the face.

On one wintry run I stumbled upon this…

Now orange emerging from a trunk is not exactly a normal thing to see, especially during the winter, so this definitely stood out like a sore thumb. Sure, some fungal diseases produce bright orange fruiting bodies during the growing season (i.e. various rust diseases or Chicken of the Woods/Sulphur fungus) but this was something different. This was an intentional placement of spray foam into a cavity within the tree… and it wasn’t just this one little spot, the tree was full of these patch jobs!

Let’s backtrack for a minute and take a look at wounds and cavities…

Cavities of various sizes and locations on the tree can be found everywhere!

Cavities are the result of decay (which in turn is caused predominantly by fungi and also bacteria). Improper pruning techniques as well as storm or construction damage are just a few examples of injury that can result in decay within a tree. In general, trees are able to ‘compartmentalize’ decay- separating diseased wood from healthy wood with a type of barrier within the tree. While the process of decay is one that a tree cannot halt, it is one that the tree can effectively slow through compartmentalization (with some tree species better at it than others). Trees will also react to decay by trying to outgrow it- adding more wood to the area near the problem (a way of reinforcing the weakened area).

Cavities in the making: the removal of large branches coupled with poor pruning cut locations means that the tree’s ability to heal itself has been compromised. Without being able to heal, the wound site/excess material begins to decay and this eventually leads to cavity formation (The photo on the right illustrates more advanced decay giving way to a cavity).

Gardeners, homeowners, and tree lovers tend to be meddlers. We look at cavities and decay and instantly feel the need to do something to help the tree. The thing is, the tree doesn’t necessarily need our help and it is quite possible that we can make things worse. If we do anything that compromises the barrier between diseased and healthy wood, we can speed the progression of decay within the tree (this is obviously bad!).

So what’s up with the expanding foam?

The rationale behind the use of expandable foam is that it can keep animals and moisture-holding debris out of the cavity. It also fills the space where water could otherwise collect. Moisture is necessary for the proliferation of decay organisms so the idea behind the expandable foam is to eliminate this scenario.

Being a flexible and non-abrasive material, it is also thought that expandable foam is kind to the interior of the cavity as the tree sways and grows around it- it will not rub and break through the ‘barrier’ between healthy and compromised wood- a concern with concrete or bricks- fillers that have been historically implemented to fill cavities. (Concrete, brick, mortar and stones have NO place inside the cavity of a tree! Incidentally, our case study tree had also been filled with concrete in some places. Poor thing.)

With all that said- if the expandable foam is not applied correctly, it can trap moisture within the cavity and hold it there. It can also prevent a tree from properly healing over. The type of foam used, how the foam is pared down to the cavity, as well as the coating used over the foam are all considerations for proper application of this technique. For these reasons, I would argue that the use of expandable foam in cavities is an arboricultural practice that should only be prescribed and implemented by a professional (ISA certified arborist) in very select cases. Even with that, I can not find any recent scientific research that suggests expandable foam is a valuable cavity repair technique. Finally, it is also important to keep in mind that when “decay is at play, get the professional’s say” (yes, I made that up just now)- decay can affect the structural integrity of the tree, so it is important that an arborist is brought-in to examine the extent of the decay and determine if any actions are required to mitigate the problem.

In the case of the ‘foam tree’ above, many of the cavities (and resultant patches) are small- there really was no need to meddle. There are also very large cavities and areas of significant decay on both the trunk and primary branches of this tree- these issues would certainly not be solved by expandable foam and require the attention of an ISA certified arborist. So in the end the liberal placement of foam patches has accomplished nothing for this tree except the creation of a blight on the winter landscape… and the inspiration for a blog post ;)

Stay tuned… while we are talking about meddling, no discussion would be complete without addressing wound dressings… coming up in a future post!

The sun is setting on winter… thoughts now turn to spring!

References:

American National Standard for Tree Care Operations- Tree, Shrub and Other Woody Plant Management- Standard Practices (Pruning). ANSI A300 (Part 1)-2008.

Gilman, Edward F. 2002. An Illustrated Guide to Pruning, 2nd Edition. Delmar, Cengage Learning.

Lilly, Sharon J. 2010. Arborists’ Certification Study Guide. International Society of Arboriculture.

Smiley, E. Thomas. Bartlett Tree Experts. (n.d.) Research Laboratory Technical Report: Cavity Filling. https://www.bartlett.com/resources/cavity-filling.pdf

University of Florida. (2020, January 21) Landscape Plants. Hollows and Cavities. https://hort.ifas.ufl.edu/woody/cavity.shtml